Peanut Butter Balls Recipe

Dreamy No-Bake Peanut Butter Balls Recipe for Sweet Tooths

Sweet, no-bake chocolate-coated peanut butter balls have been my secret holiday treat since childhood.

Memories of helping grandma mix ingredients flood back every time I roll these delectable spheres.

My kitchen buzzes with excitement when preparing this simple dessert that never fails to impress.

Some recipes seem complicated, but these balls come together in minutes with minimal effort.

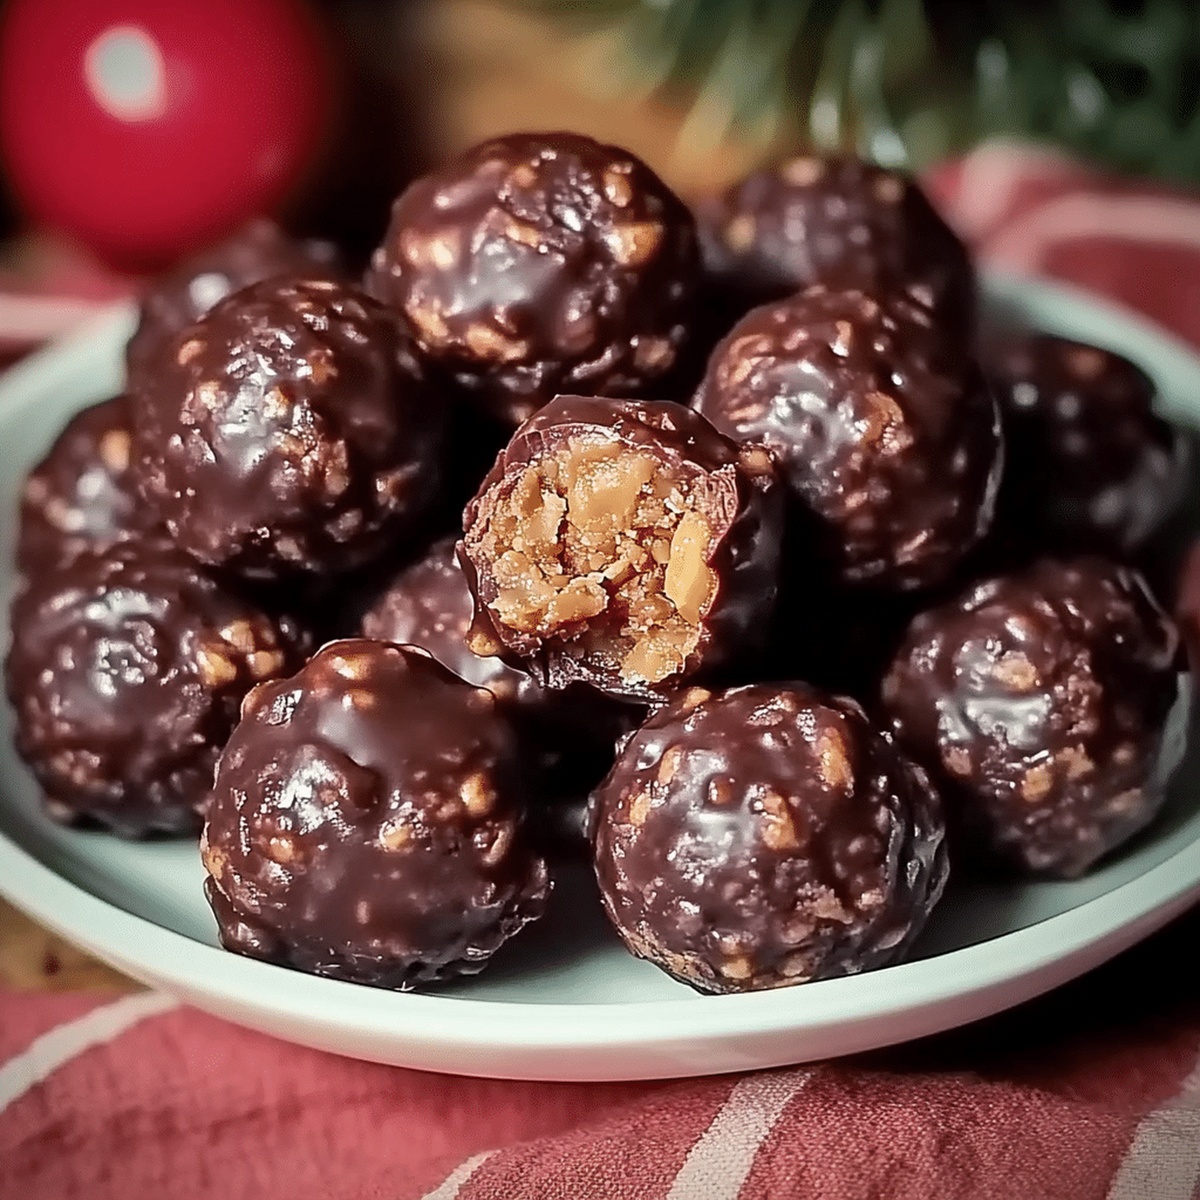
Rich peanut butter combined with powdered sugar creates a perfectly smooth, creamy center that melts in your mouth.

Chocolate coating adds a luxurious finish that makes these treats irresistible.

Each bite promises pure indulgence, so grab a mixing bowl and let’s create something delightful.

You’ll want to share these addictive little gems with everyone you know.

How to Roll and Chill Peanut Butter Balls

Step 1: Prepare Creamy Filling

Grab a large mixing bowl and combine:
  • Smooth peanut butter
  • Powdered sugar
  • Graham cracker crumbs
  • Vanilla extract

Use your hands to knead everything until the mixture becomes uniform and slightly sticky.

Step 2: Shape Delightful Rounds

Use a small cookie scoop to create bite-sized spheres. Gently roll each portion between your palms to create smooth balls. Place them on a parchment-lined baking sheet. Pop the tray into the refrigerator for 30 minutes to help them set.

Step 3: Craft Chocolate Coating

Select your preferred chocolate melting method:

Double Boiler Technique:
  • Fill a pot with water
  • Place a heatproof bowl on top
  • Add chocolate chips
  • Stir until completely smooth
Microwave Technique:
  • Place chocolate in microwave-safe bowl
  • Heat in 30-second intervals
  • Stir between each interval

Optional: Add coconut oil for a silkier texture.

Step 4: Dunk and Cover

Remove chilled balls from refrigerator. Using a fork, carefully dip each ball into melted chocolate. Ensure complete coverage, allowing excess chocolate to drip off.

Step 5: Final Chill

Return chocolate-coated balls to parchment-lined sheet. Refrigerate for another 30 minutes until chocolate hardens completely.

Step 6: Serve and Delight

Transfer your chocolate peanut butter balls to an airtight container. Refrigerate and enjoy within a week- if they last that long!

Tips for Dipping and Storing Peanut Butter Balls

  • Prevent Sticky Hands: Lightly coat your hands with cooking spray or wear disposable gloves when forming peanut butter balls to keep the mixture from sticking to your fingers.
  • Chocolate Coating Trick: Add a tablespoon of coconut oil or vegetable shortening to melted chocolate to create a smoother, shinier coating that's easier to work with.
  • Temperature Matters: Ensure peanut butter balls are completely chilled before dipping in chocolate to prevent the filling from melting and creating a messy coating.
  • Customize Flavor Variations: Swap graham cracker crumbs with crushed pretzels or add a sprinkle of sea salt on top for a unique twist on the classic recipe.
  • Make-Ahead Magic: Freeze the finished peanut butter balls for up to 3 months, wrapped tightly in plastic wrap and stored in an airtight container for quick dessert options.

Best Storage Tips for Peanut Butter Snacks

  • Store peanut butter balls in an airtight container between layers of parchment paper to prevent sticking, keeping them fresh for up to 7 days.
  • Wrap individual balls tightly in plastic wrap, then place in a freezer-safe container to maintain quality for 2-3 months without losing flavor or texture.
  • Remove frozen peanut butter balls from the freezer and let them sit at room temperature for 15-20 minutes before serving, ensuring a perfect soft bite.
  • When transferring cold balls from the refrigerator or freezer, allow them to rest briefly to minimize moisture buildup on the chocolate coating.

Sweet Snacks That Pair with Peanut Butter Balls

  • Creamy cold milk perfectly balances the rich chocolate and peanut butter flavors, creating a nostalgic childhood treat sensation.
  • A robust dark roast coffee cuts through the sweetness, offering a sophisticated contrast that enhances the peanut butter ball's complex taste profile.
  • Select a sweet port wine that harmonizes with the chocolate coating, providing a luxurious adult twist to this classic confection.
  • Craft a smooth bourbon or whiskey pairing that highlights the nutty undertones and complements the dessert's decadent texture.

Coating and Filling Ideas for Peanut Butter Balls

  • Almond Butter Alternative: Replace peanut butter with almond butter for a different nutty flavor profile, perfect for those with peanut allergies.
  • Vegan Chocolate Coating: Use dairy-free dark chocolate chips and substitute graham cracker crumbs with crushed gluten-free cookies to create a plant-based version.
  • Keto-Friendly Adaptation: Swap powdered sugar with powdered erythritol, use almond flour instead of graham cracker crumbs, and choose sugar-free chocolate chips for a low-carb option.
  • No-Bake Protein Boost: Add a scoop of vanilla or chocolate protein powder to the peanut butter mixture for extra nutrition and a protein-packed snack.

Peanut Butter Balls for a No-Bake Treat

  • Quick and easy dessert that delivers a mouthwatering combination of peanut butter and chocolate in every single bite.
  • Requires minimal cooking skills with simple steps that take less than an hour from start to finish, perfect for spontaneous sweet cravings.
  • Engaging recipe that allows children to help mix ingredients and roll balls, creating fun family bonding time while learning basic kitchen skills.
  • Impressive no-bake dessert that can be prepared in advance, making it excellent for gatherings, potlucks, holiday celebrations, and unexpected guests.

Everything You’ll Need for Peanut Butter Balls

Base Ingredients:
  • Peanut Butter: Creamy base for the filling, smooth and rich flavor.
  • Powdered Sugar: Adds sweetness and helps bind the mixture.
  • Graham Cracker Crumbs: Provides texture and subtle graham flavor.
  • Vanilla Extract: Enhances overall taste with warm, sweet notes.
Chocolate Coating:
  • Semi-Sweet Chocolate Chips: Creates smooth, rich chocolate shell.
  • Coconut Oil (Optional): Helps thin chocolate for easier coating.
Binding and Preparation:
  • Parchment Paper: Non-stick surface for easy ball forming and cooling.
Print
clock clock iconcutlery cutlery iconflag flag iconfolder folder iconinstagram instagram iconpinterest pinterest iconfacebook facebook iconprint print iconsquares squares iconheart heart iconheart solid heart solid icon
Peanut Butter Balls Recipe

Peanut Butter Balls Recipe


5 Stars 4 Stars 3 Stars 2 Stars 1 Star

4.8 from 18 reviews

  • Total Time: 1 hour 20 minutes
  • Yield: 24 1x

Description

Irresistible peanut butter balls combine creamy chocolate and nutty goodness for a classic no-bake treat. Sweet indulgence meets simple preparation, creating a delightful snack you’ll crave again and again.


Ingredients

Scale

Main Ingredients:

  • 1 cup creamy peanut butter
  • 2 cups semi-sweet chocolate chips
  • 2 cups powdered sugar

Binding Ingredients:

  • ¼ cup unsalted butter, softened
  • 1 teaspoon vanilla extract

Coating Ingredients:

  • 2 tablespoons coconut oil or vegetable shortening

Instructions

  1. Prepare a spacious mixing vessel and blend peanut butter, powdered sugar, and graham cracker crumbs until a cohesive, dense mixture forms. Integrate vanilla extract, using hands to thoroughly incorporate all components into a uniform consistency.
  2. Utilize a cookie scoop to craft compact, uniform spheres from the nutty mixture. Arrange these delicate orbs on a parchment-lined tray, ensuring consistent sizing.
  3. Chill the formed spheres in the refrigerator for approximately half an hour, allowing them to solidify and maintain their shape during the chocolate coating process.
  4. Create a melting station for the chocolate chips using either a double boiler or microwave technique. Heat gently, stirring frequently to achieve a silky, glossy texture. Optional: incorporate coconut oil for a smoother chocolate coating.
  5. Remove chilled peanut butter spheres and carefully immerse each one in the molten chocolate. Employ a fork to ensure complete coverage, allowing excess chocolate to elegantly cascade back into the melting vessel.
  6. Return chocolate-enrobed spheres to the parchment-lined tray, then refrigerate until the chocolate shell becomes completely firm and gleaming.
  7. Transfer the completed confections to an airtight storage container. Refrigerate and consume within one week, though their irresistible nature suggests they will vanish much sooner.

Notes

  • Experiment with different nut butters like almond or cashew for unique flavor variations and to accommodate nut allergies.
  • Use gluten-free graham crackers or crushed gluten-free cookies to make the recipe celiac-friendly and accessible to more people.
  • Add a pinch of sea salt to the peanut butter mixture to enhance the sweet-savory balance and create a more complex taste profile.
  • Consider using dark chocolate or white chocolate as alternative coating options to customize the treat’s appearance and flavor intensity.
  • Prep Time: 20 minutes
  • Cook Time: 1 hour
  • Category: Snacks, Desserts
  • Method: Blending
  • Cuisine: American

Nutrition

  • Serving Size: 24
  • Calories: 180
  • Sugar: 12 g
  • Sodium: 50 mg
  • Fat: 10 g
  • Saturated Fat: 4 g
  • Unsaturated Fat: 6 g
  • Trans Fat: 0 g
  • Carbohydrates: 21 g
  • Fiber: 1 g
  • Protein: 3 g
  • Cholesterol: 5 mg
Daves Miller

Daves Miller

Contributing Chef & Culinary Educator

Expertise

  • American Southern cuisine with a modern twist.
  • Instruction in culinary fundamentals and advanced techniques.
  • Development of recipes that highlight seasonal and local produce.​
  • Mastery of artisanal bread and pastry techniques, from laminated doughs to decorative sugar artistry.

Education

Sullivan University, Louisville, Kentucky

  • Degree: Associate of Science Degree in Culinary Arts
  • Focus: Specialized in cooking techniques and culinary sciences, hands‑on externships, professional kitchen lab training, and career preparation for restaurants, entrepreneurship, and global culinary opportunities.

White Mountains Community College, Berlin, New Hampshire

  • Program: Baking and Pastry Arts degree
  • Focus: Specialized in comprehensive baking and pastry arts, including bread making, artisan breads, cake decorating and design, chocolates, confections, and decorative centerpieces; product development and baking theory; and career preparation for baker and pastry chef roles in many places.

Daves is the friendly face guiding you through flavorful, fuss-free recipes at Picture Perfect Meals. 

He studied culinary arts at Sullivan University and embraced Baking and Pastry Arts at White Mountains Community College. Daves specializes in comforting meals with vibrant flavors, highlighting fresh, seasonal ingredients.

Leave a Reply

Your email address will not be published. Required fields are marked *

Recipe rating 5 Stars 4 Stars 3 Stars 2 Stars 1 Star