
Peanut Butter Lunch Lady Cookie Bars Recipe Dreamiest School Treat
These legendary peanut butter lunch lady cookie bars transport me straight back to elementary school cafeteria memories.
School kitchens always seemed to create magic with simple ingredients and massive mixing bowls.
Soft, chewy rectangles of nostalgic sweetness promise pure comfort in every single bite.
Cafeteria workers understood the secret of creating irresistible treats that made kids smile.
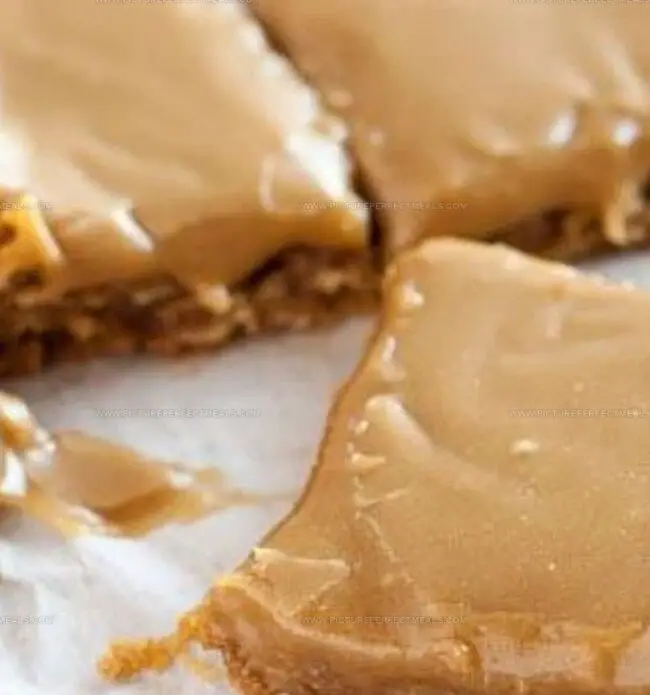
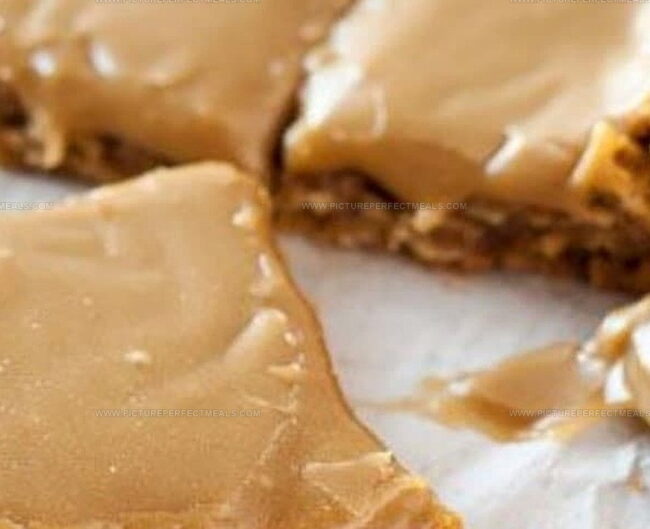
Thick layers of creamy peanut butter merge perfectly with a tender cookie base that melts in you mouth.
Classic recipes like these connect generations through delicious shared experiences.
Come relish this childhood favorite that turns an ordinary afternoon into a delightful snack adventure.
Peanut Butter Lunch Lady Cookie Bars That Take You Back
What You Need for Peanut Butter Lunch Lady Cookie Bars
Main Ingredients:
Butter and Sugars:- Butter, Granulated Sugar, Brown Sugar: Provide sweet, rich base for the cookie bars, creating a tender and caramelized flavor profile. Soft butter helps with smooth mixing and even texture.
Peanut Butter:- Peanut Butter: Adds signature nutty flavor and creamy richness to the bars. Smooth, creamy peanut butter works best for even distribution.
Flour and Leavening:- All-Purpose Flour, Baking Soda, Salt: Create structure, help the bars rise, and balance the sweetness. Unbleached flour recommended for best texture.
Eggs and Vanilla:How to Bake Peanut Butter Lunch Lady Cookie Bars
Step 1: Prepare Baking Station
Warm the oven to 350°F. Grab a 9×13-inch pan and coat with cooking spray or butter. Line with parchment paper, letting edges hang over sides for easy removal.
Step 2: Create Creamy Base
In a spacious mixing bowl, combine:Whip ingredients until they transform into a fluffy, light mixture that looks like soft clouds.
Step 3: Blend Wet Ingredients
Mix in:Stir until everything blends smoothly and looks consistent.
Step 4: Combine Dry Components
In a separate bowl, blend:Gently fold dry ingredients into wet mixture, stirring until just combined. Avoid overmixing.
Step 5: Spread and Bake
Pour batter into prepared pan. Spread evenly using a spatula. Slide into preheated oven.
Step 6: Check for Doneness
Bake for 25-30 minutes. Look for golden brown edges and a center that’s set but slightly soft. Insert toothpick- it should come out with a few moist crumbs.
Step 7: Cool and Slice
Remove from oven. Let bars cool completely in pan. Use parchment paper edges to lift out. Cut into square or rectangular pieces.
Easy Tips for Cookie Bar Success
Keeping Cookie Bars Fresh All Week
Great Matches for Peanut Butter Cookie Bars
Cookie Bar Variations to Keep Things Fun
Gluten-Free Peanut Butter Bars: Swap regular flour with almond flour or gluten-free all-purpose flour blend for a celiac-friendly option that maintains the rich, soft texture.
Low-Sugar Wellness Bars: Replace granulated and brown sugars with monk fruit sweetener or stevia to reduce overall sugar content while keeping the classic peanut butter flavor profile.
Vegan Protein Bars: Substitute butter with coconut oil, use flax eggs instead of regular eggs, and choose a plant-based peanut butter to create a completely dairy-free and egg-free version.
Chocolate Chip Peanut Butter Bars: Fold in dark chocolate chips or dairy-free chocolate chunks into the batter before baking to add extra indulgence and a delicious chocolate element.
Print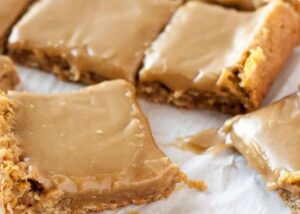
Peanut Butter Lunch Lady Cookie Bars Recipe
- Total Time: 50 minutes
- Yield: 24 1x
Description
Legendary Peanut Butter Lunch Lady Cookie Bars bring nostalgia straight from school cafeterias to home kitchens. Craving comfort and sweetness, you’ll love these classic treats with rich peanut butter flavor and classic chocolate drizzle.
Ingredients
Main Ingredients:
- 1 cup (225 g / 8 ounces) unsalted butter (softened)
- 1 ½ cups (375 g / 13.2 ounces) creamy peanut butter
- 1 cup (200 g / 7 ounces) granulated sugar
- 1 cup (220 g / 7.8 ounces) brown sugar (packed)
- 2 large eggs
Dry Ingredients:
- 2 cups (250 g / 8.8 ounces) all-purpose flour
- 1 teaspoon baking soda
- ½ teaspoon salt
Frosting Ingredients:
- 1 cup (250 g / 8.8 ounces) powdered sugar
- ½ cup (125 g / 4.4 ounces) creamy peanut butter
- 34 tablespoons milk (adjust for consistency)
- 1 teaspoon vanilla extract
Instructions
- Prepare the baking environment by warming the oven to 350F (175C) and creating a non-stick surface in a 9×13-inch pan using parchment paper and a light grease coating.
- Transform butter and sugars into a creamy, airy mixture by vigorously beating them until they develop a fluffy, pale texture that indicates perfect incorporation.
- Introduce peanut butter and blend until silky smooth, then incorporate eggs individually, ensuring each is fully integrated before adding the next, followed by a splash of vanilla extract to enhance the flavor profile.
- Create a dry ingredient foundation by thoroughly combining flour, baking soda, and salt in a separate vessel, then gently fold these elements into the wet mixture, stirring until just harmonized without overmixing.
- Distribute the cookie dough evenly across the prepared pan, creating a uniform layer that will guarantee consistent baking and texture. Slide the pan into the preheated oven and monitor for 25-30 minutes, watching for golden-brown edges and a clean toothpick test, which signals perfect doneness.
- Allow the baked bars to cool completely within the pan, permitting them to set and develop a rich, chewy consistency before cutting and serving.
Notes
- Ensure butter is softened at room temperature for smooth creaming and better texture.
- Use creamy peanut butter for consistent flavor and easier mixing, avoiding natural or chunky varieties.
- Test doneness by gentle pressing center of bars – they should spring back slightly and edges look golden brown.
- Slightly underbake for extra chewy texture, as bars will continue cooking while cooling in pan.
- Prep Time: 20 minutes
- Cook Time: 30 minutes
- Category: Snacks, Desserts
- Method: Baking
- Cuisine: American
Nutrition
- Serving Size: 24
- Calories: 335
- Sugar: 25 g
- Sodium: 134 mg
- Fat: 16 g
- Saturated Fat: 6 g
- Unsaturated Fat: 10 g
- Trans Fat: 0 g
- Carbohydrates: 42 g
- Fiber: 1 g
- Protein: 7 g
- Cholesterol: 31 mg
Daves Miller
Contributing Chef & Culinary Educator
Expertise
Education
Sullivan University, Louisville, Kentucky
White Mountains Community College, Berlin, New Hampshire
Daves is the friendly face guiding you through flavorful, fuss-free recipes at Picture Perfect Meals.
He studied culinary arts at Sullivan University and embraced Baking and Pastry Arts at White Mountains Community College. Daves specializes in comforting meals with vibrant flavors, highlighting fresh, seasonal ingredients.