Heavenly Peanut Butter Snowballs Recipe for Winter Magic
Sweet holiday memories often start with unexpected kitchen magic, like these delightful peanut butter snowballs that sparkle with nostalgia.
Childhood treats can become grown-up delights when crafted with care and imagination.
Each creamy bite carries whispers of festive cheer and comfort.
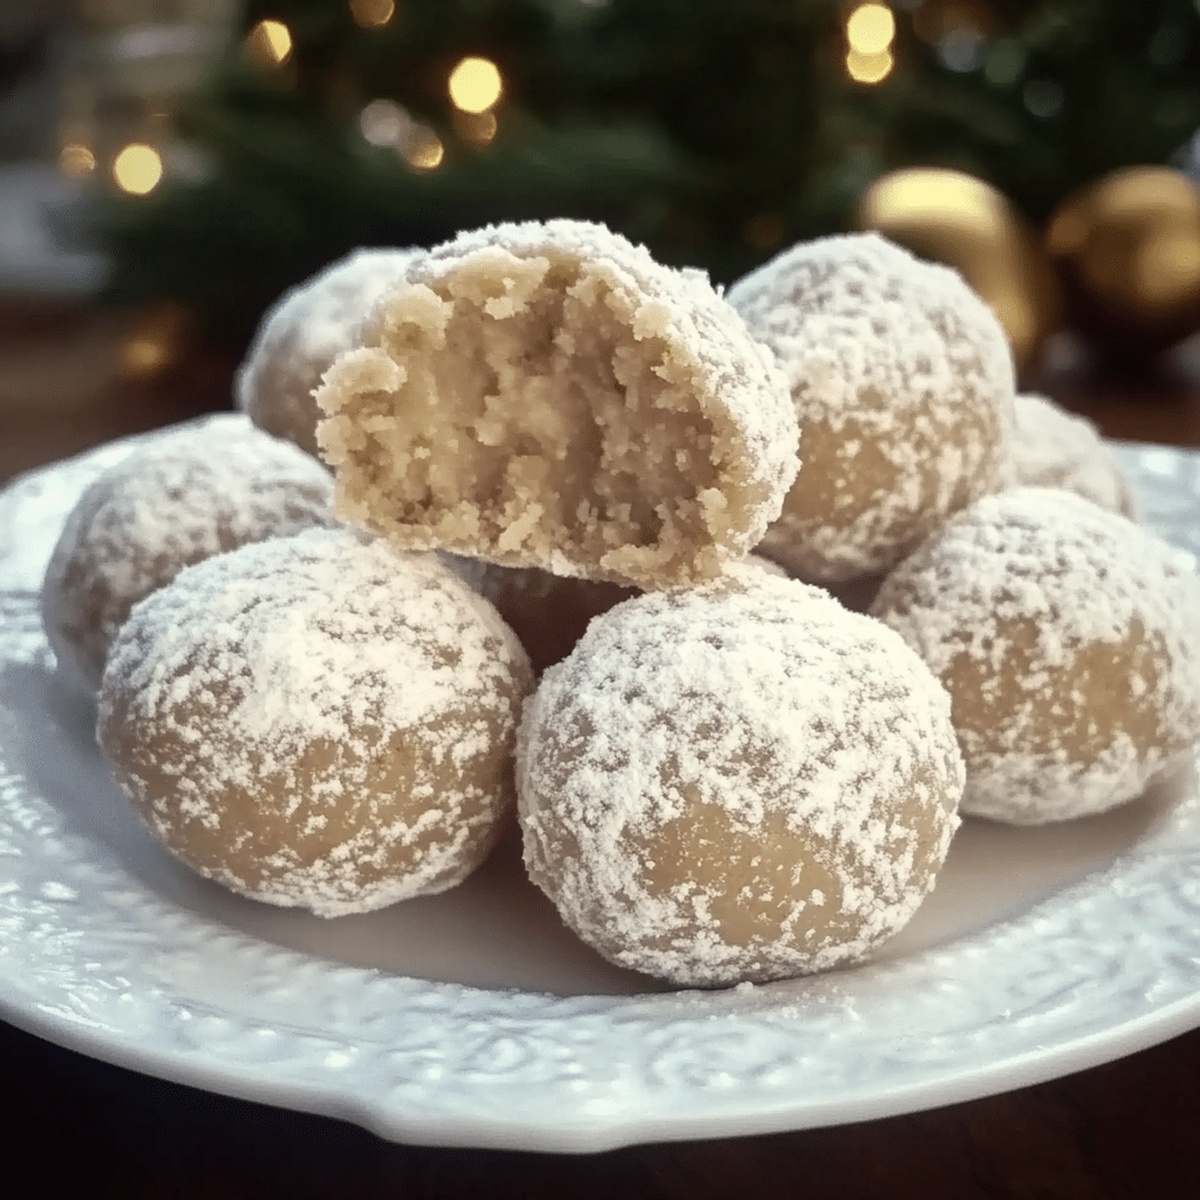
Powdery white coatings give these little spheres an enchanting winter wonderland aesthetic.
Quick and simple ingredients combine to create something truly special.
Chocolate lovers and peanut butter fans will find themselves swooning over these elegant confections.
Grab a mixing bowl and let the delicious adventure begin.
Why Peanut Butter Snowballs Are Always a Crowd Favorite
What Goes Into Making Peanut Butter Snowballs
Primary Ingredients:
Peanut Butter Mix Ingredients:- Peanut Butter, Softened Butter: Creamy base that provides rich, smooth texture and nutty flavor. Smooth, natural peanut butter works best.
Coating Ingredients:- White Chocolate: Creates smooth, sweet exterior shell for snowballs. High-quality chocolate melts more evenly.
Preparation Ingredients:- Parchment Paper: Prevents sticking and makes handling and cleanup easier. Silicone baking mat can be a substitute.
Simple Steps to Shape Peanut Butter Snowballs
Step 1: Mixing Magic Ingredients
Grab a spacious mixing bowl
Combine creamy peanut butter
Add softened butter
Include powdered sugar
Toss in crushed graham crackers
Pour vanilla extract
Blend everything until the mixture transforms into a smooth, moldable dough
The consistency should hold together perfectly when squeezed
Step 2: Shaping Snowy Treats
Roll the mixture into small, round balls
Each ball should be about bite-sized
Place the balls on a parchment-lined baking sheet
Pop the sheet into the freezer
Chill for 15-20 minutes until firm and solid
Step 3: Chocolate Transformation
Select a microwave-safe bowl
Break white chocolate into chunks
Melt chocolate in short 30-second bursts
Stir between each heating interval
Continue until chocolate becomes silky and completely smooth
Step 4: Coating with Creamy Goodness
Remove frozen peanut butter balls from freezer
Use a fork or toothpick for dipping
Carefully submerge each ball in melted white chocolate
Allow excess chocolate to drip off
Return coated balls to parchment paper
Step 5: Adding Festive Touches
Sprinkle decorative elements while chocolate remains wet
Options include:Step 6: Setting and Serving
Let snowballs rest at room temperature
Wait until chocolate hardens completely
Refrigerate for faster setting
Serve chilled or at comfortable room temperature
Enjoy your delectable homemade treats
Tips That Help Peanut Butter Snowballs Turn Out Right
How to Store Peanut Butter Snowballs Without Drying Out
Best Pairings for Peanut Butter Snowballs
Flavor Variations for Peanut Butter Snowballs
Print
Peanut Butter Snowballs Recipe
- Total Time: 35 minutes
- Yield: 24 1x
Description
Sweet Peanut Butter Snowballs deliver creamy comfort wrapped in coconut’s delicate embrace. Delightful winter treats roll smooth chocolate and tropical coconut into bite-sized holiday magic you’ll crave again and again.
Ingredients
Main Ingredients:
- 1 cup (240 milliliters) creamy peanut butter
- ½ cup (113 grams) unsalted butter, softened
- 1 ½ cups (180 grams) crushed graham crackers (about 12 sheets)
Sweeteners and Flavor Enhancers:
- 2 cups (240 grams) powdered sugar (plus extra for coating, if desired)
- 1 teaspoon (5 milliliters) vanilla extract
Coating and Garnish:
- 8 ounces (226 grams) white chocolate (for dipping)
- Optional Garnishes: sprinkles, shredded coconut, or crushed peanuts
Instructions
- Create a creamy foundation by thoroughly blending peanut butter, softened butter, powdered sugar, crushed graham crackers, and vanilla extract in a spacious mixing bowl until the ingredients form a uniform, pliable dough.
- Carefully shape the mixture into compact, uniform spheres approximately one inch in diameter, positioning each ball onto a parchment-lined baking tray.
- Rapidly chill the proto-snowballs in the freezer for approximately 15-20 minutes, ensuring they become sufficiently firm and maintain their structural integrity during the coating process.
- Utilize a microwave-safe vessel to gradually melt white chocolate, employing precise 30-second intervals and gently stirring between each heating cycle to achieve a smooth, glossy consistency.
- Extract the chilled peanut butter spheres and systematically immerse each one into the molten white chocolate, utilizing a fork or delicate toothpick to facilitate complete coverage while allowing excess chocolate to elegantly cascade away.
- Immediately embellish the chocolate-enrobed spheres with optional decorative elements like festive sprinkles, delicate shredded coconut, or finely crushed peanuts while the coating remains liquid.
- Allow the snowballs to stabilize at ambient temperature or expedite the setting process by transferring them to the refrigerator, ensuring the chocolate achieves a complete, glossy hardness before serving.
Notes
- Chill the mixture thoroughly before rolling to prevent sticky hands and ensure neat, uniform balls.
- Use room temperature ingredients for smoother blending and easier mixing of the peanut butter base.
- Opt for natural peanut butter with minimal added sugar to control overall sweetness and improve texture.
- Swap graham crackers with gluten-free alternatives like almond flour or crushed gluten-free cookies for celiac-friendly version.
- Prep Time: 15 minutes
- Cook Time: 20 minutes
- Category: Snacks, Desserts
- Method: Blending
- Cuisine: American
Nutrition
- Serving Size: 24
- Calories: 157
- Sugar: 12 g
- Sodium: 70 mg
- Fat: 9 g
- Saturated Fat: 4 g
- Unsaturated Fat: 5 g
- Trans Fat: 0 g
- Carbohydrates: 18 g
- Fiber: 1 g
- Protein: 3 g
- Cholesterol: 10 mg
Daves Miller
Contributing Chef & Culinary Educator
Expertise
Education
Sullivan University, Louisville, Kentucky
White Mountains Community College, Berlin, New Hampshire
Daves is the friendly face guiding you through flavorful, fuss-free recipes at Picture Perfect Meals.
He studied culinary arts at Sullivan University and embraced Baking and Pastry Arts at White Mountains Community College. Daves specializes in comforting meals with vibrant flavors, highlighting fresh, seasonal ingredients.