
Irresistibly Soft Peppermint Meltaway Cookies Recipe
Delicate peppermint meltaway cookies promise a festive culinary adventure that’ll make your taste buds dance with joy.
Sweet memories of holiday gatherings bloom with each delicate bite.
Powdery sugar coats these tiny treasures, creating an irresistible texture that melts instantly.
Crisp winter afternoons feel magical when these delightful treats emerge from your kitchen.
Rich butter and smooth peppermint combine in a harmonious blend that whispers comfort.
Soft and delicate, these cookies bring warmth to chilly evenings.
You won’t be able to resist their charming simplicity and cool minty essence.
Bake a batch and watch everyone fall in love with these delectable little wonders.
Why People Crave Peppermint Meltaway Cookies
Inside the Ingredients for Peppermint Meltaway Cookies
Base Ingredients:Coating and Decoration:Baking Essentials:Easy Guide to Peppermint Meltaway Cookies
Step 1: Prepare Baking Station
Warm up the oven to 350F (175C). Cover two baking sheets with parchment paper.
Step 2: Whip Creamy Base
In a large mixing bowl, blend softened butter and powdered sugar until incredibly fluffy and light. Add peppermint extract and mix thoroughly.
Step 3: Create Cookie Dough
Gradually incorporate:Beat ingredients until just combined into a smooth mixture.
Step 4: Shape Delicate Cookies
Scoop out small 1-inch dough balls and place them on prepared baking sheets. Space cookies 2 inches apart. Gently flatten each ball using a spoon or fingertips.
Step 5: Bake to Perfection
Slide cookies into preheated oven. Bake 10-12 minutes until edges turn delicately golden. Let cookies rest on baking sheet for 5 minutes, then transfer to wire cooling rack.
Step 6: Craft Peppermint Glaze
Whisk together in a small bowl:Adjust consistency by adding more milk if needed. Optional: Add gel food coloring for extra flair.
Step 7: Decorate and Finish
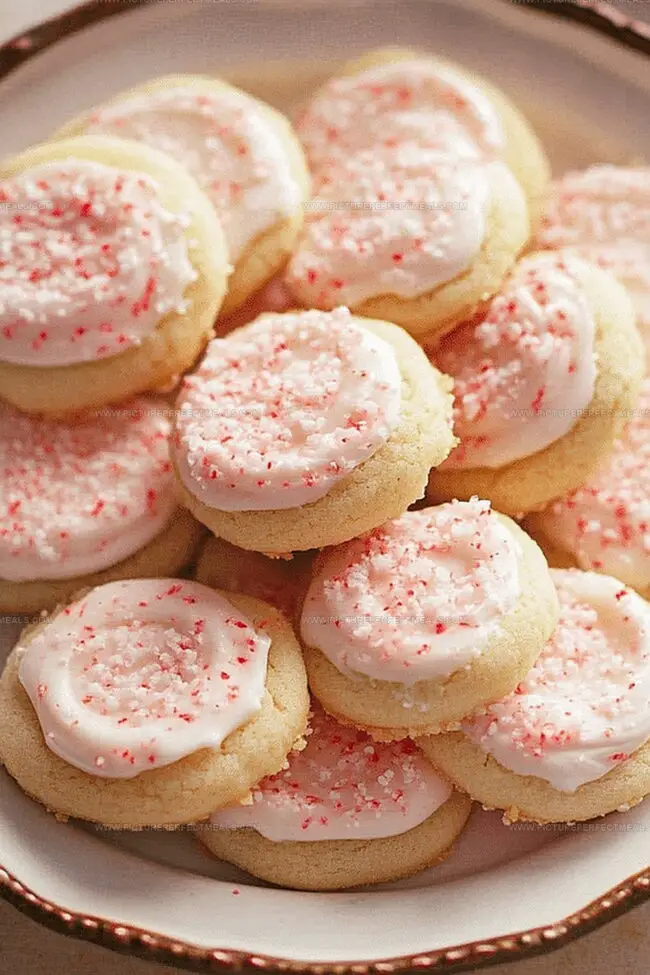
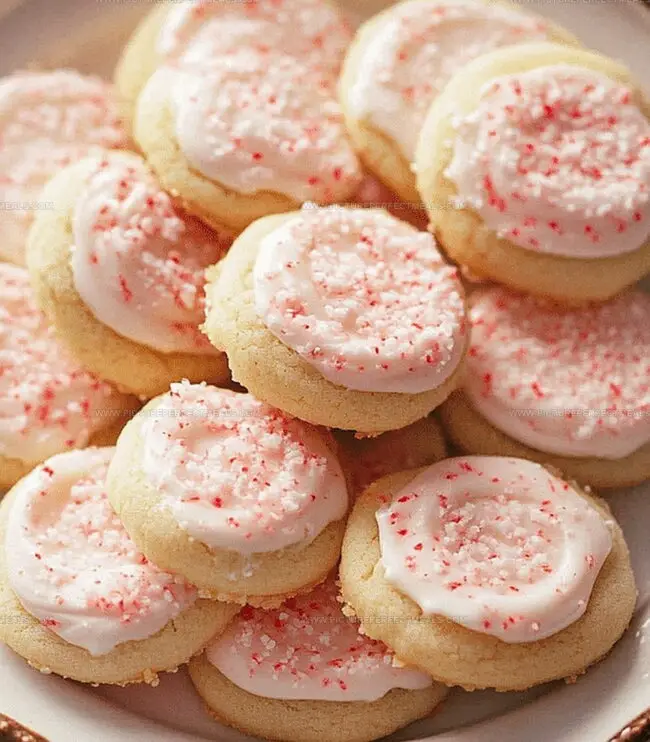
Drizzle or spoon glaze over completely cooled cookies. Immediately sprinkle with crushed candy canes or peppermint candies before glaze sets.
Secrets to Perfect Peppermint Meltaway Cookies
Keeping Peppermint Meltaway Cookies Fresh
Serving Peppermint Meltaway Cookies with Style
Tasty Variations of Peppermint Meltaway Cookies
Gluten-Free Peppermint Cloud Cookies: Replace wheat flour with a blend of almond and rice flour for a lighter, gluten-free version that maintains the delicate texture.
Dairy-Free Minty Delicate Rounds: Swap butter with coconut oil and use almond milk in the glaze to create a rich, creamy cookie suitable for dairy-sensitive individuals.
Keto-Friendly Peppermint Melt: Substitute powdered sugar with monk sweetener, use almond flour instead of wheat flour, and create a low-carb glaze using sugar-free powdered sweetener and heavy cream.
Vegan Peppermint Comfort Cookies: Use vegan butter, replace milk with coconut milk, and swap traditional glaze ingredients with a plant-based powdered sugar and almond milk combination.
Peppermint Meltaway Cookies: Curious? Start Here
The combination of butter, powdered sugar, flour, and cornstarch creates an incredibly delicate, melt-in-your-mouth texture that literally dissolves on your tongue, giving these cookies their signature “meltaway” quality.
While peppermint extract is key to the flavor profile, you could substitute with vanilla extract for a more traditional sugar cookie taste, though you’ll lose the characteristic minty essence.
Aim for a mix of fine powder and small chunks. Fine powder helps the topping adhere, while small chunks provide a nice crunch and visual appeal. Use a rolling pin or food processor to achieve the perfect texture.
Absolutely! These cookies are perfect for holiday gift packaging. They’re delicate, festive, and look professionally made. Just be sure to let the glaze set completely before stacking or packaging them.
Print
Peppermint Meltaway Cookies Recipe
- Total Time: 30 minutes
- Yield: 24 1x
Description
Delightful Peppermint Meltaway Cookies bring festive cheer with their delicate, buttery texture melting gracefully on your palate. Crisp peppermint hints and powdered sugar coating create a winter wonderland of sweet perfection that will charm holiday gatherings.
Ingredients
Main Ingredients:
- 1 cup (226 grams) unsalted butter, softened
- 1 ¼ cups (156 grams) all-purpose flour
- ½ cup (60 grams) cornstarch
Sweeteners and Flavorings:
- ½ cup (60 grams) powdered sugar
- 1 cup (120 grams) powdered sugar
- ½ teaspoon peppermint extract
- ½ teaspoon peppermint extract
Finishing and Decoration:
- ¼ teaspoon salt
- 2 tablespoons milk (plus more as needed)
- Optional: red or green gel food coloring
- Crushed candy canes or peppermint candies
Instructions
- Prepare the oven environment by heating to 350F (175C) and line two baking sheets with parchment paper for optimal cookie placement.
- Cream butter and powdered sugar in a large mixing bowl until the mixture becomes airy and voluminous, creating a smooth foundation for the cookie dough.
- Incorporate peppermint extract into the butter mixture, then gradually fold in flour, cornstarch, and salt, mixing until ingredients are just harmoniously combined.
- Using a small scoop or spoon, form 1-inch dough balls and arrange them on the prepared baking sheets, spacing them approximately 2 inches apart to allow for gentle spreading.
- Gently flatten each dough ball using the back of a spoon or fingertips, creating a uniform surface for even baking.
- Slide the baking sheets into the preheated oven and bake for 10-12 minutes, watching for delicate golden edges that signal perfect doneness.
- Remove cookies from the oven and let them rest on the baking sheet for 5 minutes to stabilize their structure, then carefully transfer to a wire cooling rack.
- Prepare the glaze by whisking powdered sugar, milk, and peppermint extract in a small bowl until achieving a smooth, silky consistency.
- Adjust the glaze thickness by adding milk in small increments if needed, and optionally introduce a hint of color with gel food coloring.
- Once cookies have completely cooled, drizzle or spoon the glaze over each cookie, creating an elegant finish.
- Immediately garnish with crushed candy canes or peppermint candies while the glaze remains wet, ensuring the decorative topping adheres perfectly.
Notes
- Ensure butter is softened at room temperature for smooth, creamy mixing without lumps.
- Use high-quality peppermint extract for a more intense, authentic flavor profile.
- Avoid overmixing the dough to prevent tough, dense cookies; stop mixing once ingredients are just combined.
- For gluten-free adaptation, substitute all-purpose flour with a 1:1 gluten-free baking blend to maintain texture.
- Chill dough for 30 minutes before baking to prevent spreading and create more defined cookie shapes.
- Store cookies in an airtight container with parchment paper between layers to maintain their delicate texture.
- Customize decoration by using white chocolate drizzle or colored sprinkles for festive variations.
- Prep Time: 15 minutes
- Cook Time: 15 minutes
- Category: Desserts, Snacks
- Method: Baking
- Cuisine: American
Nutrition
- Serving Size: 24
- Calories: 133
- Sugar: 10 g
- Sodium: 50 mg
- Fat: 8 g
- Saturated Fat: 5 g
- Unsaturated Fat: 3 g
- Trans Fat: 0 g
- Carbohydrates: 16 g
- Fiber: 0 g
- Protein: 1 g
- Cholesterol: 31 mg
Daves Miller
Contributing Chef & Culinary Educator
Expertise
Education
Sullivan University, Louisville, Kentucky
White Mountains Community College, Berlin, New Hampshire
Daves is the friendly face guiding you through flavorful, fuss-free recipes at Picture Perfect Meals.
He studied culinary arts at Sullivan University and embraced Baking and Pastry Arts at White Mountains Community College. Daves specializes in comforting meals with vibrant flavors, highlighting fresh, seasonal ingredients.