Light and Airy Pillowy Soft French Bread Recipe for Beginners
Baking bread at home fills the kitchen with warm, irresistible aromas that instantly comfort the soul.
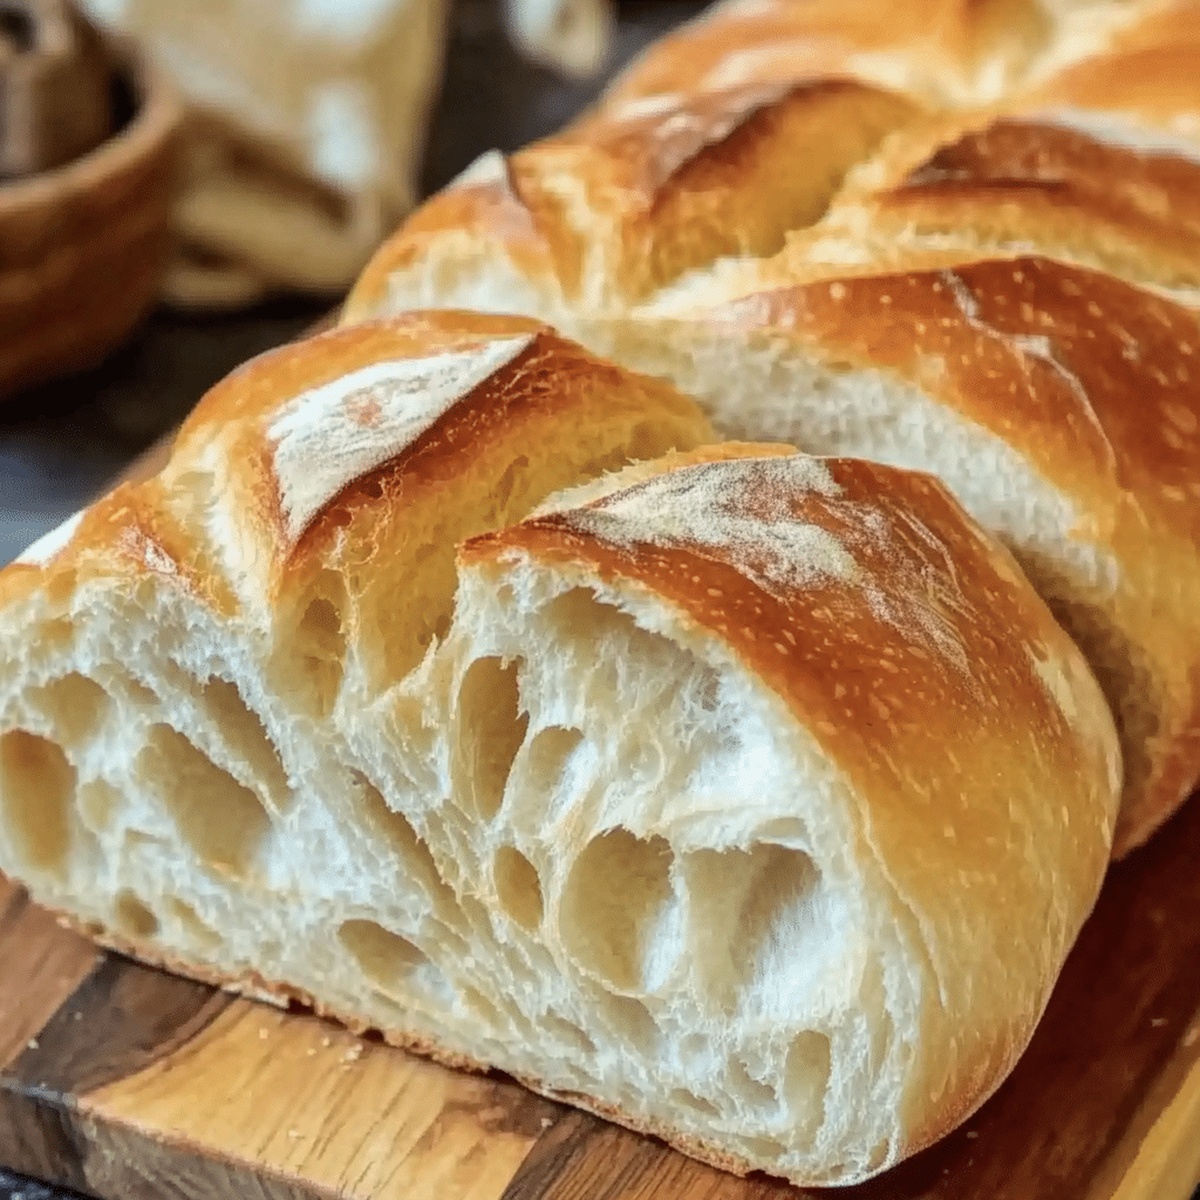
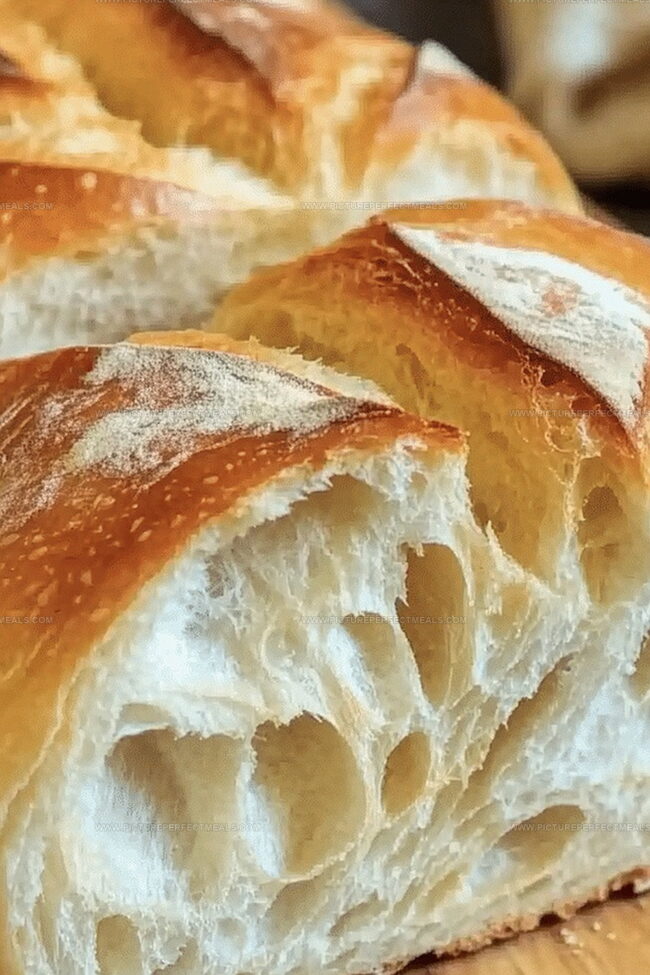
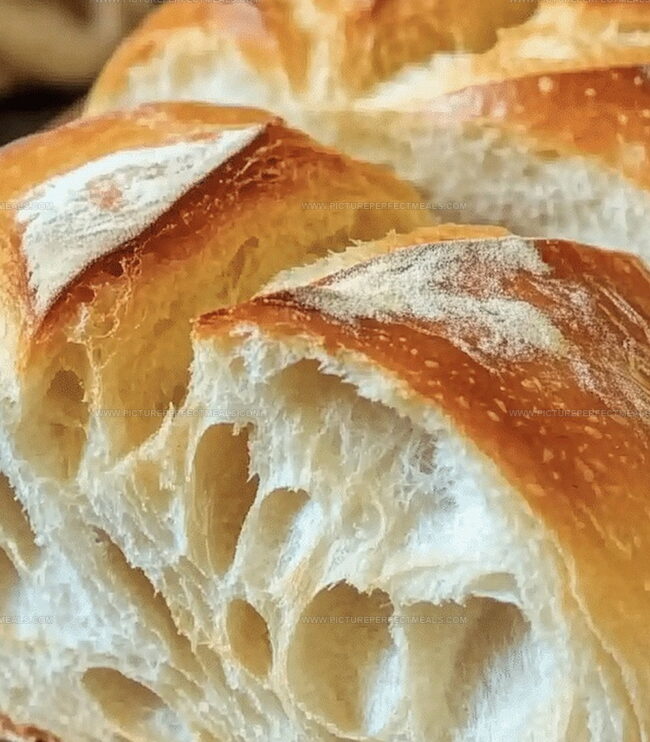
This classic French bread recipe creates a pillowy soft texture that melts in your mouth with every bite.
Simple ingredients come together to produce a stunning loaf that rivals artisan bakery offerings.
Kneading the dough releases subtle gluten strands that develop complex flavors and a beautiful rise.
Salt, flour, yeast, and water transform into a magical culinary experience that connects you to centuries of baking tradition.
Let this French bread become your new weekend baking adventure.
Quick Recipe Overview
Ingredients for Soft Fluffy French Bread
For Yeast Activation:For Dough Base:For Finishing and Shine:Tools to Make Soft Fluffy French Bread
How to Bake Soft Fluffy French Bread
Mix warm water, yeast, and sugar in a mixing bowl. Let the mixture bubble and develop for about 5 minutes until it becomes frothy.
Incorporate salt and olive oil into the yeast mixture. Gradually fold in flour until a soft, slightly sticky dough emerges. The texture should feel smooth and pliable.
Transfer dough to a floured surface. Knead energetically for 5-7 minutes, pushing and folding until the dough becomes silky and stretchy. Add tiny amounts of flour if needed to prevent sticking.
Place dough in a greased bowl, coating all sides. Cover with a clean cloth and let it rest in a cozy spot for about an hour. Watch it magically double in size.
Deflate the risen dough gently. Divide into two equal portions. Roll each piece into a rectangle, then tightly roll from the long edge. Seal the seams and ends securely.
Position loaves seam-side down on a baking sheet. Cover and let them puff up for 30 minutes until they look wonderfully plump.
Heat the oven to 375F. Brush loaves with an egg wash for a beautiful golden shine.
Slash three diagonal lines across each loaf. Slide into the oven and bake 20-25 minutes until they turn a gorgeous golden brown and sound hollow when tapped.
Transfer bread to a cooling rack. Let it rest completely before slicing to preserve its incredible texture.
Soft Fluffy French Bread – Tips & Variations
Serving Ideas for Soft Fluffy French Bread
How to Store Soft Fluffy French Bread
Print
Pillowy Soft French Bread Recipe
- Total Time: 55 minutes
- Yield: 3 1x
Description
Delectable soft fluffy French bread celebrates rustic bakery traditions from France. Crisp exterior and tender crumb invite home bakers to craft authentic European bread with simple ingredients and passionate technique.
Ingredients
- 2 cups warm water (110°F/45°C)
- 2 tbsps active dry yeast
- 2 tbsps granulated sugar
- 5 to 6 cups all-purpose flour
- 1 tbsp salt
- 2 tbsps olive oil
- 1 egg (optional, for egg wash)
Instructions
- Yeast Activation: Blend warm water, yeast, and sugar in a large mixing bowl. Watch the mixture become frothy within 5 minutes, indicating live yeast.
- Dough Formation: Incorporate salt and olive oil into the activated yeast mixture. Gradually fold in flour, creating a smooth, slightly tacky dough that pulls away from bowl edges.
- Kneading Process: Transfer dough to a floured surface. Knead vigorously for 6-8 minutes, developing elasticity and smoothness. Add minimal flour if dough remains excessively sticky.
- First Fermentation: Place dough in a lightly oiled bowl, turning to coat entirely. Cover with plastic wrap or damp cloth. Allow to rise in a warm, draft-free area for 60-90 minutes until doubled in volume.
- Shaping Loaves: Punch down risen dough and divide into two equal portions. Roll each piece into a rectangular shape, then tightly roll from the long edge, creating compact cylindrical loaves. Pinch seams and ends to seal.
- Second Proofing: Position loaves seam-side down on a parchment-lined baking sheet. Cover with a kitchen towel and let rise for 30-45 minutes until visibly puffy.
- Preparation for Baking: Preheat oven to 375F (190C). Optional egg wash can be applied for enhanced golden sheen. Make three diagonal slashes across each loaf’s surface using a sharp knife.
- Baking Stage: Slide baking sheet into preheated oven. Bake for 20-25 minutes until loaves achieve a rich golden-brown color and produce a hollow sound when tapped on the bottom.
- Cooling and Serving: Remove bread from oven and transfer to a wire rack. Allow complete cooling before slicing to maintain internal structure and optimal texture.
Notes
- Activate Yeast Precisely: Ensure water temperature is between 100-110°F (37-43°C) for optimal yeast activation without killing the microorganisms.
- Knead with Confidence: Develop gluten structure by kneading thoroughly, creating a smooth, elastic dough that springs back when gently pressed.
- Control Humidity During Rising: Place dough in a warm, draft-free area with slight moisture to prevent surface drying and promote even rising.
- Glaze for Gorgeous Finish: Egg wash creates a beautiful golden-brown crust and adds a professional bakery-like sheen to the bread’s exterior.
- Prep Time: 30 minutes
- Cook Time: 25 minutes
- Category: Breakfast, Lunch, Dinner, Snacks
- Method: Baking
- Cuisine: French
Nutrition
- Serving Size: 3
- Calories: 300
- Sugar: 2 g
- Sodium: 600 mg
- Fat: 5 g
- Saturated Fat: 0.5 g
- Unsaturated Fat: 4.5 g
- Trans Fat: 0 g
- Carbohydrates: 56 g
- Fiber: 2 g
- Protein: 9 g
- Cholesterol: 0 mg
Jenna Hartley
Founder & Recipe Creator
Expertise
Education
Box Hill Institute, Melbourne
William Angliss Institute, Melbourne
Jenna is the heart of Picture Perfect Meals, turning simple ingredients into beautiful, easy‑to‑make dishes.
Growing up around family meals in Melbourne, she trained at Box Hill Institute and then perfected her pastry skills at William Angliss Institute. She loves mixing classic Australian flavors with fresh ideas to keep cooking fun and stress‑free.