Pull-Apart Garlic Bread Wreath Recipe Magic for Any Feast
Crafting a pull apart garlic bread wreath instantly transforms your kitchen into a fragrant haven of comfort.
Warm, golden dough spirals beckon with promises of deliciousness waiting to unfold.
Soft pillowy layers promise a sensory experience that goes beyond typical bread offerings.
Each twist and turn represents a culinary adventure you’ll want to explore.
Generous garlic notes weave through tender bread, creating a centerpiece that sparks conversation and appetite.
Clusters of herbed, buttery goodness invite everyone to gather around and share.
This recipe guarantees a magical moment where bread becomes more than just a side dish—it becomes the star of your table.
Pull Apart Garlic Bread Wreath for Holiday Tables
Ingredients for Making a Garlic Bread Wreath
Bread Base:Garlic Butter Coating:Finishing Touches:How to Shape and Bake Garlic Bread Wreath
Step 1: Activate Yeast Magic
In a cozy bowl, blend warm water, sugar, and yeast. Let the mixture sit and dance for 5-10 minutes until it becomes wonderfully foamy and alive.
Step 2: Create Dough Perfection
In a spacious mixing bowl, combine flour and salt. Pour in the yeast mixture and olive oil. Stir until a beautiful dough emerges.
Gently knead the dough on a flour-dusted surface for 8-10 minutes, transforming it into a smooth, stretchy wonder. If you prefer, use a stand mixer with a dough hook for 5-6 minutes of easy kneading.
Step 3: Let Dough Rise and Shine
Nestle the dough in a lightly greased bowl, cover with a damp towel, and let it rest in a warm, cozy spot for 1-1.5 hours. Watch it double in size like magic.
Step 4: Craft Garlic Butter Goodness
In a small bowl, whip together:Step 5: Shape Wreath Wonderland
Warm up the oven to 375°F (190°C). Prepare a baking sheet with parchment paper or grease a round pan.
Gently deflate the dough and divide into 20-25 adorable little balls. Roll each piece into a perfect sphere. Dive each ball into the garlic butter mixture, ensuring a complete, delicious coating.
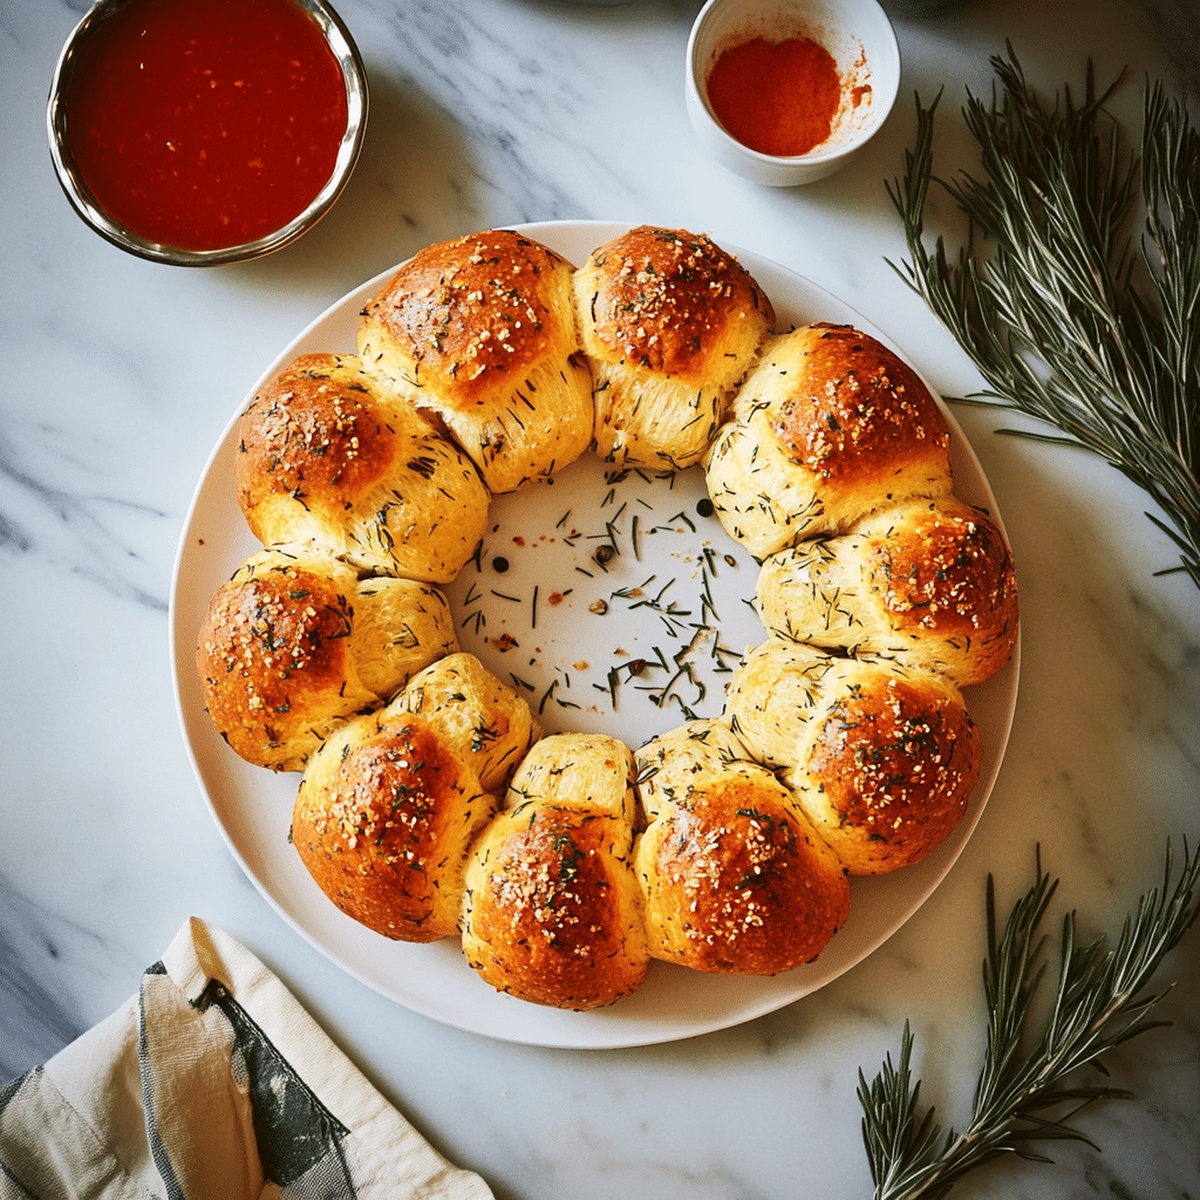
Arrange the buttery balls in a circular wreath pattern, leaving tiny spaces between them for expansion.
Step 6: Bake to Golden Perfection
Slide the wreath into the oven and bake for 20-25 minutes. Look for a beautiful golden-brown color and fully cooked texture.
Step 7: Final Flourish
Optional: Brush the warm bread with leftover garlic butter and sprinkle with Parmesan cheese. Add a sprinkle of fresh parsley for a festive touch.
Serve piping hot, accompanied by marinara sauce or herb butter for dipping.
Advice for Soft and Flavorful Garlic Bread
Store and Reheat Garlic Bread Wreath for Leftovers
Dips and Mains to Pair with Garlic Bread Wreath
Garlic Bread Wreath Variants to Try This Season
Print
Pull Apart Garlic Bread Wreath Recipe
- Total Time: 45 minutes
- Yield: 8 1x
Description
Garlic bread wreath delights guests with its irresistible aroma and show-stopping presentation. Warm, herby, and golden-brown, this crowd-pleasing centerpiece brings festive cheer to any gathering while satisfying comfort food cravings.
Ingredients
Dough Ingredients:
- 3 cups (375 g) all-purpose flour
- 1 tablespoon granulated sugar
- 1 teaspoon salt
- 2 ¼ teaspoons (1 packet) active dry yeast
- 1 cup (240 ml) warm water (110°F/45°C)
- 2 tablespoons olive oil
Garlic Butter Ingredients:
- ¼ cup (60 g) unsalted butter, melted
- 2 cloves garlic, minced
- 2 tablespoons fresh parsley, chopped
- 1 teaspoon dried Italian seasoning
Garnish:
- Grated Parmesan cheese
- Fresh parsley for decoration
Instructions
- Prepare the yeast activation liquid by combining tepid water, sugar, and yeast in a compact vessel. Allow the mixture to rest and develop a frothy texture, indicating active fermentation.
- In a spacious mixing receptacle, integrate flour and salt. Introduce the activated yeast blend and olive oil, stirring until a cohesive dough emerges.
- Transfer the dough onto a lightly floured surface and manipulate with rhythmic kneading motions. Continue working the dough until it transforms into a smooth, elastic consistency. Professional bakers can utilize a stand mixer with a dough hook for efficient processing.
- Nestle the prepared dough into a lightly greased container, drape with a slightly damp cloth, and position in a warmth-saturated environment. Allow the dough to expand and double in volume over approximately 90 minutes.
- Craft a luxurious garlic butter blend by whisking melted butter with finely minced garlic, chopped parsley, and Italian seasoning until thoroughly incorporated.
- Preheat the oven to 375°F, preparing a baking sheet with parchment paper or selecting a circular pan for presentation.
- Deflate the risen dough and segment into 20-25 petite spherical portions. Immerse each dough ball completely in the aromatic garlic butter mixture.
- Artfully arrange the butter-coated dough balls in a circular formation, maintaining modest spacing to accommodate expansion during baking.
- Bake the wreath for 20-25 minutes, monitoring until the surface achieves a rich golden-brown complexion and the interior reaches complete doneness.
- For an enhanced presentation, delicately brush the warm bread with residual garlic butter and sprinkle grated Parmesan cheese. Garnish with fresh parsley to elevate visual appeal.
- Serve immediately while warm, accompanied by marinara sauce or herb-infused butter for an indulgent dipping experience.
Notes
- Create a warm environment for yeast activation by using water between 100-110°F to ensure proper proofing without killing the yeast.
- Knead the dough thoroughly to develop gluten, which creates a more elastic and soft texture for the bread wreath.
- Allow sufficient rising time in a draft-free, warm spot to help the dough double in size and create a lighter, airier bread.
- Experiment with different herbs and cheese variations like rosemary, thyme, or sharp cheddar to customize the flavor profile.
- Prep Time: 20 minutes
- Cook Time: 25 minutes
- Category: Appetizer, Snacks
- Method: Baking
- Cuisine: Italian
Nutrition
- Serving Size: 8
- Calories: 220
- Sugar: 1 g
- Sodium: 240 mg
- Fat: 9 g
- Saturated Fat: 5 g
- Unsaturated Fat: 4 g
- Trans Fat: 0 g
- Carbohydrates: 30 g
- Fiber: 1 g
- Protein: 5 g
- Cholesterol: 20 mg
Daves Miller
Contributing Chef & Culinary Educator
Expertise
Education
Sullivan University, Louisville, Kentucky
White Mountains Community College, Berlin, New Hampshire
Daves is the friendly face guiding you through flavorful, fuss-free recipes at Picture Perfect Meals.
He studied culinary arts at Sullivan University and embraced Baking and Pastry Arts at White Mountains Community College. Daves specializes in comforting meals with vibrant flavors, highlighting fresh, seasonal ingredients.