
Dreamy Red Velvet Cinnamon Rolls Recipe for Sweet Breakfast Magic
My weekend baking ritual just discovered a magical red velvet cinnamon rolls twist that promises pure comfort.
Sweet aromas will drift through kitchens, teasing everyone’s senses with rich chocolate undertones.
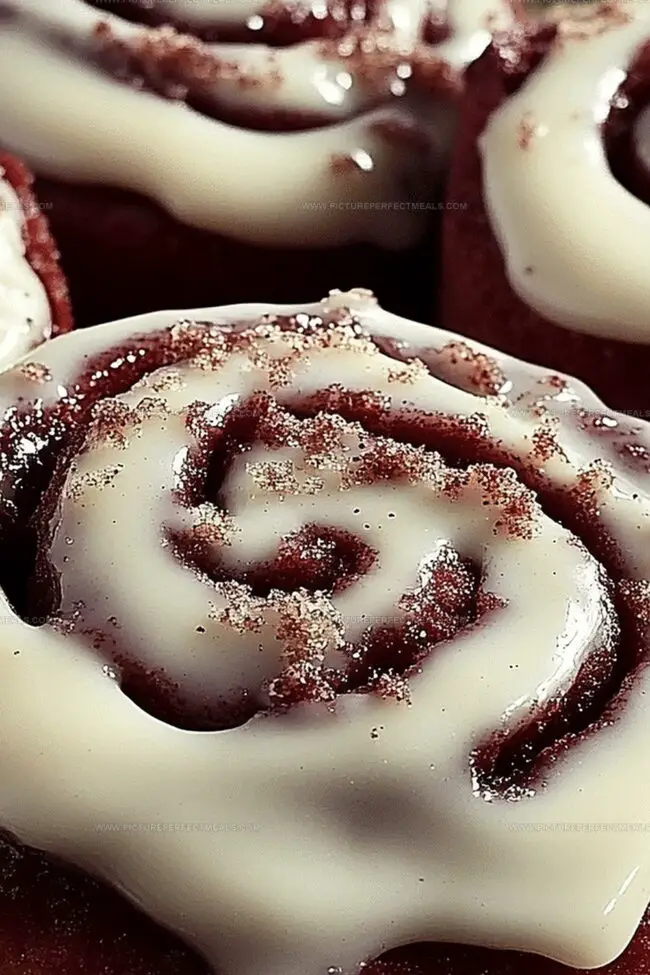
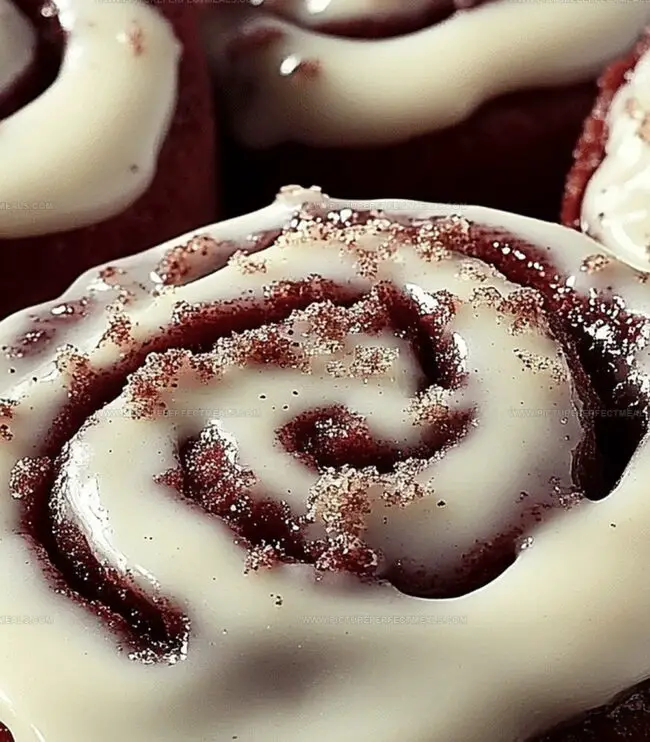
Soft, pillowy dough becomes a canvas for deep crimson swirls and warm spices.
Delicate cream cheese frosting promises to complement each tender bite perfectly.
Home bakers can easily master this decadent pastry with simple ingredients and straightforward techniques.
Unexpected flavor combinations make these rolls a delightful surprise for lazy weekend mornings.
You’ll want to savor every single crumb of this irresistible treat.
Red Velvet Cinnamon Rolls That Are Soft and Gorgeous
What You’ll Need for Fluffy Red Velvet Dough
Bread Base:Leavening and Moisture:Flavor and Sweetness:Frosting Components:Roll and Bake Red Velvet Cinnamon Rolls Like a Pro
Step 1: Activate the Yeast Powerhouse
Grab a large mixing bowl and combine warm milk, yeast, and a splash of sugar. Let the mixture sit and get bubbly for 5-10 minutes.
Step 2: Create Wet Ingredient Magic
Add to the yeast mixture:Whisk everything into a vibrant, smooth blend.
Step 3: Blend Dry Ingredient Wonders
In a separate bowl, mix together:Slowly fold the dry ingredients into the wet mixture until a soft dough emerges.
Step 4: Knead the Dough to Perfection
Transfer the dough to a floured surface. Knead by hand for 8-10 minutes or use a stand mixer with a dough hook for 5-7 minutes until the dough becomes silky smooth.
Step 5: First Dough Rise
Place the dough in a greased bowl, cover with a damp cloth, and let it rise in a warm spot for 1-1½ hours until it doubles in size.
Step 6: Craft the Filling Fusion
Mix into a creamy paste:Step 7: Roll Out the Dough Canvas
Punch down the risen dough and roll it into a 16×12-inch rectangle on a floured surface.
Step 8: Spread Filling Excitement
Evenly distribute the filling across the dough, leaving a 1-inch border on one long side.
Step 9: Roll and Slice
Tightly roll the dough from the filled long side. Slice into 12 equal rolls and nestle them in a greased 9×13-inch baking dish.
Step 10: Second Rise
Cover the rolls with a damp cloth and let them puff up for 30-45 minutes.
Step 11: Bake to Golden Perfection
Preheat the oven to 350°F (175°C). Bake rolls for 20-25 minutes until they turn light golden.
Step 12: Whip Up Creamy Frosting
Beat together:Gradually add:Blend until luxuriously creamy.
Step 13: Frost and Serve
Spread the frosting over warm rolls and enjoy immediately!
Tips for Red Velvet Rolls That Stay Tender
Save Rolls and Reheat Tips
Drinks That Go with Red Velvet Cinnamon Rolls
Creative Variants for Cinnamon Roll
Print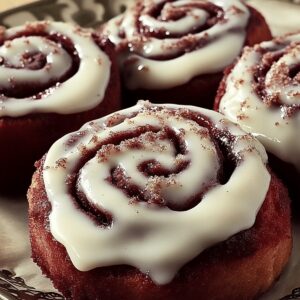
Red Velvet Cinnamon Rolls Recipe
- Total Time: 55 minutes
- Yield: 12 1x
Description
Indulgent Red Velvet Cinnamon Rolls deliver a delightful twist on classic breakfast pastries. Luxurious cocoa-infused dough swirls with creamy cream cheese frosting, promising a sweet morning celebration that will enchant dessert enthusiasts.
Ingredients
Main Ingredients:
- 3 ½ cups (440 grams) all-purpose flour
- 1 cup (240 milliliters) warm milk
- 2 large eggs
- ½ cup (115 grams) unsalted butter
- ¼ cup (50 grams) granulated sugar
Flavoring Ingredients:
- 2 tablespoons cocoa powder
- 12 teaspoons red food coloring
- 2 tablespoons ground cinnamon
- ¾ cup (150 grams) brown sugar
- 1 teaspoon vanilla extract
- 2 ¼ teaspoons (1 packet) active dry yeast
- 1 teaspoon salt
Frosting Ingredients:
- 4 ounces (115 grams) cream cheese
- 1 ½ cups (190 grams) powdered sugar
- 3 tablespoons milk or heavy cream
- 1 teaspoon vanilla extract
Instructions
- Dissolve yeast in warm milk with a portion of sugar, allowing it to bloom and become frothy for about 7-10 minutes.
- Whisk together the remaining sugar, eggs, vanilla, melted butter, and red food coloring into the activated yeast mixture until thoroughly combined.
- Create a separate mixture of flour, cocoa powder, and salt, then gradually fold these dry ingredients into the wet ingredients to form a cohesive, soft dough.
- Transfer the dough to a lightly floured surface and knead vigorously for 8-10 minutes, developing its elasticity and smoothness. The dough should feel supple and spring back when pressed.
- Place the kneaded dough in a lightly greased bowl, cover with a clean kitchen towel, and allow it to rise in a draft-free environment until it doubles in volume, approximately 1-1.5 hours.
- Punch down the risen dough and roll it into a rectangular shape approximately 16 inches long.
- Blend softened butter with brown sugar, cinnamon, and cocoa powder to create a rich, aromatic filling.
- Spread the filling evenly across the dough, leaving a small margin on one long edge to ensure clean rolling.
- Carefully roll the dough into a tight log, starting from the fully coated edge, then slice into 12 equal portions.
- Arrange the rolled segments in a greased baking dish, allowing them slight space to expand during the second proofing.
- Cover the rolls and let them rise again for 30-45 minutes until they appear puffy and interconnected.
- Preheat the oven to 350°F and bake the rolls for 22-25 minutes, monitoring their golden color and ensuring complete cooking.
- While baking, prepare the cream cheese frosting by beating cream cheese and butter until smooth, then gradually incorporating powdered sugar, vanilla, and milk.
- Once baked, generously spread the creamy frosting over the warm rolls, allowing it to slightly melt and create an irresistible glaze.
Notes
- Choose full-fat milk for richer, more tender dough texture that helps create softer rolls.
- Ensure yeast mixture is warm (not hot) to prevent killing active yeast cultures, which could prevent proper rising.
- Add extra cocoa powder for deeper red velvet color and more intense chocolate undertones.
- Substitute whole wheat flour for half the all-purpose flour to increase nutritional value and create a slightly denser texture.
- Use gel food coloring instead of liquid for more vibrant red color without changing dough consistency.
- Allow rolls to cool slightly before frosting to prevent melting and ensure smooth cream cheese coverage.
- Make dairy-free version by replacing milk with almond milk and using vegan butter alternatives.
- Chill rolls overnight in refrigerator for slower, more controlled fermentation and enhanced flavor development.
- Create gluten-free option by using cup-for-cup gluten-free flour blend with xanthan gum.
- Prep Time: 30 minutes
- Cook Time: 25 minutes
- Category: Breakfast, Snacks, Desserts
- Method: Baking
- Cuisine: American
Nutrition
- Serving Size: 12
- Calories: 300
- Sugar: 15g
- Sodium: 200mg
- Fat: 12g
- Saturated Fat: 7g
- Unsaturated Fat: 3g
- Trans Fat: 0g
- Carbohydrates: 42g
- Fiber: 1g
- Protein: 4g
- Cholesterol: 50mg
Daves Miller
Contributing Chef & Culinary Educator
Expertise
Education
Sullivan University, Louisville, Kentucky
White Mountains Community College, Berlin, New Hampshire
Daves is the friendly face guiding you through flavorful, fuss-free recipes at Picture Perfect Meals.
He studied culinary arts at Sullivan University and embraced Baking and Pastry Arts at White Mountains Community College. Daves specializes in comforting meals with vibrant flavors, highlighting fresh, seasonal ingredients.