
Divine Raspberry Cheesecake Bars Recipe: Sweet & Creamy Indulgence
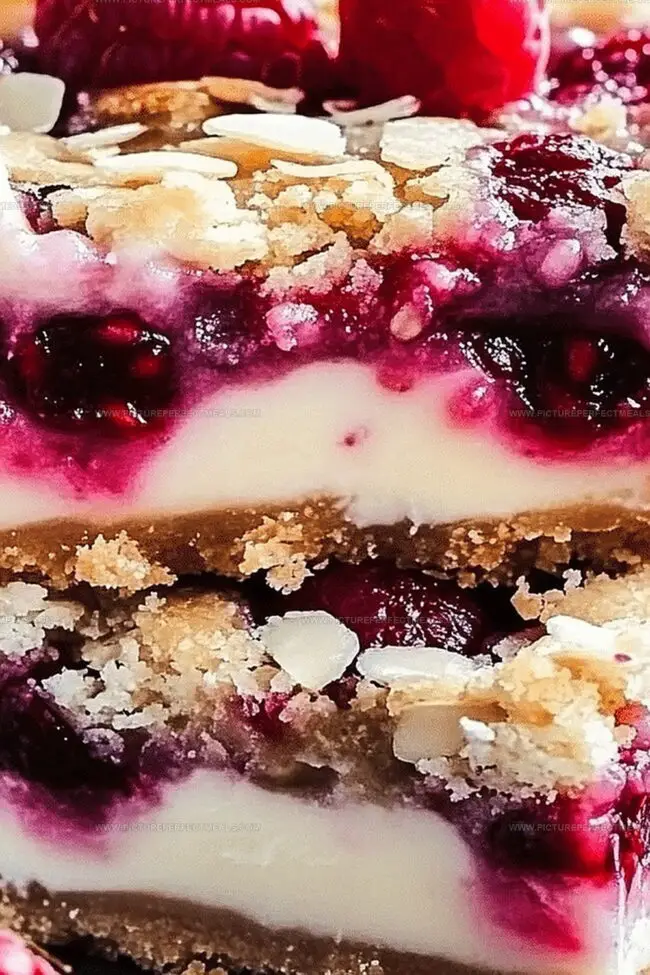
Sweet summer berries burst with flavor in these decadent raspberry cheesecake bars that blend creamy textures with tangy raspberry swirls.
The classic dessert takes an elegant twist by incorporating fresh, ripe raspberries into every luscious bite.
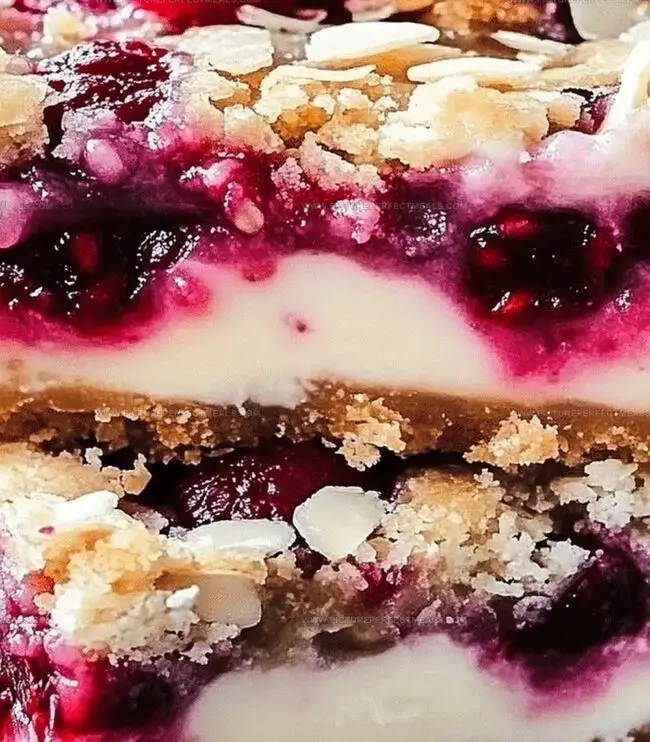
Smooth cream cheese creates a velvety base that complements the bright, jewel-toned fruit perfectly.
Each bar offers a delightful balance of rich, creamy filling and buttery graham cracker crust.
The vibrant raspberry ribbons add a stunning visual and flavor contrast to the classic cheesecake profile.
Simple yet sophisticated, these bars work beautifully for casual gatherings or elegant dinner parties.
You’ll want to savor every delectable morsel of this irresistible raspberry-infused treat.
Quick Recipe Overview
Ingredients for Raspberry Cheesecake Bars That Impress
For Crust Base:For Cheesecake Filling:For Raspberry Swirl:Kitchen Essentials for Raspberry Cheesecake Bar Baking
How to Make Raspberry Cheesecake Bars Step-by-Step
Crush graham crackers into fine crumbs and blend with melted butter. Press mixture firmly into parchment-lined baking pan. Bake briefly until golden and let cool completely.
Beat cream cheese until silky smooth. Gently incorporate eggs one by one, ensuring each blends seamlessly. Splash in vanilla for extra richness and mix thoroughly.
Blend raspberry jam with a touch of water to create a vibrant, flowing sauce. Make sure consistency is perfect for beautiful marbling.
Pour velvety cheesecake mixture over cooled crust. Artfully dot raspberry sauce across surface. Use a toothpick to create elegant swirls, transforming the dessert into a visual masterpiece.
Slide pan into preheated oven. Bake until edges set and center remains slightly soft. Watch carefully to prevent over-browning.
Allow bars to cool completely. Refrigerate for several hours until firm. Cut into neat squares and serve chilled for maximum enjoyment.
Tips to Make Raspberry Bars and Bright
Serve These Raspberry Bars with a Pop of Color
Keep Raspberry Cheesecake Bars Fresh in the Fridge
Print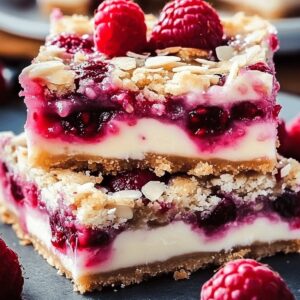
Rich Raspberry Cheesecake Bars
- Total Time: 50 minutes
- Yield: 13 1x
Description
Raspberry cheesecake bars blend creamy richness with tangy fruit in a delightful dessert. Smooth cream cheese and sweet raspberries create a perfect balance you’ll savor with each delectable bite.
Ingredients
- 16 oz (454 g) cream cheese, softened
- 2 large eggs
- 1 ½ cups (354 ml) graham cracker crumbs
- ½ cup (100 g) granulated sugar
- ½ cup (113 g) unsalted butter, melted
- ½ cup (170 g) raspberry jam
- 2 tbsps (30 ml) granulated sugar
- 1 tsp vanilla extract
- 1 tbsp (15 ml) water
Instructions
- Crust Preparation: Blend graham cracker crumbs with melted butter and sugar, pressing the mixture firmly into a parchment-lined baking pan to create a uniform, compact base.
- Crust Conditioning: Toast the crust in a preheated oven at 350°F until golden, then cool completely to develop a crisp foundation for the cheesecake bars.
- Cream Cheese Blend: Whip cream cheese until smooth, gradually mixing in sugar, eggs, and vanilla extract to create a silky, homogeneous filling with a rich, luxurious consistency.
- Raspberry Embellishment: Transform raspberry jam into a fluid sauce by whisking with water, preparing for the decorative swirl technique.
- Assembly and Swirling: Pour the cream cheese mixture evenly over the cooled crust, then artfully dot and drag the raspberry sauce across the surface to create elegant marbled patterns.
- Precision Baking: Bake at 350°F for approximately 35-40 minutes, watching for set edges and a subtle center wobble that indicates perfect custard-like texture.
- Cooling and Setting: Allow the cheesecake to cool completely at room temperature, then refrigerate for several hours to enhance flavor and achieve optimal consistency.
- Serving Finale: Slice into precise bars, revealing the beautiful raspberry-infused layers, and serve chilled for a decadent dessert experience.
Notes
- Prevent Cracking Technique: Avoid overmixing the cream cheese batter and gently fold ingredients to maintain a smooth, crack-free surface during baking.
- Temperature Control: Use room temperature ingredients, especially cream cheese and eggs, to ensure a silky, lump-free mixture and consistent baking results.
- Swirl Precision: Use a toothpick or thin knife for creating delicate raspberry swirls, making gentle figure-eight movements to achieve an elegant marbled effect.
- Chill for Perfection: Refrigerate bars for at least 4 hours or overnight to allow flavors to meld and achieve the ideal firm yet creamy texture.
- Prep Time: 15 minutes
- Cook Time: 35 minutes
- Category: Desserts
- Method: Baking
- Cuisine: American
Nutrition
- Serving Size: 13
- Calories: 273
- Sugar: 18 g
- Sodium: 210 mg
- Fat: 19 g
- Saturated Fat: 10 g
- Unsaturated Fat: 9 g
- Trans Fat: 0 g
- Carbohydrates: 24 g
- Fiber: 1 g
- Protein: 4 g
- Cholesterol: 65 mg
Jenna Hartley
Founder & Recipe Creator
Expertise
Education
Box Hill Institute, Melbourne
William Angliss Institute, Melbourne
Jenna is the heart of Picture Perfect Meals, turning simple ingredients into beautiful, easy‑to‑make dishes.
Growing up around family meals in Melbourne, she trained at Box Hill Institute and then perfected her pastry skills at William Angliss Institute. She loves mixing classic Australian flavors with fresh ideas to keep cooking fun and stress‑free.