
Swoon-Worthy Valentine’s Day Cookie Bars Recipe for Lovers
Sweet treats have a special way of melting hearts, especially when these valentine cookies with red velvet promise pure delight.
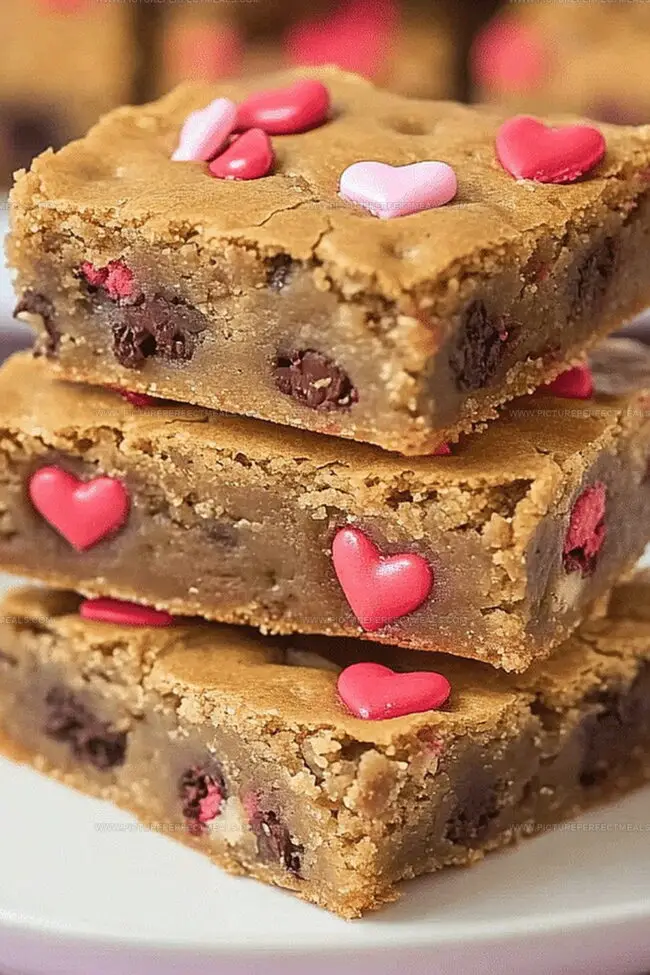
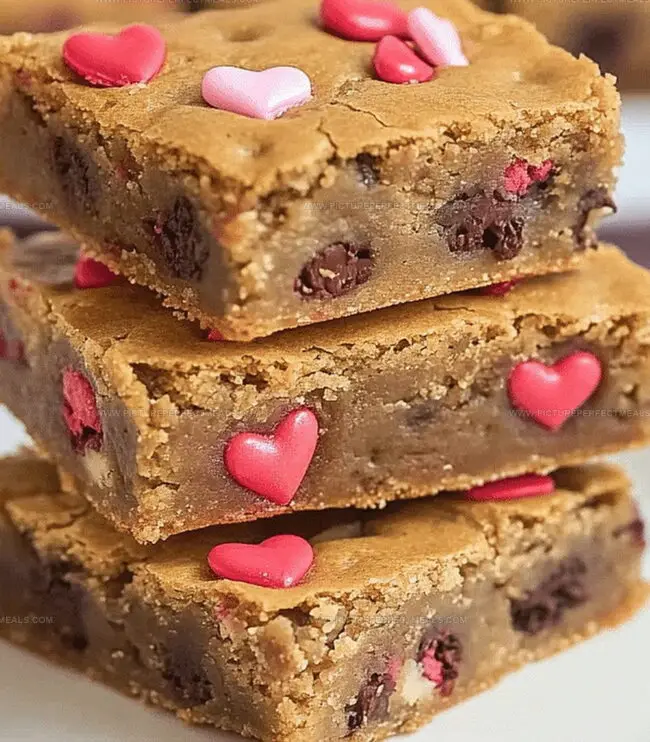
The delectable red velvet cookie bars combine rich chocolate and vibrant crimson hues for an irresistible dessert.
Soft, decadent, and perfectly portioned, these bars capture the essence of romance in every single bite.
Creamy cream cheese frosting adds a luxurious touch that elevates the entire experience.
You’ll fall in love with the deep cocoa undertones and velvety texture that make these bars a standout dessert.
Whip up these charming bars to surprise your special someone and create a memorable Valentine’s Day moment.
Indulge in love, one delicious square at a time.
Quick Recipe Overview
Everything You Need for Valentine’s Day Cookie Bars
For Base Ingredients:For Sweet Binding Ingredients:For Festive Mix-In Ingredients:Valentine’s Day Cookie Bars Prep Gear
Make Valentine’s Day Cookie Bars Like a Pro
Crank your oven to 350F and grab a 9×13 pan. Slather it with cooking spray or line with parchment paper for easy removal.
In a big mixing bowl, whisk melted butter with brown and white sugars until silky smooth. Crack in eggs and splash of vanilla, stirring until everything looks perfectly combined.
Gently fold dry ingredients into your buttery mixture. Don’t overmix! Toss in most of your colorful candies and chocolate chips, stirring just enough to distribute the goodies evenly.
Pour the dazzling batter into your prepared pan. Sprinkle remaining candies across the top for a festive Valentine’s look. Press them lightly so they peek through the surface.
Slide the pan into the oven and bake for 20-25 minutes. Look for golden edges and a slightly soft center. The bars will firm up as they cool, so resist the urge to overcook.
Let your masterpiece cool completely in the pan. Once cooled, lift out using parchment paper and slice into sweet squares. Your Valentine’s treat is ready to spread some love!
Smart Tips for Valentine’s Day Cookie Bars
Ways to Serve Valentine’s Day Cookie Bars
Store and Prep Valentine’s Day Cookie Bars with Ease
Print
Romantic Valentines Day Cookie Bars Recipe
- Total Time: 40 minutes
- Yield: 13 1x
Description
Sweet valentines day cookie bars blend rich chocolate and creamy caramel into a romantic dessert perfect for sharing. Passionate bakers can craft this indulgent treat that melts hearts with each delectable bite.
Ingredients
- ¾ cup (170 g or 1 ½ sticks) unsalted butter, melted and slightly cooled
- 2 large eggs
- 1 cup (200 g) light brown sugar, packed
- ½ cup (100 g) granulated sugar
- 2 ¼ cups (540 ml) all-purpose flour
- 1 cup valentines-themed M&Ms
- ¾ cup semi-sweet chocolate chips
- 2 tsps vanilla extract
- ½ tsp baking soda
- ¼ tsp salt
- ¼ cup valentines sprinkles (optional)
Instructions
- Preparation Sanctuary: Preheat the oven to 350F (175C) and prepare a 9×13-inch pan with parchment paper or a delicate grease application.
- Dry Ingredient Symphony: Whisk flour, baking soda, and salt in a medium mixing bowl, creating a harmonious dry foundation and setting aside.
- Wet Mixture Fusion: In a spacious bowl, vigorously blend melted butter with brown and granulated sugars until smooth. Introduce eggs and vanilla extract, stirring until perfectly unified.
- Dough Composition: Delicately fold dry ingredients into the wet mixture, minimizing stirring to maintain batter integrity. Gently incorporate most of the M&Ms, chocolate chips, and half the sprinkles throughout the mixture.
- Decorative Layering: Spread the developed dough evenly across the prepared pan, artfully pressing remaining M&Ms and sprinkles on top for visual allure and textural contrast.
- Baking Transformation: Bake for 20-25 minutes in the preheated oven, watching for golden edges and a barely set center, ensuring optimal cookie bar perfection.
- Cooling and Serving: Allow the baked creation to cool completely in the pan. Once cooled, lift the entire batch using parchment paper and slice into delectable square or rectangular servings.
Notes
- Prevent Overmixing: Stir dry and wet ingredients minimally to keep cookie bars tender and avoid tough, dense texture.
- Temperature Control: Watch baking time closely, removing bars when edges turn golden and center appears slightly underbaked for soft, gooey consistency.
- Customize Decorations: Experiment with different seasonal M&Ms and sprinkle colors to match holidays or personal preferences.
- Proper Cooling Technique: Allow bars to cool completely in pan to set properly and achieve clean, precise cutting lines.
- Prep Time: 15 minutes
- Cook Time: 25 minutes
- Category: Desserts, Snacks
- Method: Baking
- Cuisine: American
Nutrition
- Serving Size: 13
- Calories: 230
- Sugar: 18 g
- Sodium: 70 mg
- Fat: 11 g
- Saturated Fat: 6 g
- Unsaturated Fat: 4.5 g
- Trans Fat: 0 g
- Carbohydrates: 34 g
- Fiber: 1 g
- Protein: 2 g
- Cholesterol: 35 mg
Jenna Hartley
Founder & Recipe Creator
Expertise
Education
Box Hill Institute, Melbourne
William Angliss Institute, Melbourne
Jenna is the heart of Picture Perfect Meals, turning simple ingredients into beautiful, easy‑to‑make dishes.
Growing up around family meals in Melbourne, she trained at Box Hill Institute and then perfected her pastry skills at William Angliss Institute. She loves mixing classic Australian flavors with fresh ideas to keep cooking fun and stress‑free.