Sweet aromas of cinnamon and warm apple pie spices waft through the kitchen during this rustic apple crisp recipe.
Seasonal baking brings comfort and joy to any home gathering.
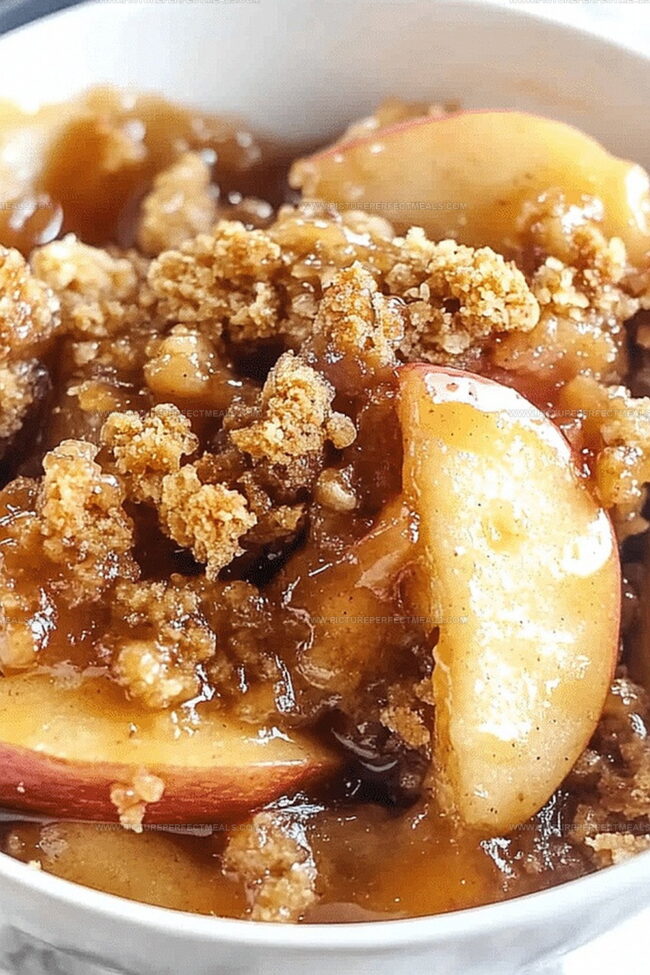
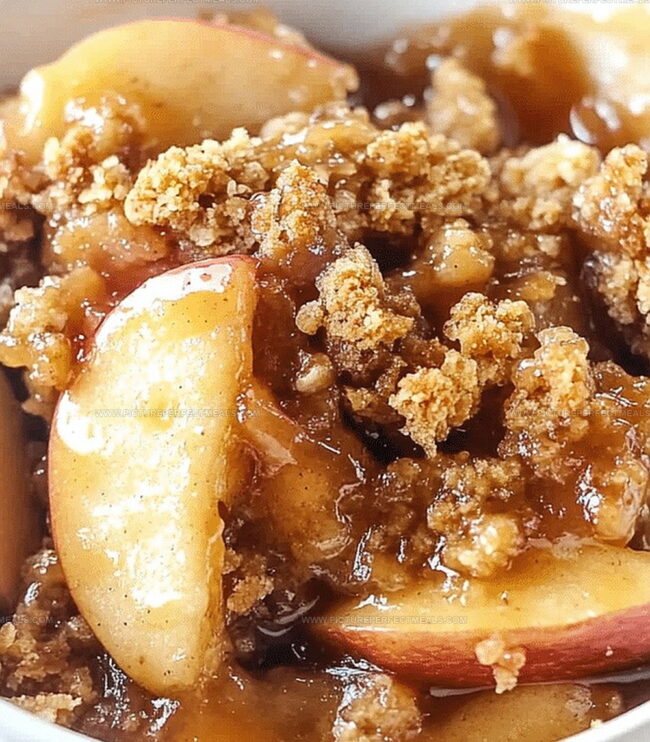
Fresh, ripe apples meld perfectly with a crispy, golden-brown topping that adds delightful texture and crunch.
Fall’s most beloved dessert promises a delectable blend of soft, caramelized fruit and buttery, sweet crumble.
Bakers of all skill levels can easily master this simple yet impressive treat.
The blend of tart apples and sugary oat topping creates a harmonious balance of flavors.
You’ll want to savor every single bite of this irresistible dessert.
Quick Recipe Overview
Prep Time: 15 minutes
Cook Time: 40-45 minutes
Total Time: 1 hour
Calories: 300 kcal
Servings: 8
Gather the Goodies for Apple Crisp
For Fruity Base:
Apples: Crisp, sweet-tart varieties like Honeycrisp or Granny Smith create the perfect tangy foundation for this classic dessert.
Lemon Juice: Brightens the apples’ flavor and prevents browning, adding a zesty touch to the filling.
Sugar: Enhances natural apple sweetness and helps create a delightful caramelized texture.
Cinnamon: Warm, aromatic spice that complements the apples’ natural flavor profile.
Nutmeg: Adds depth and subtle warmth to the fruit mixture.
Cornstarch: Thickens the apple filling, creating a luscious, silky texture.
For Crumbly Topping:
All-Purpose Flour: Provides structure and creates a crispy, golden-brown layer.
Brown Sugar: Delivers rich, molasses-like sweetness and helps achieve a caramelized crunch.
Butter: Brings richness and helps bind the topping ingredients together.
Rolled Oats: Adds wonderful texture and a hearty, wholesome element to the crisp.
For Baking Preparation:
Baking Spray or Butter: Ensures the dish doesn’t stick and allows for easy serving.
Apple Crisp Gear That Gets the Job Done
Large bowl: Perfect for mixing apple slices with spices and coating evenly.
9×13-inch baking dish: Essential for spreading and baking the crisp.
Cutting board: Needed for slicing apples safely and cleanly.
Sharp knife: Helps cut apples into uniform slices.
Measuring cups and spoons: Crucial for accurate ingredient proportions.
Mixing spoon or spatula: Helps toss and combine apple mixture thoroughly.
Oven mitts: Protect hands when handling hot baking dish.
Your Step-by-Step Apple Crisp Guide
Warm Up the Oven Bring your kitchen to life by preheating the oven to a cozy 350 degrees, creating the perfect environment for a delightful dessert.
Prepare Apple Mixture Slice your apples into delicate wedges and dance them with a sprinkle of sugar, a splash of zesty lemon juice, a whisper of cinnamon, a hint of nutmeg, and a touch of cornstarch to bind all the flavors together.
Set the Stage Lovingly transfer your apple mixture into a well-greased baking dish, spreading the fruit evenly to ensure each bite will be a perfect blend of sweet and spicy goodness.
Create Crispy Topping Combine flour, brown sugar, oats, and a generous pat of cold butter, using your fingertips to blend until the mixture resembles crumbly, golden breadcrumbs that will transform into a crunchy crown for your apple treasure.
Crown Your Creation Generously sprinkle the crumbly topping over the apple mixture, making sure every inch is covered with the promise of a delectable crunch.
Bake to Perfection Slide the baking dish into the waiting oven and let it bake for about 45 minutes, until the top turns a beautiful golden brown and the apples bubble with sweet, fragrant juices.
Cool and Serve Allow your masterpiece to rest for a few minutes after baking, letting the flavors meld and settle before serving warm, potentially with a scoop of vanilla ice cream for extra indulgence.
Apple Crisp Tips, Swaps & Secrets
Slice Smart: Use a mix of apple varieties like Granny Smith and Honeycrisp for a complex flavor and perfect texture balance.
Make-Ahead Magic: Prepare the crisp topping and apple filling separately up to 24 hours in advance, then assemble and bake just before serving.
Gluten-Free Option: Swap regular flour with almond flour or gluten-free all-purpose flour blend in the topping for a celiac-friendly dessert.
Dairy-Free Twist: Replace butter with coconut oil or vegan butter to create a delicious dairy-free version without compromising taste.
Nutty Crunch Boost: Add chopped pecans or sliced almonds to the topping for extra texture and a rich, toasted flavor profile.
When and How to Serve Apple Crisp
Cozy Comfort Companion: Serve this warm apple crisp with a generous scoop of vanilla ice cream, creating a delightful contrast between the hot, spiced apples and cold, creamy sweetness.
Breakfast Remix: Transform leftovers into a morning treat by crumbling the crisp over yogurt or blending it into overnight oats for a delicious breakfast transformation.
Rustic Dessert Presentation: Garnish with a light dusting of cinnamon or chopped nuts like pecans or walnuts to add texture and elevate the visual appeal of this classic dessert.
Party-Perfect Serving: Portion into individual ramekins for an elegant dinner party dessert that allows guests to enjoy their own personal apple crisp with a touch of sophistication.
Stash or Save That Apple Crisp Leftover Joy
Smart Refrigeration Strategy: Store leftover apple crisp in an airtight container inside the refrigerator for up to 4 days, keeping the topping crisp and fruit fresh.
Freezing Wisdom: Wrap individual portions or the entire dessert tightly in plastic wrap and aluminum foil, then freeze for maximum 3 months without losing texture or flavor.
Room Temperature Tips: Let the crisp cool completely before covering to prevent condensation, which can make the crumbly topping soggy and less appetizing.
Reheating Magic: Warm individual servings in the microwave for 30-45 seconds or reheat the entire dish in a 350F oven for 10-15 minutes to restore the original crispness and enjoyment.
Recipe development with a focus on single-dish meals.
Fusion of traditional and modern Australian cuisines.
Food styling and photography for digital platforms.
Education
Box Hill Institute, Melbourne
Degree: Advanced Diploma of Hospitality Management
Focus: Specialized in practical food and beverage service, responsible alcohol and hygiene compliance, legal risk management, and hands‑on experience in a simulated restaurant environment.
William Angliss Institute, Melbourne
Program: Certificate IV in Patisserie
Focus: Specialized in pastry and bakery techniques, cookery and specialty food preparation, recipe planning and costing, commercial kitchen operations, sustainable and inclusive work practices, food safety and hygiene compliance, and workplace health and safety.
Jenna is the heart of Picture Perfect Meals, turning simple ingredients into beautiful, easy‑to‑make dishes.
Growing up around family meals in Melbourne, she trained at Box Hill Institute and then perfected her pastry skills at William Angliss Institute. She loves mixing classic Australian flavors with fresh ideas to keep cooking fun and stress‑free.

Jenna Hartley
Founder & Recipe Creator
Expertise
Education
Box Hill Institute, Melbourne
William Angliss Institute, Melbourne
Jenna is the heart of Picture Perfect Meals, turning simple ingredients into beautiful, easy‑to‑make dishes.
Growing up around family meals in Melbourne, she trained at Box Hill Institute and then perfected her pastry skills at William Angliss Institute. She loves mixing classic Australian flavors with fresh ideas to keep cooking fun and stress‑free.