
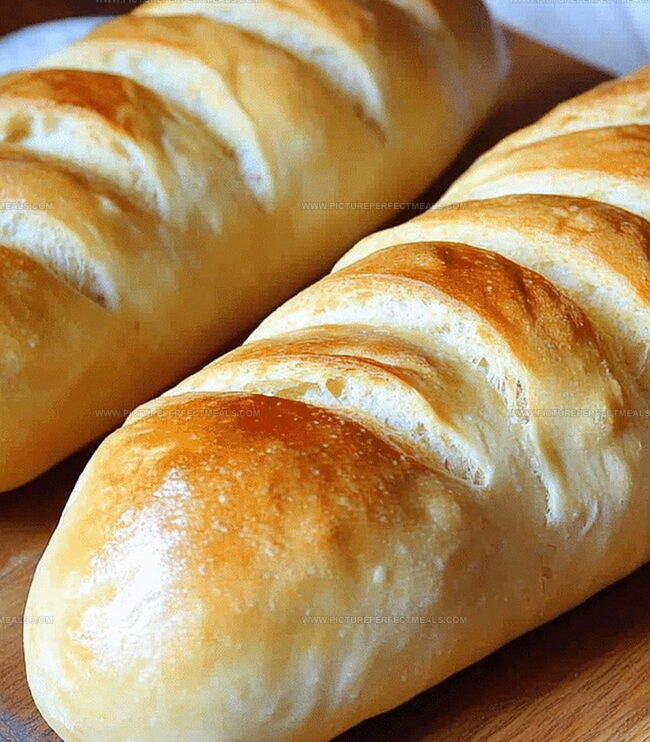
Golden Crusty French Bread Recipe: Rustic Homemade Bakery Magic
Warm, golden loaves of french bread rise from humble ingredients, promising a delightful culinary journey that connects generations of bakers.
Crisp crusts and soft, pillowy interiors speak to the magic of simple, traditional baking techniques.
The french bread recipe we’re exploring today brings the charm of artisan bakeries right into your kitchen.
Kneading dough becomes a meditative process that transforms basic flour, water, yeast, and salt into something extraordinarily comforting.
Each step in crafting this bread tells a story of patience and passion.
The aroma of freshly baked bread will fill your home with warmth and nostalgia.
Roll up your sleeves and let’s create a bread that celebrates the timeless art of homemade baking.
Quick Recipe Overview

Homemade Bakery French Bread Ingredient Essentials
For Bread Activation:For Dry Ingredients:For Enriching and Finishing:Tools That Help You Knead, Rise, and Bake Like a Baker
How to Make Homemade French Bread With Bakery Vibes
Mix warm water, yeast, and sugar in a small bowl. Let the mixture sit and become frothy, which signals the yeast is ready to work its magic.
Combine flour and salt in a large mixing bowl. Pour in the activated yeast mixture and olive oil. Knead the ingredients until a smooth, elastic dough forms.
Place the dough in a lightly oiled bowl, cover with a clean kitchen towel. Let it rest in a warm spot for about an hour until it doubles in size.
Punch down the risen dough and transfer to a floured surface. Gently roll and shape into a classic long French bread shape.
Position the shaped loaf on a baking sheet. Cover and let rise again for about 30 minutes until puffy.
Preheat the oven to 375°F. Make diagonal slashes across the top of the loaf with a sharp knife.
Slide the baking sheet into the oven. Bake for 25-30 minutes until the bread turns a beautiful golden brown and sounds hollow when tapped.
Remove bread from oven and let cool on a wire rack. Slice and serve warm for the most delightful homemade bread experience.
Variations Like Herbs, Garlic, or Cheese Swirls
Serve With Soup, Sandwiches, or Olive Oil
Keep Bread Fresh With These Storage Tips
Print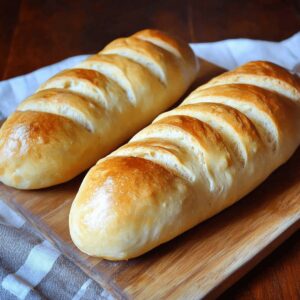
Rustic Homemade Bakery French Bread Recipe
- Total Time: 40 minutes
- Yield: 3 1x
Description
Homemade bakery French bread brings the essence of Paris right to kitchen counters. Crisp golden crust and pillowy interior invite passionate bakers to savor authentic French culinary traditions.
Ingredients
- 1 packet (7 grams / 2 ¼ tsps) active dry yeast
- 4 cups (500 grams) all-purpose flour
- 1 ½ cups (360 ml) warm water
- 1 ½ tsps salt
- 1 tbsp (15 ml) sugar
- 1 tbsp (15 ml) olive oil
- 1 egg
- 1 tbsp (15 ml) water
Instructions
- Yeast Activation: Dissolve yeast in warm water with sugar, allowing the mixture to become foamy and alive for 5-10 minutes, signaling its readiness.
- Dough Foundation: Merge flour and salt in a spacious mixing bowl, crafting a central crater to receive the liquid ingredients with precision.
- Dough Formation: Introduce the activated yeast into the flour basin, gently blending until a cohesive, slightly rough dough emerges, integrating all components seamlessly.
- Kneading Technique: Transfer the dough to a lightly dusted surface, working it vigorously for 8-10 minutes to develop a smooth, springy consistency that springs back when touched.
- First Fermentation: Nestle the dough in a lightly oiled vessel, drape with a moisture-laden cloth, and allow it to rest in a tranquil, warmth-embraced environment until it expands to double its original volume.
- Shaping Artistry: Tenderly deflate the risen dough, molding it into an elongated, elegant loaf on a baking sheet, then score diagonal slashes across the surface to facilitate steam escape and create a classic French bread aesthetic.
- Second Proofing: Grant the shaped loaf additional resting time, permitting it to become airy and voluminous while preheating the oven to a blazing temperature.
- Steam Baking: Position a shallow water pan on the oven’s lower rack to generate moisture, then slide the bread into the heated chamber, baking until it transforms into a golden, crusty masterpiece with a resonant hollow tone when tapped.
- Cooling Ritual: Extract the bread from the oven and transfer to a wire rack, allowing the crust to crisp and the interior to stabilize, completing the French bread’s transformative journey.
Notes
- Check Yeast Freshness: Ensure your yeast is active and not expired by observing a frothy, bubbly reaction during activation.
- Master Kneading Technique: Develop a smooth, elastic dough by applying consistent pressure and stretching motions during the 8-10 minute kneading process.
- Control Rising Environment: Place dough in a warm, draft-free spot like a turned-off oven with a pan of warm water to ensure optimal rising conditions.
- Steam Matters: Create authentic French bread crust by adding a shallow water pan in the oven, which helps develop a crispy, golden exterior and soft interior.
- Prep Time: 15 minutes
- Cook Time: 25 minutes
- Category: Breakfast, Lunch, Dinner, Snacks
- Method: Baking
- Cuisine: French
Nutrition
- Serving Size: 3
- Calories: 290
- Sugar: 2 g
- Sodium: 500 mg
- Fat: 3 g
- Saturated Fat: 0.5 g
- Unsaturated Fat: 2.5 g
- Trans Fat: 0 g
- Carbohydrates: 56 g
- Fiber: 2 g
- Protein: 9 g
- Cholesterol: 0 mg
Jenna Hartley
Founder & Recipe Creator
Expertise
Education
Box Hill Institute, Melbourne
William Angliss Institute, Melbourne
Jenna is the heart of Picture Perfect Meals, turning simple ingredients into beautiful, easy‑to‑make dishes.
Growing up around family meals in Melbourne, she trained at Box Hill Institute and then perfected her pastry skills at William Angliss Institute. She loves mixing classic Australian flavors with fresh ideas to keep cooking fun and stress‑free.