
Golden Crust Rustic Homemade White Bread Recipe: Country Charm!
Crafting a rustic homemade white bread recipe sparks joy in every baker’s heart.
Kneading soft, pillowy white bread dough creates a sensory experience that connects us to generations of home cooks.
The aroma of freshly baked bread fills the kitchen with warmth and comfort.
Each carefully measured ingredient whispers stories of tradition and love.
Bread making is an art that transforms simple pantry staples into golden, crusty perfection.
This simple yet elegant recipe will have you falling in love with bread making from the very first slice.
Quick Recipe Overview
Ingredients for Homemade White Bread
For Yeast Activation:For Dough Structure:For Finishing Touch:Baking Tools for Perfect Sandwich Bread
How to Make Fluffy White Bread at Home
Mix warm water, yeast, and sugar in a cozy bowl. Let the mixture dance and bubble for a few minutes until it looks frothy and alive.
Toss in softened butter and a pinch of salt. Slowly fold in flour, stirring until a soft, pillowy dough emerges. Work the mixture until it feels smooth and stretchy.
Transfer the dough to a floured surface. Massage and fold the dough, turning it into a silky, elastic bundle. Keep kneading until it feels perfect and springy.
Nestle the dough into a greased bowl, making sure it’s completely coated. Cover with a soft cloth and let it relax in a warm, peaceful spot. Watch it grow and double in size.
Gently deflate the risen dough and mold it into a beautiful loaf. Tuck it into a greased pan and let it rise again, reaching just above the pan’s edges.
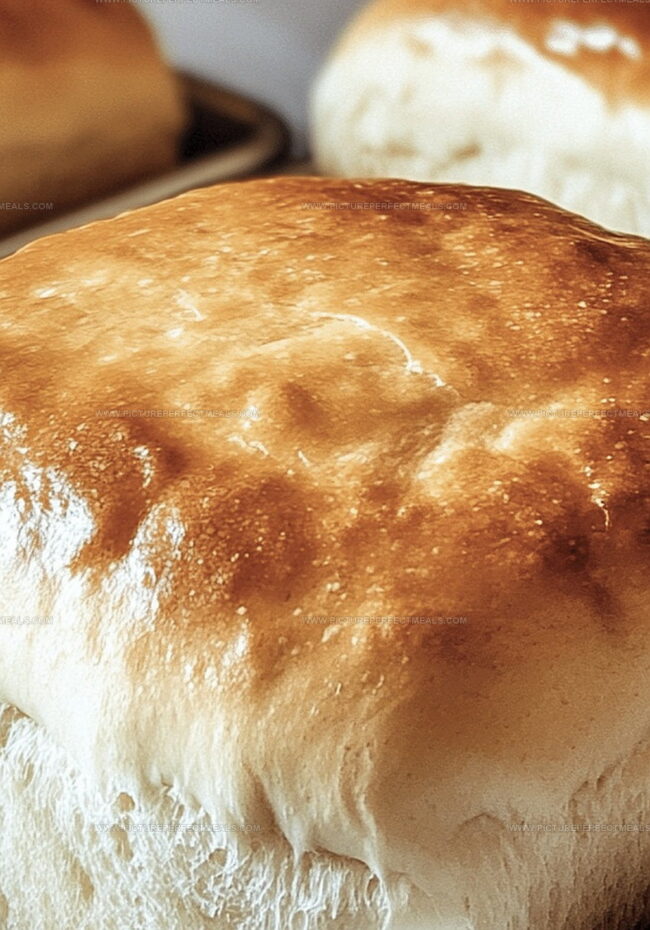
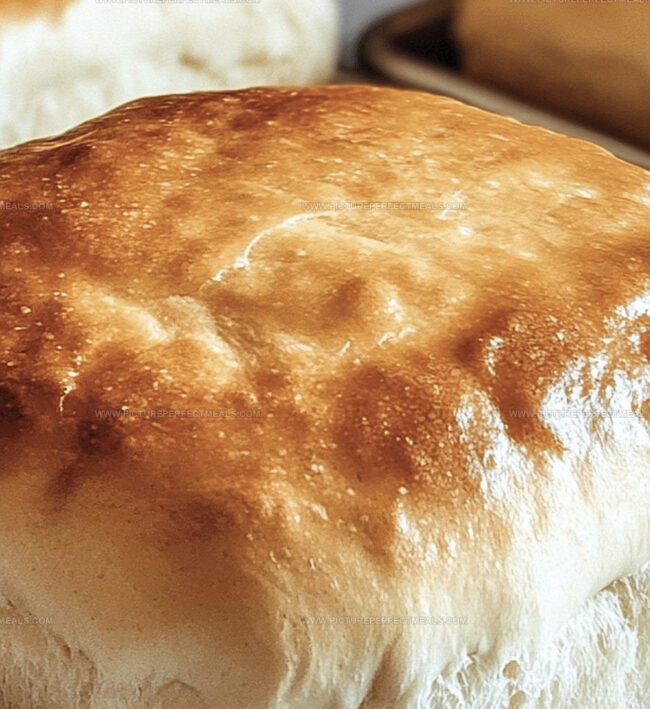
Heat the oven to a toasty 375F. Slide the pan inside and bake until the top turns a gorgeous golden brown. Tap the loaf – it should sound hollow and proud.
Rescue the bread from the pan and let it cool on a wire rack. Slice into this warm, fragrant treasure and savor your homemade masterpiece.
Tricks for Better Rise and Texture
White Bread: Slicing, Serving, and Storing
How to Keep Bread Soft Without a Box
Print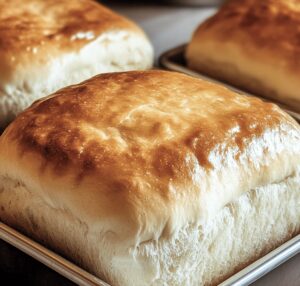
Rustic Homemade White Bread Recipe
- Total Time: 50 minutes
- Yield: 2 1x
Description
Freshly baked easy homemade white bread emerges as a comforting classic in home kitchens. Crisp golden crust and tender interior promise simple pleasure for bread enthusiasts who crave warm, aromatic slices.
Ingredients
- 3 cups (360 g / 12.7 oz) all-purpose flour
- 1 cup (240 ml / 8 fl oz) warm water
- 2 ¼ tsps (1 packet) active dry yeast
- 2 tbsps unsalted butter (softened)
- 2 tbsps granulated sugar
- 1 tsp salt
Instructions
- Yeast Activation: Blend warm water, yeast, and sugar in a large mixing bowl. Let the mixture rest 5-10 minutes until it becomes frothy and bubbling.
- Dough Formation: Integrate softened butter, salt, and flour into the yeast mixture. Knead thoroughly by hand or with a stand mixer until a smooth, elastic dough emerges with consistent texture.
- First Proofing: Place dough in a greased container, completely covering the surface. Shield with a damp cloth and allow to rise in a warm, undisturbed space for 1-1.5 hours until volume dramatically increases.
- Shaping and Second Rise: Punch down the expanded dough and carefully shape into a loaf. Transfer to a greased 9×5-inch pan, then cover for a secondary rise of 30-45 minutes, enabling the dough to slightly crest above the pan’s edges.
- Baking Preparation: Preheat oven to 375F (190C). Position the prepared loaf in the center rack, ensuring even heat distribution.
- Baking and Cooling: Bake for 25-30 minutes until the bread develops a rich golden-brown exterior and sounds hollow when tapped. Remove from pan and cool on a wire rack for at least 30 minutes before slicing to maintain structural integrity.
Notes
- Check Yeast Freshness: Verify yeast is active by ensuring foamy texture forms within 5-10 minutes; stale yeast prevents proper bread rising.
- Knead with Precision: Develop gluten structure through consistent kneading, creating smooth elastic dough that springs back when pressed; under-kneading results in dense bread.
- Temperature Matters: Use warm water (110-115°F) to activate yeast without killing it; cold water prevents activation, while hot water destroys yeast cells.
- Rise in Warm Spot: Place dough in draft-free, warm area around 80-85°F for optimal fermentation; kitchen counters near appliances or inside slightly warmed oven work perfectly.
- Prep Time: 20 minutes
- Cook Time: 30 minutes
- Category: Breakfast, Lunch, Dinner, Snacks
- Method: Baking
- Cuisine: American
Nutrition
- Serving Size: 2
- Calories: 410
- Sugar: 7 g
- Sodium: 290 mg
- Fat: 6 g
- Saturated Fat: 4 g
- Unsaturated Fat: 2 g
- Trans Fat: 0 g
- Carbohydrates: 74 g
- Fiber: 3 g
- Protein: 10 g
- Cholesterol: 15 mg
Jenna Hartley
Founder & Recipe Creator
Expertise
Education
Box Hill Institute, Melbourne
William Angliss Institute, Melbourne
Jenna is the heart of Picture Perfect Meals, turning simple ingredients into beautiful, easy‑to‑make dishes.
Growing up around family meals in Melbourne, she trained at Box Hill Institute and then perfected her pastry skills at William Angliss Institute. She loves mixing classic Australian flavors with fresh ideas to keep cooking fun and stress‑free.