Rustic Sweet Potato Pie Bars Recipe

Rustic Sweet Potato Pie Bars Recipe: Country-Style Treats

Comfort baking takes on a whole new dimension with these rustic sweet potato pie bars that blend homestyle warmth and delectable sweetness.

Southern kitchens have long celebrated this delightful dessert nestled between tradition and innovation.

Creamy sweet potatoes create a velvety base that promises rich, nostalgic flavors in every bite.

Layers of buttery crust and silky filling merge into a dessert that whispers of family gatherings and cozy afternoons.

Warm spices dance through the recipe, adding depth and complexity to each mouthwatering square.

The balance of textures and flavors transforms an ordinary treat into an extraordinary experience.

You’ll want to savor every crumb of this irresistible homemade delight.

Quick Recipe Overview

Prep Time: 20 minutes

Cook Time: 40 minutes

Total Time: 1 hour

Calories: 250 kcal

Servings: 12

What’s in the Sweet Potato Pie Bars

For Crust Ingredients:
  • All-Purpose Flour: Provides sturdy base for the pie bars, choose unbleached flour for best texture.
  • Powdered Sugar: Adds subtle sweetness and helps create delicate, crumbly crust.
  • Salt: Enhances overall flavor and balances sweetness in the crust.
  • Cold Butter: Creates flaky texture, use high-quality unsalted butter for rich flavor.
For Filling Ingredients:
  • Sweet Potatoes: Creamy base that delivers natural sweetness and vibrant orange color, select smooth, firm potatoes without blemishes.
  • Granulated Sugar: Intensifies sweetness and helps create smooth filling texture.
  • Brown Sugar: Adds deep caramel notes and moisture to the filling.
  • Eggs: Bind ingredients and provide structure, ensure they're fresh and at room temperature.
  • Evaporated Milk: Creates rich, silky consistency, adds depth to the filling.
  • Vanilla Extract: Brings warm, aromatic flavor, use pure vanilla for best results.
  • Cinnamon: Adds warmth and classic pie spice profile.
  • Nutmeg: Provides subtle, complex background flavor.
  • Ginger: Offers slight heat and brightness to the filling.
  • Salt: Balances and heightens other flavors in the filling.
For Optional Topping Ingredients:
  • Whipped Cream, Marshmallow Fluff, Crushed Pecans: Provide decorative and textural contrast, allowing personalization of the dessert.

Gear Guide for Sweet Potato Baking

  • Food processor or pastry cutter: Essential for creating a perfect, crumbly crust that's the foundation of these delicious bars.
  • 9×13-inch baking pan: Your key vessel for baking these sweet and creamy bars.
  • Parchment paper: Helps you easily lift and remove the bars without any mess.
  • Large mixing bowl: Perfect for whisking together the silky smooth sweet potato filling.
  • Whisk: Crucial for blending the filling ingredients into a velvety mixture.
  • Toothpick: Helps you check if the bars are perfectly baked.
  • Sharp knife: Needed for cleanly slicing the bars into neat squares.

How to Make Sweet Potato Pie Bars at Home

  • Warm Up the Oven

Crank your oven to a toasty 350F and get a baking pan ready by giving it a light grease and tucking in some parchment paper.

  • Create a Crumbly Base

Blend flour, powdered sugar, and salt in a food processor. Toss in cold butter and pulse until the mixture looks like sandy crumbs. Press this mixture firmly into the pan and bake until it turns a gentle golden color.

  • Whip Up the Sweet Potato Magic

In a big mixing bowl, combine sweet potatoes with sugars, eggs, milk, and spices. Stir everything until the mixture becomes silky smooth and blended.

  • Layer and Bake

Pour the vibrant sweet potato mixture over the pre-baked crust, spreading it evenly across the surface. Slide the pan back into the oven and bake until the filling sets and a toothpick comes out clean.

  • Cool and Slice

Let the bars cool completely, then chill in the refrigerator. Once firm, lift out the bars using the parchment paper and slice into delightful squares. Top with a dollop of whipped cream or sprinkle of crushed nuts for extra pizzazz.

Makeover Ideas for Pie Bars

  • Baking Brilliance: Swap cold butter for room temperature butter for easier mixing and a more tender crust.
  • Make-Ahead Magic: Prepare the bars up to 3 days in advance and store in an airtight container in the refrigerator for convenient entertaining.
  • Gluten-Free Option: Replace all-purpose flour with a gluten-free flour blend to make the recipe suitable for those with gluten sensitivities.
  • Spice It Up: Experiment with additional warm spices like cardamom or allspice to create a unique flavor profile that elevates the traditional sweet potato pie taste.
  • Dairy-Free Adaptation: Use coconut milk instead of evaporated milk and coconut oil in place of butter to create a delicious dairy-free version that's just as creamy and rich.

Serve Pie Bars Like You Mean It

  • Cozy Dessert Companions: Serve these sweet potato pie bars with a warm beverage like spiced chai latte or hot apple cider for a comforting autumn experience.
  • Holiday Presentation Magic: Dust the bars with powdered sugar, add a dollop of cinnamon-spiced whipped cream, and garnish with toasted pecans for an elegant holiday dessert that looks professionally prepared.
  • Perfect Brunch Sidekick: Pair these bars with a light yogurt parfait or fresh fruit salad to balance the richness and create a delightful morning or afternoon treat that feels both indulgent and refreshing.
  • Seasonal Entertaining Twist: Arrange the bars on a beautiful wooden board with seasonal decorations like small pumpkins or autumn leaves, creating a stunning dessert centerpiece that captures the warmth of the season.

Storage Tips for Sweet Potato Bars

  • Smart Slicing Strategy: Cut bars into uniform squares using a sharp, clean knife for professional-looking presentation. Wipe blade between cuts to ensure crisp, neat edges without crumbling.
  • Chilling Technique: Refrigerate bars for minimum 2 hours to enhance flavor development and create firm, clean-cutting texture. Cold temperature helps stabilize filling and intensifies sweet potato's rich taste.
  • Freezer-Friendly Approach: Wrap individual bars separately in plastic wrap, then store in airtight container for up to 3 months. Thaw overnight in refrigerator before serving to maintain original texture and taste.
  • Freshness Protection: Store completed bars in sealed container within refrigerator for 5-7 days. Place parchment paper between layers to prevent sticking and maintain structural integrity of each delicious square.
Print
clock clock iconcutlery cutlery iconflag flag iconfolder folder iconinstagram instagram iconpinterest pinterest iconfacebook facebook iconprint print iconsquares squares iconheart heart iconheart solid heart solid icon
Rustic Sweet Potato Pie Bars Recipe

Rustic Sweet Potato Pie Bars


5 Stars 4 Stars 3 Stars 2 Stars 1 Star

4.9 from 23 reviews

  • Total Time: 1 hour
  • Yield: 13 1x

Description

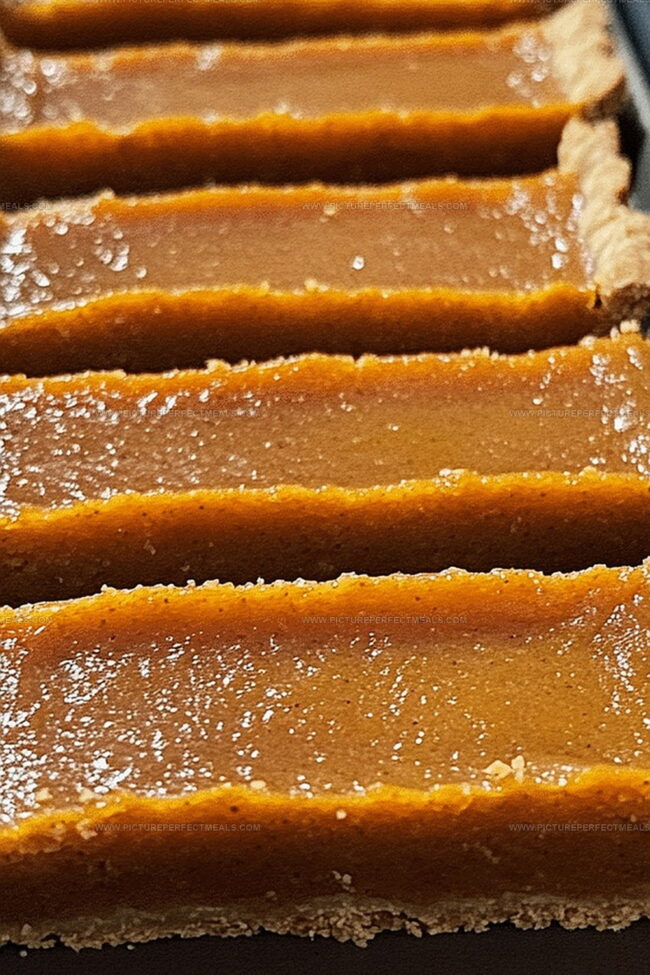
Creamy sweet potato pie bars blend Southern comfort with irresistible dessert magic. Nutty graham cracker crust and silky spiced filling promise a delightful escape into seasonal indulgence you’ll savor with pure happiness.


Ingredients

Scale
  • 2 cups mashed sweet potatoes
  • 1 ¾ cups all-purpose flour
  • ¾ cup (1 ½ sticks/340 g) unsalted butter, cold and cubed
  • 2 large eggs
  • ¾ cup granulated sugar
  • ½ cup powdered sugar
  • ¼ cup light brown sugar, packed
  • ½ cup evaporated milk (or heavy cream)
  • 1 tsp vanilla extract
  • ½ tsp ground cinnamon
  • ¼ tsp ground nutmeg
  • ¼ tsp ground ginger (optional)
  • ½ tsp salt
  • Pinch of salt
  • Whipped cream (optional)
  • Marshmallow fluff (optional)
  • Crushed pecans (optional)
  • Cinnamon sugar (optional)

Instructions

  1. Crust Preparation: Pulse flour, powdered sugar, and salt in a food processor. Add cold butter and blend until crumbly. Press mixture evenly into parchment-lined 9×13-inch baking pan.
  2. Initial Baking: Roast crust in preheated 350F (175C) oven for 15 minutes until pale golden. Remove and let rest momentarily.
  3. Filling Creation: Whisk mashed sweet potatoes with granulated sugar, brown sugar, eggs, evaporated milk, vanilla extract, cinnamon, nutmeg, ginger, and salt until silky and uniform.
  4. Assembly and Baking: Spread sweet potato mixture smoothly over pre-baked crust. Return to oven and bake 35-40 minutes until filling sets completely and toothpick emerges clean.
  5. Cooling and Setting: Allow bars to cool entirely at room temperature, then refrigerate for minimum two hours to firm texture.
  6. Serving Presentation: Extract entire dessert using parchment paper edges. Slice into precise squares. Optionally garnish with whipped cream, marshmallow fluff, or crushed pecans for enhanced visual appeal and flavor complexity.

Notes

  • Optimize Butter Temperature: Keep butter extremely cold when preparing the crust to achieve a flakier, more crumbly texture that ensures perfect layering and prevents greasy results.
  • Prevent Filling Cracking: Avoid overbaking by removing the pie bars when the center still appears slightly jiggly, as it will continue setting during cooling, maintaining a smooth and creamy consistency.
  • Sweet Potato Selection Matters: Use fresh, orange-fleshed sweet potatoes with high moisture content for richest flavor and smoothest filling, preferably roasting and mashing them yourself instead of using canned puree.
  • Dietary Adaptation Strategies: Swap traditional ingredients for gluten-free flour blend, replace butter with coconut oil, and use dairy-free milk alternatives to create inclusive versions suitable for various dietary needs without compromising taste quality.
  • Prep Time: 20 minutes
  • Cook Time: 40 minutes
  • Category: Desserts, Snacks
  • Method: Baking
  • Cuisine: American

Nutrition

  • Serving Size: 13
  • Calories: 287
  • Sugar: 21 g
  • Sodium: 170 mg
  • Fat: 13 g
  • Saturated Fat: 8 g
  • Unsaturated Fat: 5 g
  • Trans Fat: 0 g
  • Carbohydrates: 39 g
  • Fiber: 2 g
  • Protein: 3 g
  • Cholesterol: 58 mg
Jenna Hartley

Jenna Hartley

Founder & Recipe Creator

Expertise

  • Recipe development with a focus on single-dish meals.
  • Fusion of traditional and modern Australian cuisines.
  • Food styling and photography for digital platforms.​

Education

Box Hill Institute, Melbourne

  • Degree: Advanced Diploma of Hospitality Management
  • Focus: Specialized in practical food and beverage service, responsible alcohol and hygiene compliance, legal risk management, and hands‑on experience in a simulated restaurant environment.

William Angliss Institute, Melbourne

  • Program: Certificate IV in Patisserie
  • Focus: Specialized in pastry and bakery techniques, cookery and specialty food preparation, recipe planning and costing, commercial kitchen operations, sustainable and inclusive work practices, food safety and hygiene compliance, and workplace health and safety.

Jenna is the heart of Picture Perfect Meals, turning simple ingredients into beautiful, easy‑to‑make dishes. 

Growing up around family meals in Melbourne, she trained at Box Hill Institute and then perfected her pastry skills at William Angliss Institute. She loves mixing classic Australian flavors with fresh ideas to keep cooking fun and stress‑free.

Leave a Reply

Your email address will not be published. Required fields are marked *

Recipe rating 5 Stars 4 Stars 3 Stars 2 Stars 1 Star