Dreamy Silky Chocolate Mousse Cake Recipe for Sweet Smiles
Decadent chocolate mousse cake promises pure indulgence for dessert enthusiasts seeking a luxurious treat.
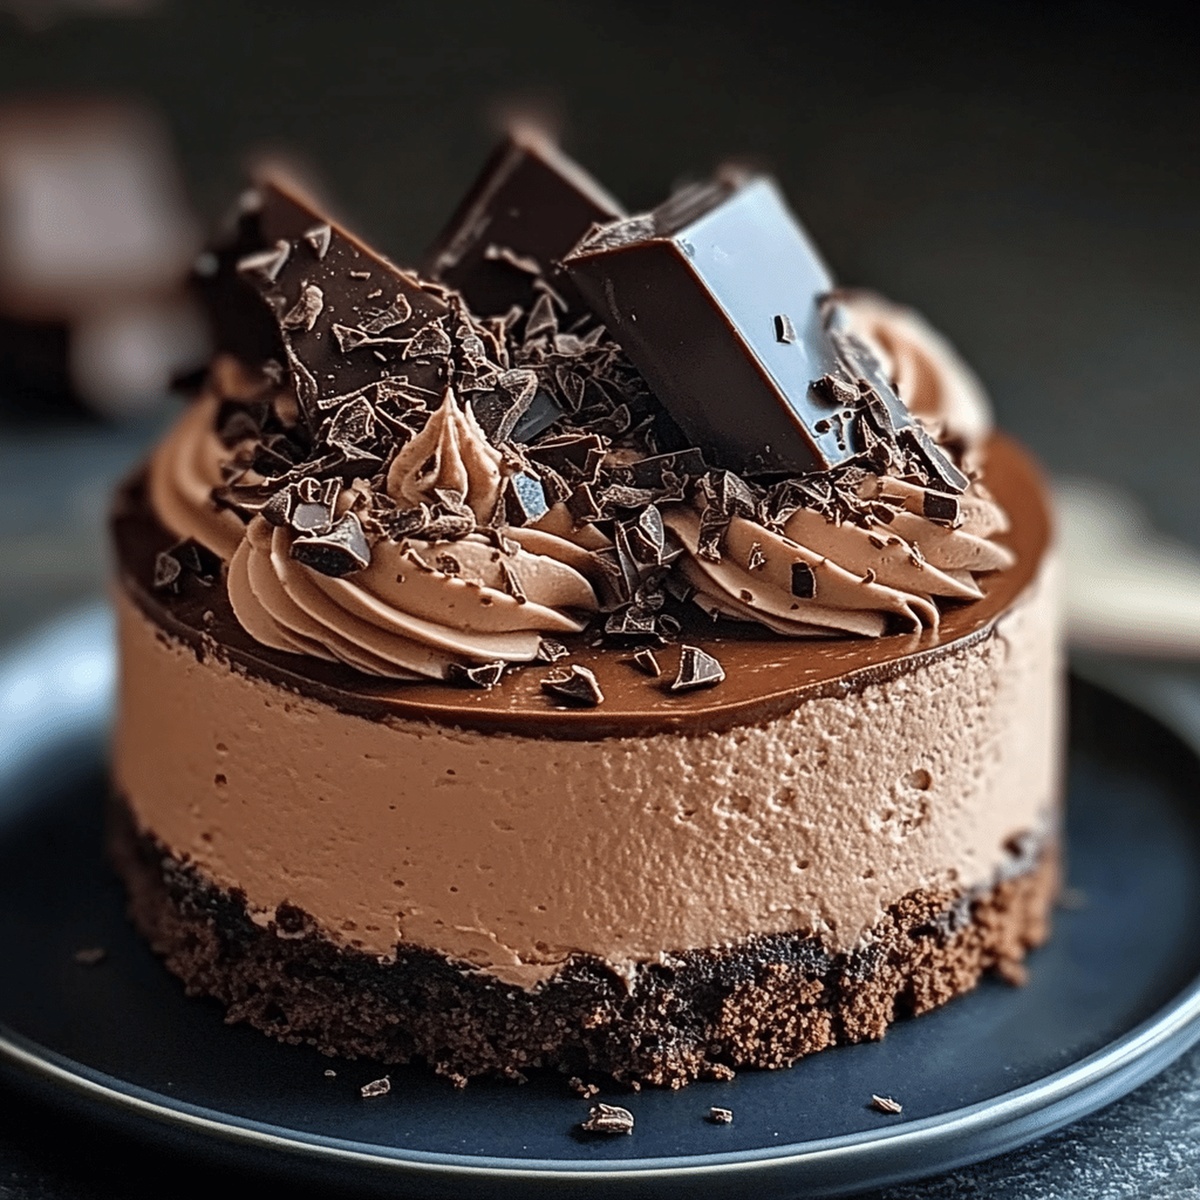
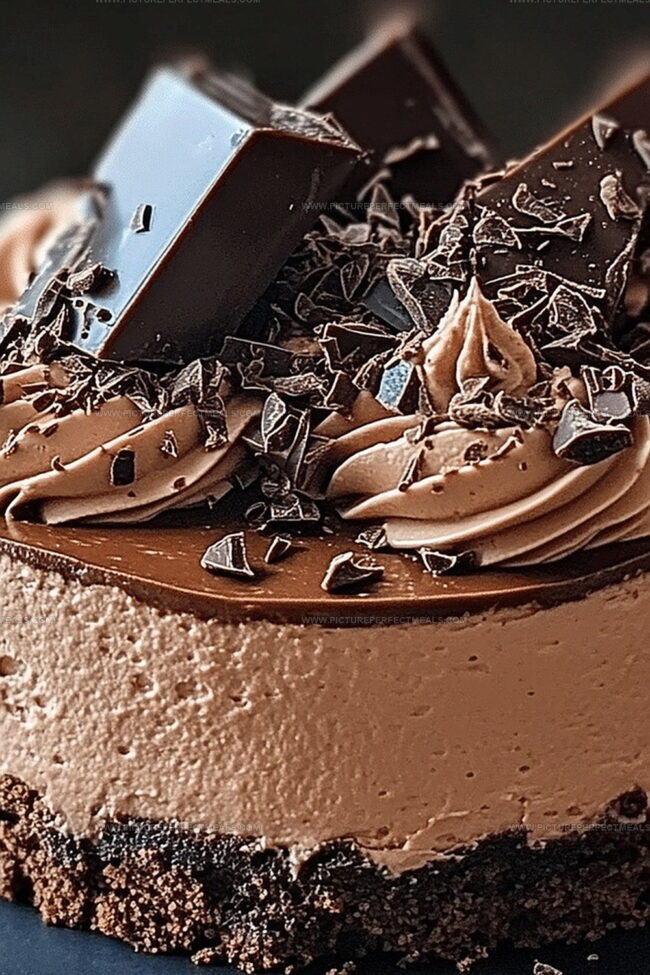
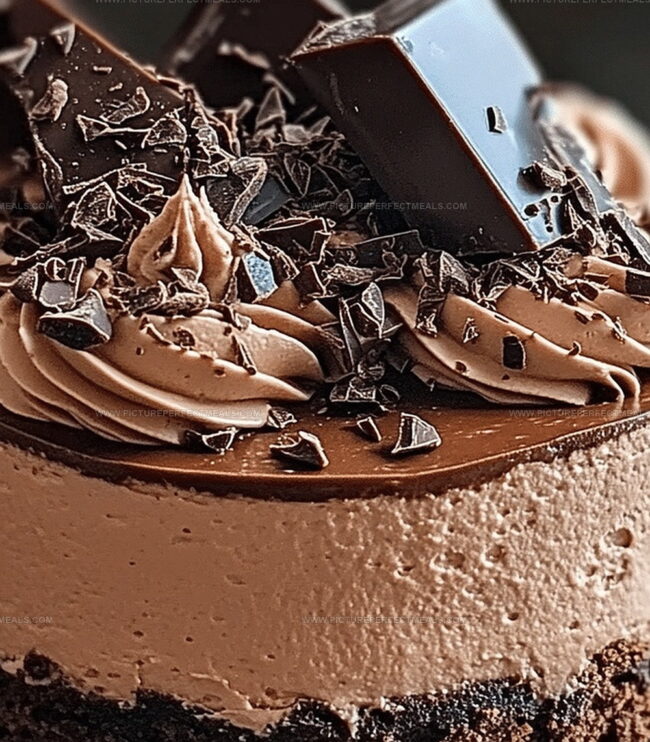
Layers of rich, velvety chocolate create a symphony of flavors that dance across your palate.
This classic French-inspired dessert blends smooth ganache with airy mousse in perfect harmony.
Each delicate slice reveals a stunning combination of textures that melts effortlessly.
Dark chocolate provides deep, intense notes complemented by a light, creamy consistency.
The recipe transforms simple ingredients into an elegant masterpiece that looks far more complicated than its actual preparation.
Chocolate lovers will fall head over heels for this irresistible dessert that guarantees to impress at any gathering.
Quick Recipe Overview
Chocolate Mousse Cake Ingredient Breakdown
For Cake Base:For Sweeteners and Moisture:For Binding and Flavor:Tools for Smooth Mousse and Rich Cake Layers
How to Make Chocolate Mousse Cake From Start to Finish
Warm up the oven to a toasty 350F. Grab your springform pan and give it a light coating of grease, then line the bottom with parchment paper for easy cake removal.
Blend cocoa powder, flour, baking soda, and a pinch of salt in a mixing bowl until perfectly combined and looking like a chocolatey powder mix.
Cream together butter and sugars in a separate bowl, mixing until the texture becomes light and fluffy like a delicious cloud. This should take about two minutes of energetic beating.
Gently fold in eggs one by one, then splash in some vanilla extract to boost the flavor profile. Mix until everything looks smooth and consistent.
Slowly incorporate dry ingredients and buttermilk, alternating between the two. Pour in hot coffee to create a silky, rich batter that looks super glossy and tempting.
Transfer the batter into your prepared pan and slide it into the preheated oven. Bake for 20-25 minutes until a toothpick comes out clean. Let the cake cool completely before moving forward with any additional steps.
Variations to Make This Dessert Even More Luxurious
Serve Sliced With a Raspberry or Chocolate Sauce
Store Carefully to Keep It Fluffy and Rich
Print
Silky Chocolate Mousse Cake Recipe
- Total Time: 1 hour
- Yield: 9 1x
Description
Sinful chocolate mousse cake delights chocolate enthusiasts with layers of rich, creamy indulgence. French pastry techniques combine elegant chocolate ganache and silky mousse for an exquisite dessert you’ll savor with pure pleasure.
Ingredients
- ¾ cup (150 g) granulated sugar
- ½ cup (100 g) brown sugar
- 1 cup (125 g) all-purpose flour
- ½ cup (50 g) unsweetened cocoa powder
- ½ cup (115 g) unsalted butter, softened
- 2 large eggs
- ½ cup (120 ml) buttermilk
- ½ cup (120 ml) hot coffee or hot water
- 1 tsp baking soda
- ½ tsp salt
- 1 tsp vanilla extract
- 1 ½ cups (360 ml) heavy whipping cream
- 1 ½ cups (255 g) semi-sweet or dark chocolate chips
- 2 tbsps unsalted butter
- ½ tsp vanilla extract
- ½ cup (120 ml) heavy cream
- ½ cup (85 g) semi-sweet or dark chocolate chips
- 1 tbsp butter (for shine)
Instructions
- Preparing Vessel: Preheat oven to 350F (175C). Meticulously butter a 9-inch springform pan and line with parchment paper, covering bottom and sides completely.
- Dry Ingredient Assembly: Whisk cocoa powder, flour, baking soda, and salt in a medium bowl until uniformly blended and free of lumps.
- Creaming Process: Using an electric mixer, blend butter with granulated and brown sugars until the mixture becomes light, voluminous, and exceptionally fluffy, approximately 2 minutes.
- Wet Ingredient Integration: Add eggs one at a time, ensuring complete incorporation after each addition. Fold in vanilla extract, creating a smooth, consistent mixture.
- Batter Composition: Alternate adding dry ingredient blend and buttermilk to the wet mixture. Pour in hot coffee, stirring continuously to generate a silky, homogeneous batter.
- Baking Procedure: Pour batter into prepared pan, spreading evenly. Bake for 20-25 minutes until center sets and cake springs back when lightly touched.
- Cooling Stage: Remove cake from oven and allow to cool completely within the pan, enabling structural stabilization and preventing potential collapse.
Notes
- Choose Quality Chocolate: Select high-quality dark or semi-sweet chocolate for rich, intense flavor that elevates the entire dessert’s taste profile.
- Control Moisture Carefully: Avoid overmixing batter to prevent dense texture; gentle folding maintains cake’s light, airy consistency and prevents potential toughness.
- Monitor Baking Precisely: Check cake doneness at 20-minute mark by inserting toothpick – it should come out with minimal crumbs to ensure perfect moisture without underbaking.
- Adapt for Dietary Needs: Substitute buttermilk with dairy-free alternatives like almond milk or coconut milk for lactose-intolerant guests, maintaining similar moisture and texture characteristics.
- Prep Time: 30 minutes
- Cook Time: 30 minutes
- Category: Desserts
- Method: Baking
- Cuisine: French
Nutrition
- Serving Size: 9
- Calories: 405
- Sugar: 32 g
- Sodium: 180 mg
- Fat: 28 g
- Saturated Fat: 17 g
- Unsaturated Fat: 9 g
- Trans Fat: 0 g
- Carbohydrates: 38 g
- Fiber: 2 g
- Protein: 5 g
- Cholesterol: 70 mg
Jenna Hartley
Founder & Recipe Creator
Expertise
Education
Box Hill Institute, Melbourne
William Angliss Institute, Melbourne
Jenna is the heart of Picture Perfect Meals, turning simple ingredients into beautiful, easy‑to‑make dishes.
Growing up around family meals in Melbourne, she trained at Box Hill Institute and then perfected her pastry skills at William Angliss Institute. She loves mixing classic Australian flavors with fresh ideas to keep cooking fun and stress‑free.