Silky Chocolate No-Bake Cheesecake Bars Recipe

Dreamy Silky Chocolate No-Bake Cheesecake Bars Recipe

Decadent chocolate no-bake cheesecake bars promise pure indulgence with minimal effort.

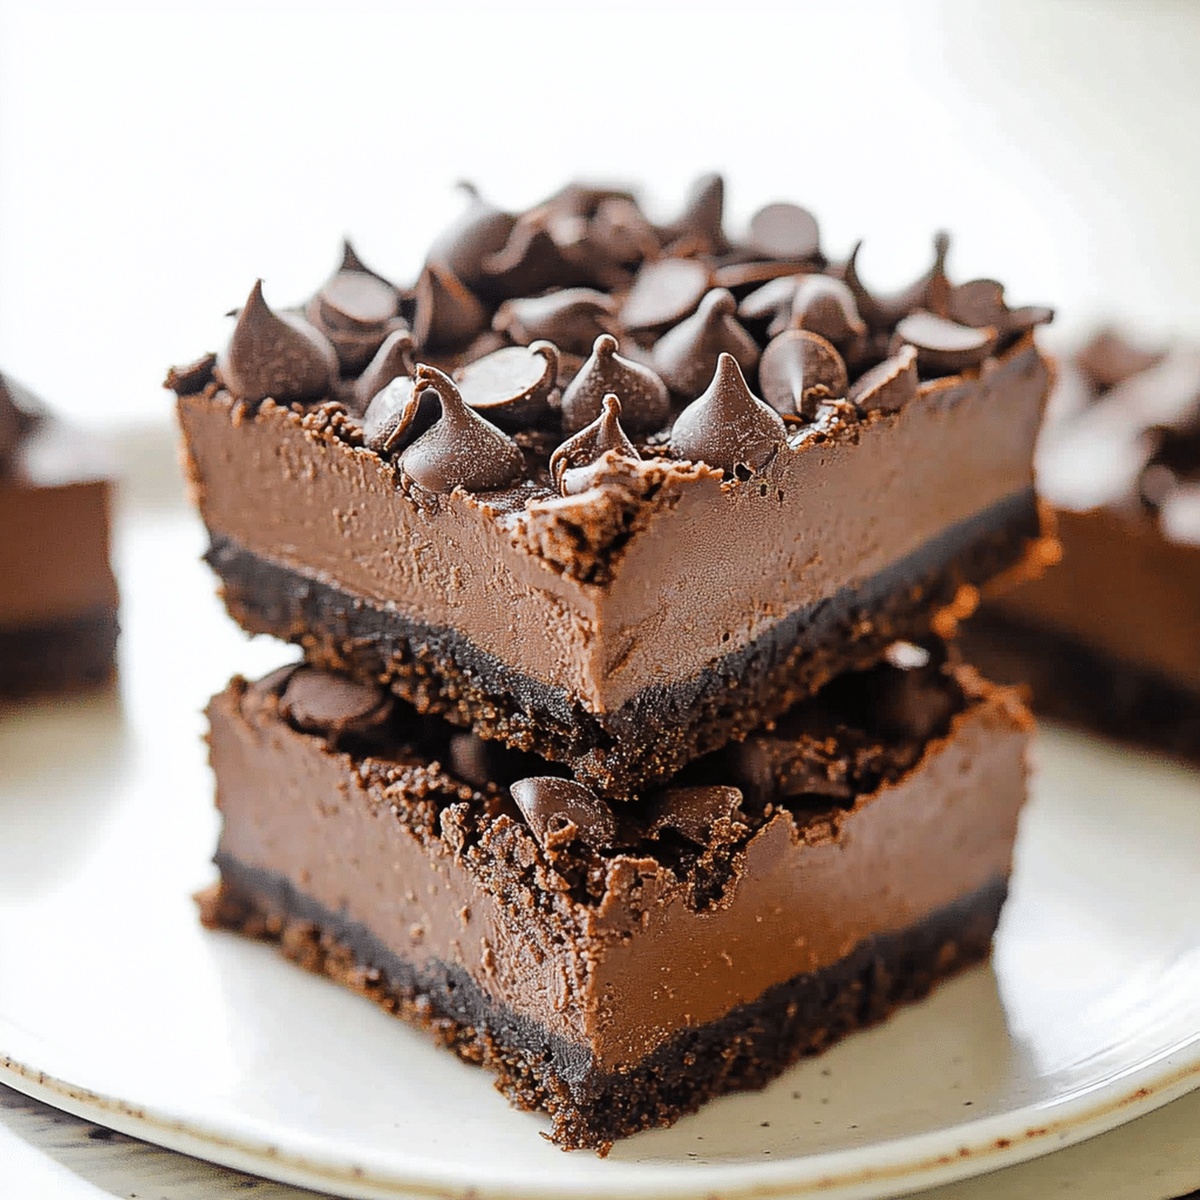
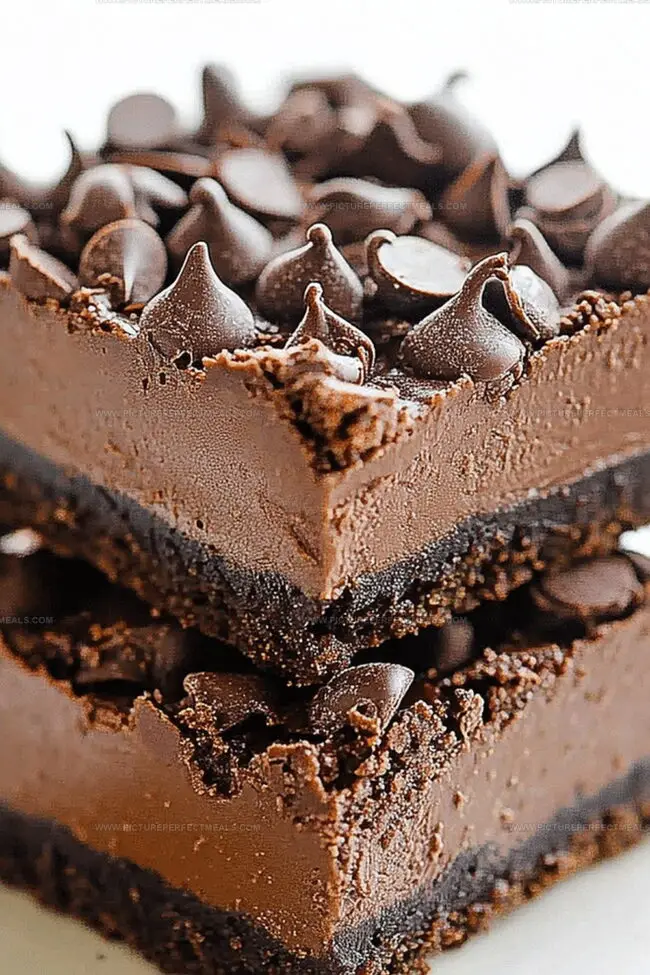
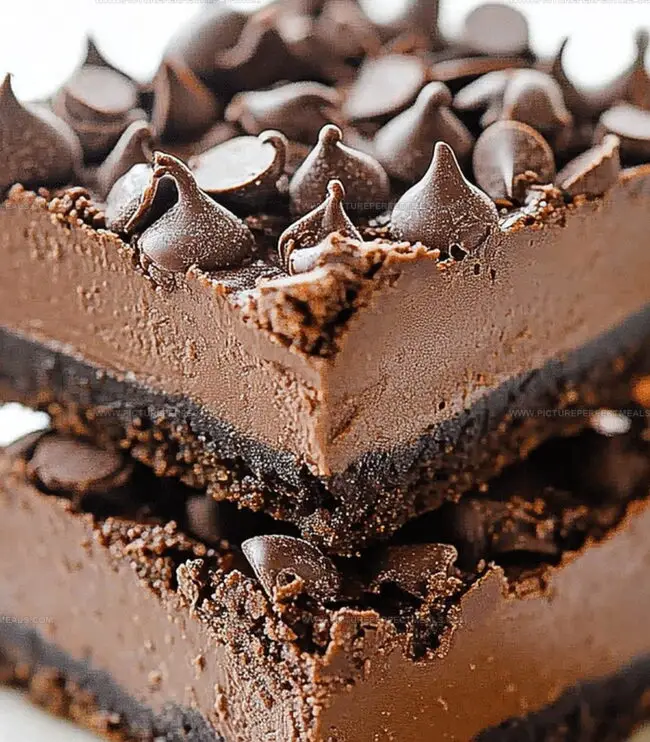
Creamy layers of rich chocolate nestled in a buttery graham cracker crust create an irresistible dessert.

This simple recipe blends smooth cream cheese and velvety chocolate in a delightful treat that melts in your mouth.

No oven required means less hassle and more enjoyment for busy home bakers.

Each bite delivers a luxurious combination of deep chocolate flavor and silky texture.

Chilled to perfection, these bars offer a refreshing and elegant dessert option for any occasion.

Prepare to savor every single delectable moment of this heavenly chocolate delight.

Quick Recipe Overview

Quick Recipe Overview

Prep Time: 20 minutes

Cook Time: 4 hours

Total Time: 4 hours 20 minutes

Calories: 300 kcal

Servings: 12

What You’ll Use for Chocolate No-Bake Cheesecake Bars

For Crust:
  • Graham Crackers: Provides a buttery, crisp foundation that complements the creamy filling and adds delightful texture.
  • Unsalted Butter: Binds the crumbs together, creating a sturdy and flavorful base that holds the cheesecake layers.
For Filling:
  • Cream Cheese: Creates the rich, velvety base with a tangy smoothness that defines classic cheesecake.
  • Powdered Sugar: Sweetens the filling while ensuring a silky, lump-free texture.
  • Cocoa Powder: Delivers deep chocolate intensity and transforms the traditional cheesecake into a decadent chocolate version.
  • Vanilla Extract: Enhances overall flavor complexity with its warm, aromatic notes.
  • Heavy Whipping Cream: Adds lightness and creates a fluffy, mousse-like consistency to the filling.
For Ganache and Garnish:
  • Dark Chocolate Chips: Provides rich, intense chocolate flavor for the smooth ganache topping.
  • Heavy Cream: Helps create a glossy, pourable ganache that sets beautifully on the cheesecake.
  • Whipped Cream: Optional garnish that adds extra indulgence and visual appeal.
  • Fresh Berries: Optional topping that brings a bright, fresh contrast to the rich chocolate dessert.

Kitchen Must-Haves for Chocolate No-Bake Cheesecake Bars

  • 8×8-inch baking pan: Essential for creating the perfect bar size and shape.
  • Parchment paper: Crucial for easy removal and clean cutting of bars.
  • Mixing bowls: Large and medium sizes needed for preparing crust and filling.
  • Spatula: Perfect for smoothing out layers and spreading mixtures evenly.
  • Electric mixer or whisk: Necessary for beating cream cheese and whipping cream to smooth consistency.
  • Measuring cups and spoons: Important for accurate ingredient quantities.
  • Small saucepan or microwave: Used for heating cream for ganache.
  • Sharp knife: Required for cutting bars into clean, precise squares.

Let’s Build These No-Bake Cheesecake Bars

Let’s Build These No-Bake Cheesecake Bars
  • Prep the Base

Create a cozy foundation by pressing cookie crumbs mixed with melted butter into your baking pan. Smooth the surface and pop it in the fridge to chill while you craft the creamy layer.

  • Whip Up the Chocolate Dream

Blend cream cheese with cocoa and sugar until velvety smooth. Gently fold in whipped cream, creating a luxurious, airy mixture that’ll make taste buds dance.

  • Layer Your Delight

Spread the chocolate cheesecake filling over the cool crust, creating a silky canvas of deliciousness.

  • Drench in Chocolate Magic (Optional)

Warm cream and pour over chocolate chips. Watch them melt into a glossy ganache, then cascade it over your cheesecake layer for extra indulgence.

  • Chill and Transform

Tuck your creation into the refrigerator for several hours. Let the magic happen as it firms into a decadent dessert.

  • Slice and Celebrate

Lift the bars from the pan using parchment paper. Slice into tempting squares and adorn with a sprinkle of chocolate shavings or a dollop of cream if you’re feeling fancy.

Tips & Tricks for No-Bake Cheesecake Bars

  • Crust Crusher Tip: Use a flat-bottomed glass or measuring cup to press the cookie crumb mixture firmly and evenly into the pan, creating a compact and stable base that won't crumble when slicing.
  • Dairy-Free Delight: Swap regular cream cheese with coconut cream cheese and use dairy-free whipped cream alternative to make this recipe friendly for lactose-intolerant dessert lovers.
  • Chocolate Lover's Upgrade: Experiment with different chocolate types like dark, milk, or white chocolate in the ganache to create unique flavor profiles that match your taste preferences.
  • Make-Ahead Magic: These cheesecake bars can be prepared up to 3 days in advance and stored covered in the refrigerator, making them perfect for stress-free party planning or unexpected sweet cravings.
  • Gluten-Free Transformation: Replace traditional cookie crumbs with gluten-free graham crackers or almond flour-based cookies to make this dessert suitable for those with gluten sensitivities.

Serving Up Chocolate Cheesecake Bars

  • Decadent Dessert Companions: Fresh raspberries or strawberries add a bright, tangy contrast to the rich chocolate cheesecake, creating a flavor explosion on your plate.
  • Chocolate Lover's Dream: Sprinkle extra cocoa powder or chocolate shavings on top for an intense chocolate experience that will make chocolate enthusiasts swoon with delight.
  • Elegant Plating Trick: Serve chilled bars on a white rectangular plate with a light dusting of powdered sugar and a small mint leaf for a sophisticated, restaurant-style presentation that impresses guests instantly.
  • Texture Harmony Boost: Accompany these bars with a scoop of vanilla bean ice cream or a dollop of whipped cream to introduce a creamy, cool element that complements the dense cheesecake texture perfectly.

Store and Chill Those Cheesecake Bars

  • Cool Down Strategy: Refrigerate bars in an airtight container for maximum freshness, keeping them sealed to prevent absorbing other refrigerator odors.
  • Storage Timeframe: These delightful bars remain delicious for 5-7 days when kept chilled, maintaining their creamy texture and rich chocolate flavor.
  • Freezing Technique: Wrap individual bars tightly in plastic wrap, then place inside a freezer-safe container. Frozen bars stay perfect for up to 3 months, allowing quick dessert access anytime.
  • Serving Temperature Tip: Remove bars from refrigerator 10-15 minutes before enjoying, letting them slightly soften for the most luxurious, melt-in-your-mouth experience.
Print
clock clock iconcutlery cutlery iconflag flag iconfolder folder iconinstagram instagram iconpinterest pinterest iconfacebook facebook iconprint print iconsquares squares iconheart heart iconheart solid heart solid icon
Silky Chocolate No-Bake Cheesecake Bars Recipe

Silky Chocolate No-Bake Cheesecake Bars Recipe


5 Stars 4 Stars 3 Stars 2 Stars 1 Star

4.8 from 39 reviews

  • Total Time: 4 hours 20 minutes
  • Yield: 13 1x

Description

Rich chocolate no-bake cheesecake bars offer a creamy, indulgent dessert without oven time. Chocolate lovers will savor these smooth, chilled treats perfect for quick summer entertaining.


Ingredients

Scale
  • 8 oz (226 g) cream cheese, softened
  • 1 ½ cups (180 g) chocolate cookie crumbs (Oreo crumbs)
  • ½ cup (85 g) semi-sweet chocolate chips
  • 1 cup (240 ml) heavy whipping cream
  • ¼ cup (60 ml) heavy cream
  • ½ cup (60 g) powdered sugar
  • ¼ cup (25 g) unsweetened cocoa powder
  • ¼ cup (60 ml) unsalted butter, melted
  • 1 tsp vanilla extract
  • Whipped cream
  • Shaved chocolate
  • Fresh berries

Instructions

  1. Preparation: Line an 8-inch pan with parchment paper, allowing overhang for easy removal.
  2. Crust Formation: Blend cookie crumbs with melted butter, pressing firmly and evenly across the pan’s base to create a compact foundation; refrigerate while preparing filling.
  3. Filling Creation: Whip cream cheese until smooth, integrating powdered sugar, cocoa powder, and vanilla extract; gently fold in whipped cream to maintain a light, airy texture.
  4. Layering: Spread the chocolate cream cheese mixture evenly over the chilled crust, smoothing the surface with a spatula.
  5. Ganache Finish: Heat cream until steaming, pour over chocolate chips, stir until glossy, then drizzle uniformly across the cheesecake layer.
  6. Chilling and Setting: Refrigerate for at least four hours until completely firm and set.
  7. Serving Presentation: Use parchment paper edges to lift the dessert, slice into precise bars, and optionally garnish with whipped cream, chocolate shavings, or fresh berries for an elegant touch.

Notes

  • Crust Consistency Check: Press cookie crumbs firmly and evenly to prevent crumbly or uneven base that might compromise structural integrity.
  • Temperature Matters: Ensure cream cheese is at room temperature for smooth, lump-free mixing and optimal texture development.
  • Whipping Wisdom: Fold whipped cream gently to maintain airiness and prevent deflating the delicate chocolate cheesecake mixture.
  • Chilling Crucial: Allow minimum four hours refrigeration for complete setting and optimal flavor melding, preferably overnight for enhanced taste profile.
  • Prep Time: 20 minutes
  • Cook Time: 4 hours
  • Category: Desserts, Snacks
  • Method: None
  • Cuisine: American

Nutrition

  • Serving Size: 13
  • Calories: 280
  • Sugar: 18 g
  • Sodium: 150 mg
  • Fat: 20 g
  • Saturated Fat: 11 g
  • Unsaturated Fat: 9 g
  • Trans Fat: 0 g
  • Carbohydrates: 26 g
  • Fiber: 1 g
  • Protein: 3 g
  • Cholesterol: 50 mg
Jenna Hartley

Jenna Hartley

Founder & Recipe Creator

Expertise

  • Recipe development with a focus on single-dish meals.
  • Fusion of traditional and modern Australian cuisines.
  • Food styling and photography for digital platforms.​

Education

Box Hill Institute, Melbourne

  • Degree: Advanced Diploma of Hospitality Management
  • Focus: Specialized in practical food and beverage service, responsible alcohol and hygiene compliance, legal risk management, and hands‑on experience in a simulated restaurant environment.

William Angliss Institute, Melbourne

  • Program: Certificate IV in Patisserie
  • Focus: Specialized in pastry and bakery techniques, cookery and specialty food preparation, recipe planning and costing, commercial kitchen operations, sustainable and inclusive work practices, food safety and hygiene compliance, and workplace health and safety.

Jenna is the heart of Picture Perfect Meals, turning simple ingredients into beautiful, easy‑to‑make dishes. 

Growing up around family meals in Melbourne, she trained at Box Hill Institute and then perfected her pastry skills at William Angliss Institute. She loves mixing classic Australian flavors with fresh ideas to keep cooking fun and stress‑free.

Leave a Reply

Your email address will not be published. Required fields are marked *

Recipe rating 5 Stars 4 Stars 3 Stars 2 Stars 1 Star