
Dreamy Silky Vegan Peanut Butter Mousse Recipe for Sweet Treats
Creamy and decadent vegan peanut butter mousse has become a game-changing dessert for plant-based enthusiasts.
This luscious treat delivers pure indulgence without dairy ingredients.
Smooth cashews blend effortlessly with rich peanut butter to create a luxurious texture.
Every spoonful promises intense nutty flavor and velvety consistency.
The recipe requires minimal ingredients and zero complicated techniques.
Whip up this dreamy dessert in mere minutes for an irresistible sweet experience that will delight your taste buds and impress even the most skeptical dessert lovers.
Quick Recipe Overview
Vegan Peanut Butter Mousse Ingredient Must-Haves
For Creamy Base:For Flavor and Sweetness:For Stabilizing and Enhancing:Kitchen Tools to Make Creamy Mousse with Ease
Instructions for Dreamy Vegan PB Mousse
Pour the coconut milk into the refrigerator and let it sit overnight. The cold temperature will help separate the creamy top layer from the liquid underneath.
Carefully open the chilled can and gently scoop out the thick, white cream that has risen to the top. This luxurious layer is what gives our mousse its dreamy texture.
Grab your hand mixer or whisk and transform the coconut cream into a light, airy cloud. Beat vigorously until the cream becomes smooth and fluffy, creating a perfect base for our mousse.
Add rich, creamy peanut butter to the whipped coconut base. Mix thoroughly until the ingredients combine into a silky, decadent mixture that will make your taste buds dance.
Incorporate your favorite sweetener, stirring gently to maintain the mousse’s delicate texture. Taste and adjust sweetness to your preference, ensuring a perfectly balanced dessert.
Transfer the mousse into elegant serving dishes and refrigerate for at least an hour. This cooling time allows the flavors to meld and the texture to set, creating a refreshing treat that’s both indulgent and light.
Dairy-Free Variations You’ll Love
Serving Tips for Sweet Peanut Butter
Mousse Storage Tips That Actually Work
Print
Silky Vegan Peanut Butter Mousse Recipe
- Total Time: 35 minutes
- Yield: 5 1x
Description
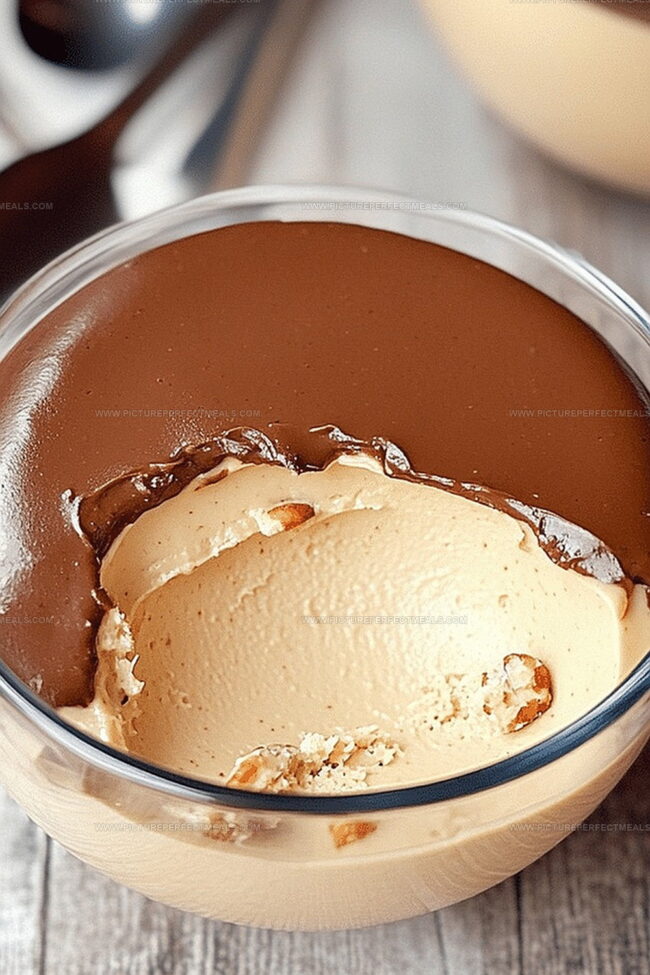
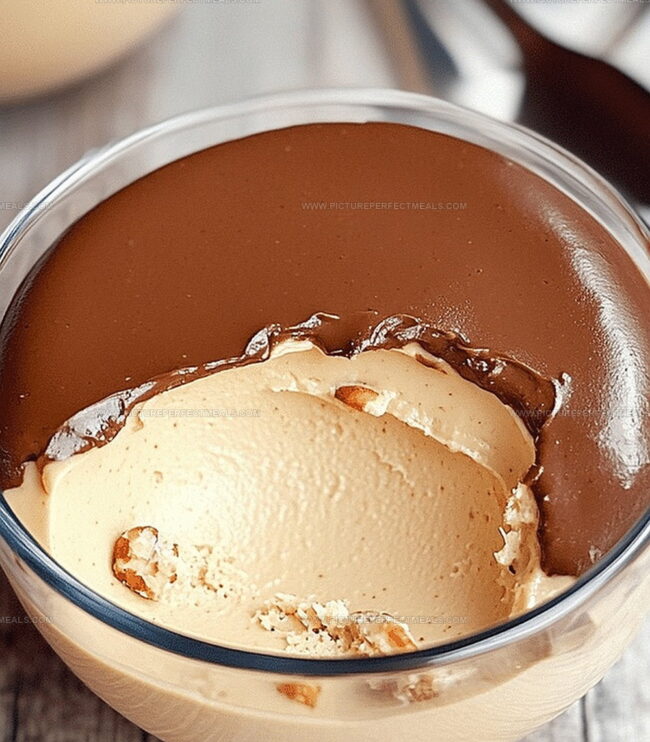
Creamy vegan peanut butter mousse delights dessert enthusiasts with its rich, silky texture. Smooth chocolate drizzle and crushed peanuts complete this indulgent plant-based treat you’ll savor to the last spoonful.
Ingredients
- 1 (14 oz / 400 g) can full-fat coconut milk, chilled overnight
- ½ cup creamy natural peanut butter (unsweetened)
- ¼ cup maple syrup or agave syrup
- 1 tsp vanilla extract
- ¼ tsp sea salt
- 2 tbsps cocoa powder
- Chopped peanuts
- Dairy-free chocolate chips
- Coconut whipped cream
- Drizzle of melted dark chocolate or peanut butter
Instructions
- Cream Extraction: Carefully separate solidified coconut cream from its liquid in a chilled can, preserving the remaining liquid for future culinary projects.
- Whipping Process: Use a hand mixer to transform coconut cream into a light, fluffy texture, ensuring smooth and consistent integration without creating dense pockets.
- Flavor Fusion: Gently fold peanut butter into the whipped coconut cream, maintaining the delicate air structure while creating a harmonious blended mixture.
- Sweetening Stage: Gradually introduce powdered sugar, mixing thoroughly to develop a velvety, consistent mousse with balanced sweetness and airy consistency.
- Texture Refinement: Continue whipping until the mixture achieves peak fluffiness, creating a rich, creamy dessert with luxurious volume and smooth appearance.
- Presentation and Chilling: Transfer mousse into serving glasses or storage container, smoothing with a spatula, then refrigerate for a minimum of one hour to set and intensify flavors.
- Final Touch: Before serving, enhance with optional garnishes like chopped peanuts or a dark chocolate drizzle to elevate visual and taste dimensions.
Notes
- Optimize Coconut Cream Separation: Chill the coconut milk can overnight in the refrigerator for easier cream extraction and cleaner separation from liquid.
- Prevent Deflation Technique: Fold peanut butter gently into whipped coconut cream using a spatula, maintaining light, airy texture by avoiding aggressive stirring.
- Control Sugar Incorporation: Add powdered sugar gradually and taste incrementally to balance sweetness without overwhelming the delicate mousse consistency.
- Temperature Matters: Ensure all ingredients are cold before whipping to help stabilize the mousse structure and achieve optimal volume and smoothness.
- Prep Time: 10 minutes
- Cook Time: 25 minutes
- Category: Desserts, Snacks
- Method: Blending
- Cuisine: American
Nutrition
- Serving Size: 5
- Calories: 290
- Sugar: 8 g
- Sodium: 120 mg
- Fat: 25 g
- Saturated Fat: 13 g
- Unsaturated Fat: 12 g
- Trans Fat: 0 g
- Carbohydrates: 17 g
- Fiber: 2 g
- Protein: 7 g
- Cholesterol: 0 mg
Jenna Hartley
Founder & Recipe Creator
Expertise
Education
Box Hill Institute, Melbourne
William Angliss Institute, Melbourne
Jenna is the heart of Picture Perfect Meals, turning simple ingredients into beautiful, easy‑to‑make dishes.
Growing up around family meals in Melbourne, she trained at Box Hill Institute and then perfected her pastry skills at William Angliss Institute. She loves mixing classic Australian flavors with fresh ideas to keep cooking fun and stress‑free.