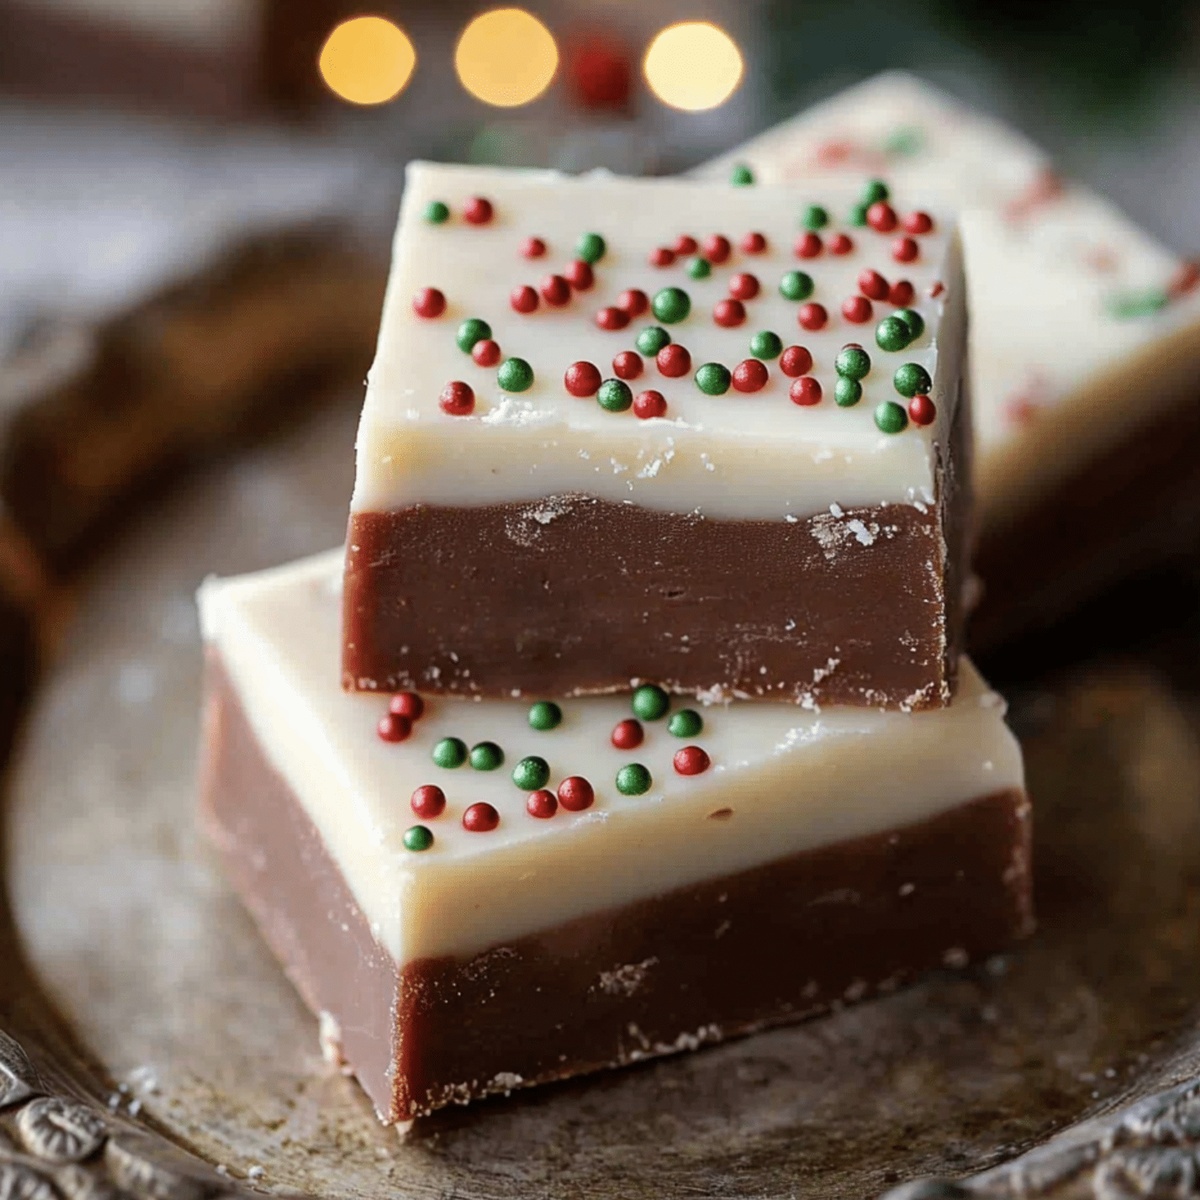
Dreamy Smooth Christmas Fudge Recipe for Sweet Winter Magic
Chocolate lovers unite around this decadent Christmas fudge recipe that melts hearts faster than snowflakes in sunlight.
Sweet memories of holiday gatherings bloom when creamy chocolate swirls through this classic treat.
Generations have cherished this simple yet luxurious dessert that requires minimal ingredients and maximum love.
Rich cocoa and velvety condensed milk combine to create a mouthwatering confection that sparkles with festive cheer.
Every bite promises pure indulgence and warmth during the most wonderful time of the year.
Smooth and silky, this fudge will become your new holiday tradition that everyone craves.
Your family and friends won’t be able to resist this irresistible Christmas delight.
Quick Recipe Overview
Ingredients for The Best Christmas Fudge
For Base and Binding:For Color and Flavor:For Decoration:For Preparation:What You’ll Use to Create Christmas Fudge
Bringing The Best Christmas Fudge to Life: Step-by-Step
Line a pan with parchment paper, creating extra edges for easy lifting later.
Combine white chocolate chips and sweetened condensed milk in a saucepan, warming gently while stirring until completely smooth. Remove from heat and blend in vanilla extract.
Separate the melted mixture into three bowls. Use food coloring to transform portions into festive red, green, and white sections.
Pour spoonfuls of each colored mixture into the pan, alternating colors. Use a toothpick to gently swirl colors together, creating a beautiful marble effect.
Sprinkle holiday-themed decorations across the surface while the fudge is still warm, pressing them lightly to ensure they stick.
Refrigerate the fudge for at least two hours until it becomes firm and solid.
Lift the fudge out using parchment paper edges, then cut into bite-sized squares perfect for holiday sharing.
Make Christmas Fudge Yours with These Tips
Ways to Share and Enjoy The Best Christmas Fudge
Keep Your Christmas Fudge Sweet and Fresh
Print
Smooth Christmas Fudge Recipe
- Total Time: 2 hours 10 minutes
- Yield: 17 1x
Description
Festive Christmas fudge brings holiday cheer with its rich chocolate and marshmallow blend. Creamy, melt-in-mouth texture delights guests, and you’ll savor each delectable bite of this classic seasonal treat.
Ingredients
- 3 cups (525 g) white chocolate chips
- 1 can (14 oz / 396 g) sweetened condensed milk
- 1 tsp vanilla extract
- Red gel food coloring
- Green gel food coloring
- Holiday sprinkles
Instructions
- Pan Preparation: Line an 8-inch baking pan with parchment paper, allowing excess to drape over edges for easy extraction.
- Chocolate Fusion: Gently melt white chocolate chips with sweetened condensed milk in a medium saucepan over low heat, stirring until silky smooth. Remove from heat and blend in vanilla extract.
- Color Division: Partition the molten chocolate mixture into three equal portions, preparing for festive transformation.
- Chromatic Enhancement: Infuse two portions with red and green gel food coloring, maintaining one portion in pristine white, ensuring uniform color distribution.
- Layering Technique: Artfully cascade alternating spoonfuls of red, green, and white mixtures into the prepared pan, creating a whimsical visual mosaic.
- Marbling Process: Employ a toothpick or slender skewer to delicately intertwine colors, generating an elegant swirled pattern without compromising the distinct hues.
- Decorative Embellishment: While the fudge surface remains tepid, delicately scatter holiday-themed sprinkles across the top, gently pressing to secure their placement.
- Setting and Chilling: Refrigerate the fudge for a minimum of 2 hours, allowing it to solidify into a firm, sliceable confection. Once completely chilled, extract from the pan using parchment paper overhang and slice into delectable bite-sized segments for serving.
Notes
- Prevent Seizing: Melt chocolate slowly over low heat, stirring constantly to avoid burning or separating the mixture.
- Color Precision: Use gel food coloring instead of liquid for vibrant colors without altering fudge consistency.
- Swirling Technique: Gently drag toothpick through colors in minimal strokes to create beautiful marbling without blending colors completely.
- Storage Strategy: Keep fudge refrigerated in an airtight container for up to 1 week, separating layers with parchment paper to maintain texture and prevent sticking.
- Prep Time: 10 minutes
- Cook Time: 2 hours
- Category: Desserts, Snacks
- Method: Blending
- Cuisine: American
Nutrition
- Serving Size: 17
- Calories: 205
- Sugar: 22 g
- Sodium: 54 mg
- Fat: 9 g
- Saturated Fat: 5 g
- Unsaturated Fat: 4 g
- Trans Fat: 0 g
- Carbohydrates: 29 g
- Fiber: 0 g
- Protein: 2 g
- Cholesterol: 15 mg
Jenna Hartley
Founder & Recipe Creator
Expertise
Education
Box Hill Institute, Melbourne
William Angliss Institute, Melbourne
Jenna is the heart of Picture Perfect Meals, turning simple ingredients into beautiful, easy‑to‑make dishes.
Growing up around family meals in Melbourne, she trained at Box Hill Institute and then perfected her pastry skills at William Angliss Institute. She loves mixing classic Australian flavors with fresh ideas to keep cooking fun and stress‑free.