
Velvety Maple Walnut Fudge Recipe: A Sweet Treat for Everyone
Creamy and decadent maple walnut fudge captures the essence of comfort in every sweet bite.
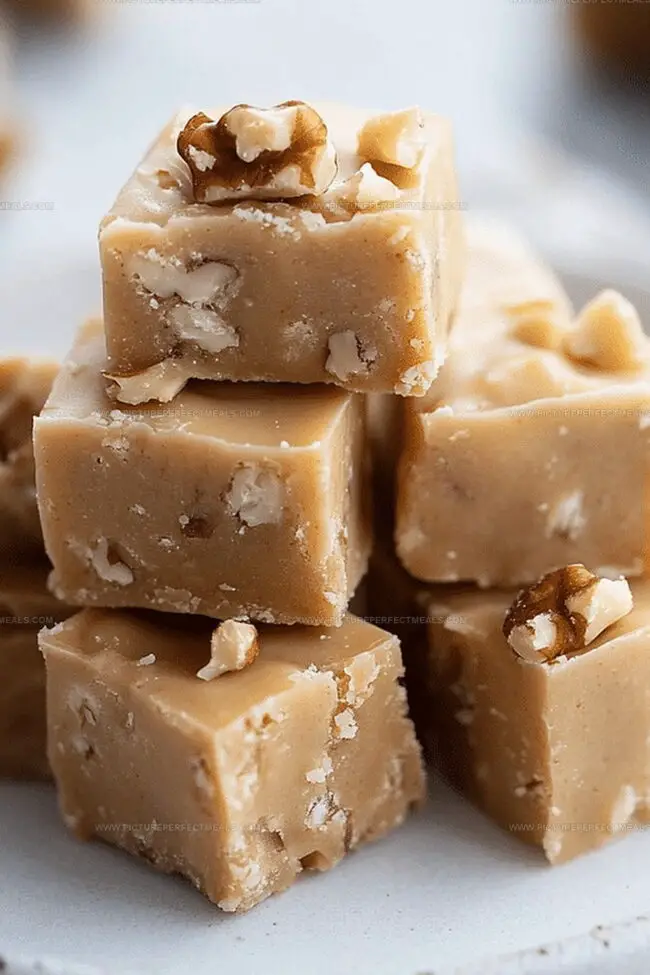
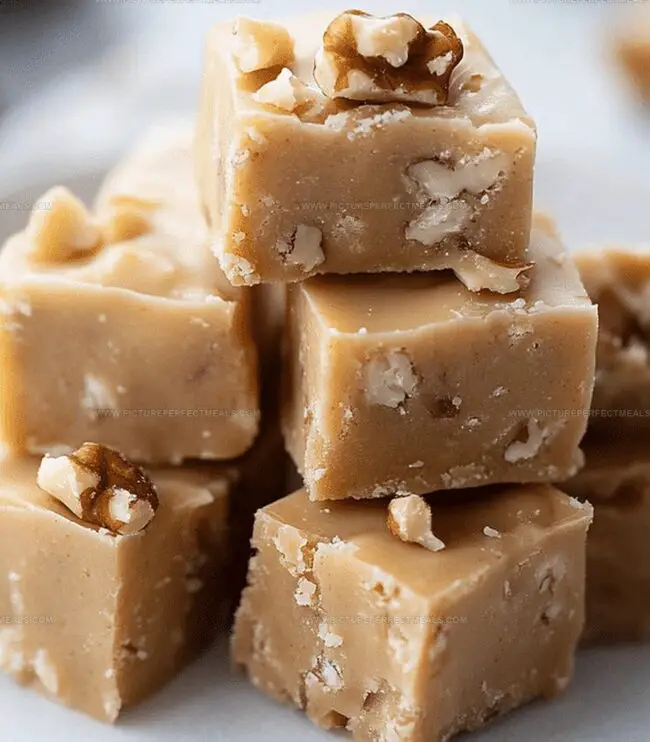
Rich maple syrup blends seamlessly with crunchy walnuts, creating a delightful treat that melts on your tongue.
The balance of sweetness and nuttiness makes this dessert irresistible.
Each piece promises a luxurious experience with its silky texture and deep flavor profile.
Walnuts add a satisfying crunch that perfectly complements the smooth fudge base.
This recipe transforms simple ingredients into a stunning confection that will impress anyone who tastes it.
Prepare to indulge in a mouthwatering dessert that brings warmth and joy to any gathering.
Quick Recipe Overview
Gather Your Ingredients for Maple Walnut Fudge
For Sweet Base:For Flavor and Texture Enhancers:For Preparation Support:Gear Guide for Maple Walnut Fudge
Making It Happen for Maple Walnut Fudge
Line a pan with parchment paper, creating extra edges for easy lifting.
Combine sugar, cream, butter, maple syrup, and salt in a saucepan. Gently heat while stirring until ingredients blend smoothly.
Turn up heat and let mixture bubble. Use a candy thermometer to track temperature until it reaches 240F without stirring.
Remove from heat and let mixture rest until it drops to 110F. This takes around 30-40 minutes.
Use a mixer or wooden spoon to beat the liquid until it thickens and loses its shiny appearance, about 5-7 minutes.
Fold in powdered sugar, chopped walnuts, and vanilla extract until fully incorporated.
Pour mixture into prepared pan, smoothing the surface quickly. Let fudge settle at room temperature for 2-3 hours.
Remove fudge using parchment edges, slice into squares. Keep in sealed container at room temperature for up to one week.
Smart Tips + Tweaks for Maple Walnut Fudge
Presentation Ideas for Maple Walnut Fudge
Make-Ahead Notes for Maple Walnut Fudge
Print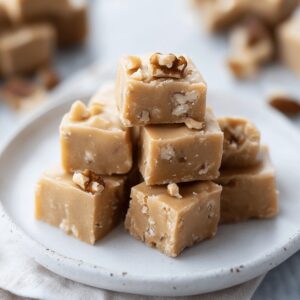
Smooth Maple Walnut Fudge Recipe
- Total Time: 35 minutes
- Yield: 17 1x
Description
Maple walnut fudge delivers a rich Canadian dessert experience with deep woodland flavors. Sweet maple syrup and toasted walnuts create a classic treat you’ll savor slowly.
Ingredients
- 2 cups (473 ml / 16 fl oz) granulated sugar
- 1 cup (237 ml / 8 fl oz) heavy cream
- ½ cup (118 ml / 4 fl oz) unsalted butter, cut into pieces
- ½ cup (118 ml / 4 fl oz) pure maple syrup
- 1 ½ cups (170 g / 6 oz) chopped walnuts
- 2 cups (250 g / 8.8 oz) powdered sugar, sifted
- 1 tsp vanilla extract
- ¼ tsp salt
Instructions
- Preparation: Line a square baking dish with parchment paper, extending edges for easy removal.
- Syrup Creation: Merge granulated sugar, heavy cream, butter, maple syrup, and salt in a medium saucepan. Heat gently while stirring until ingredients seamlessly combine and butter melts completely.
- Boiling Phase: Elevate temperature to medium-high, allowing the mixture to reach a vigorous boil. Track temperature with a candy thermometer until it precisely hits 240F (soft-ball stage). Avoid stirring during this critical cooking stage.
- Cooling Interval: Remove from heat and let mixture naturally cool to 110F without interference. This transformation typically requires 30-40 minutes.
- Texture Development: Energetically beat the mixture using a hand mixer until it thickens and loses its glossy sheen, approximately 5-7 minutes.
- Final Incorporation: Fold in powdered sugar, finely chopped walnuts, and vanilla extract, ensuring uniform distribution throughout the mixture.
- Setting Process: Transfer fudge swiftly into prepared pan, smoothing the surface with a spatula. Allow to solidify at room temperature for 2-3 hours until firm.
- Serving Preparation: Extract fudge from pan using parchment paper edges. Slice into precise, uniform squares. Store in a sealed container at room temperature for optimal freshness, maintaining quality for up to one week.
Notes
- Precision in Temperature: Use a reliable candy thermometer for accurate soft-ball stage (240F), as slight temperature variations can dramatically affect fudge texture and consistency.
- Avoid Stirring During Boiling: Resist the urge to stir while mixture reaches soft-ball stage, preventing sugar crystallization and ensuring smooth, creamy fudge.
- Beating Technique Matters: Vigorously beat the cooled mixture until it loses glossiness and thickens, which develops the signature fudge smoothness and prevents graininess.
- Storage and Freshness: Keep fudge in an airtight container at room temperature, separating layers with parchment paper to maintain optimal texture and prevent sticking.
- Prep Time: 15 minutes
- Cook Time: 20 minutes
- Category: Desserts, Snacks
- Method: Boiling
- Cuisine: American
Nutrition
- Serving Size: 17
- Calories: 172
- Sugar: 27 g
- Sodium: 37 mg
- Fat: 7 g
- Saturated Fat: 4 g
- Unsaturated Fat: 3 g
- Trans Fat: 0 g
- Carbohydrates: 26 g
- Fiber: 1 g
- Protein: 2 g
- Cholesterol: 15 mg
Jenna Hartley
Founder & Recipe Creator
Expertise
Education
Box Hill Institute, Melbourne
William Angliss Institute, Melbourne
Jenna is the heart of Picture Perfect Meals, turning simple ingredients into beautiful, easy‑to‑make dishes.
Growing up around family meals in Melbourne, she trained at Box Hill Institute and then perfected her pastry skills at William Angliss Institute. She loves mixing classic Australian flavors with fresh ideas to keep cooking fun and stress‑free.