Sticky Honey Garlic Chicken Recipe: Sweet & Savory Magic
Tender chicken pieces glazed with a mouthwatering honey garlic sauce capture the hearts of busy home cooks everywhere.
This sticky honey garlic chicken recipe delivers bold flavors that dance across your taste buds with every bite.
Weeknight dinners demand simple yet delicious solutions that don’t compromise on taste.
The combination of sweet honey and aromatic garlic creates a perfect balance of flavor that will have everyone at the dinner table asking for seconds.
Marinating the chicken ensures maximum flavor penetration and incredible tenderness.
Quick to prepare and even faster to devour, this dish transforms ordinary ingredients into an extraordinary meal.
Prepare to savor every single succulent morsel of this irresistible chicken sensation.
Quick Recipe Overview
Honey Garlic Chicken: Pantry Picks
For Chicken Preparation:For Coating Ingredients:For Sauce and Finishing:Tools to Make Honey Garlic Chicken
Cooking Honey Garlic Chicken at Home
Grab chicken pieces and sprinkle with salt and pepper. Create three bowls: one with flour blend, another with whisked eggs, and last with crunchy breadcrumbs. Coat each chicken piece by rolling it through flour, dunking in eggs, then covering with breadcrumbs.
Pour vegetable oil into a deep pan, heating until it reaches a hot 350F. Carefully drop chicken pieces into oil, flipping occasionally until they turn golden brown and cook completely through. Rest fried chicken on paper towels to drain extra oil.
Combine honey, soy sauce, rice vinegar, and minced garlic in a small pot. Warm the mixture gently, stirring until ingredients meld together. Add cornstarch to create a smooth, slightly thick sauce.
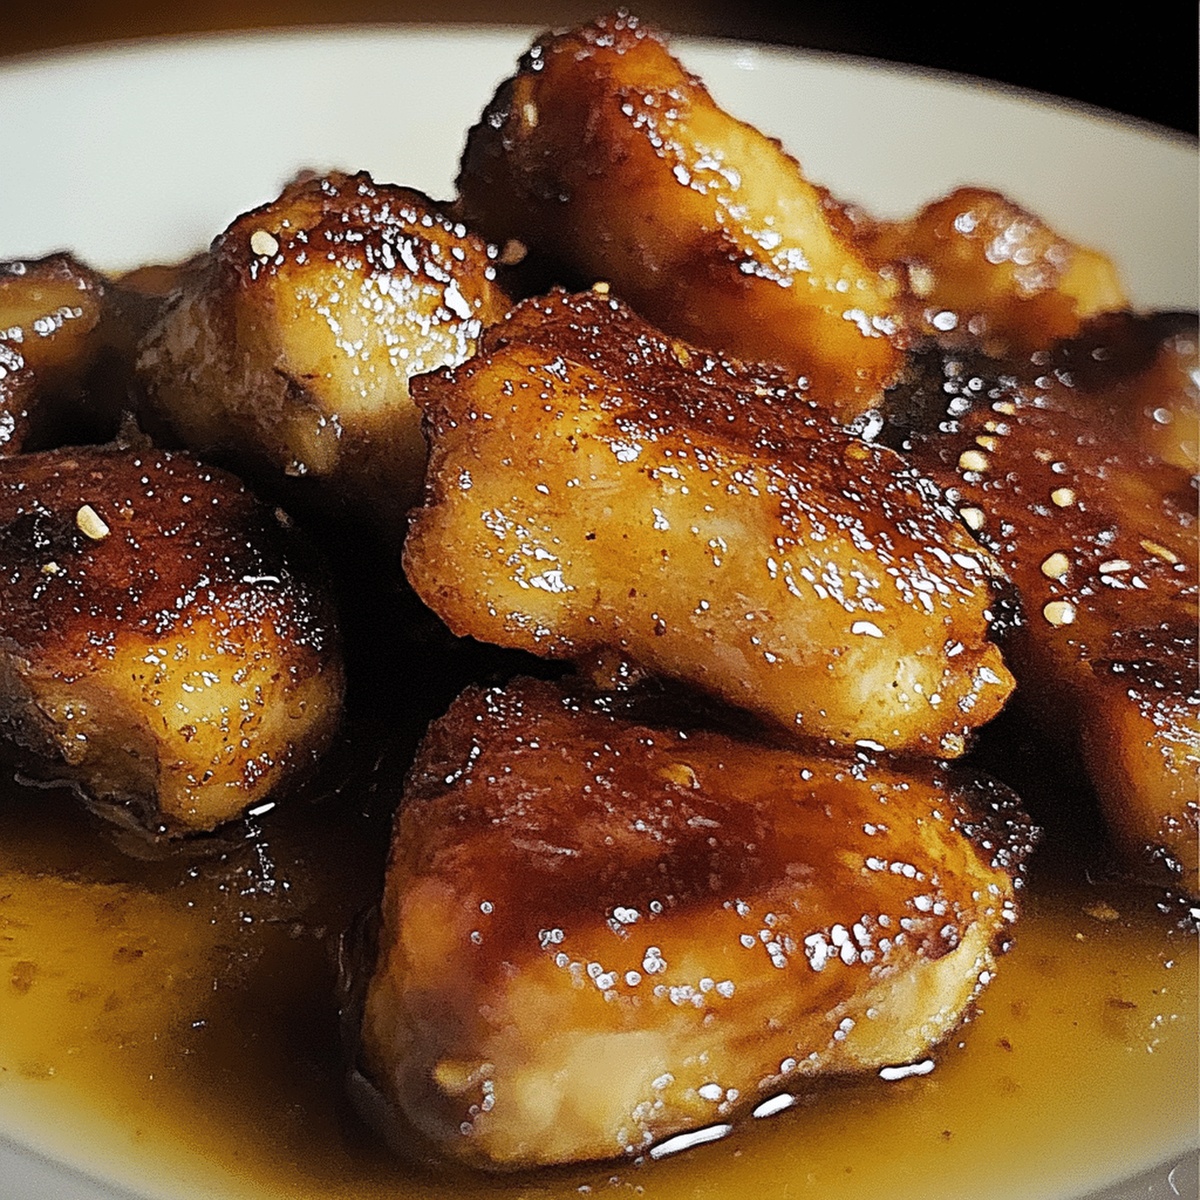
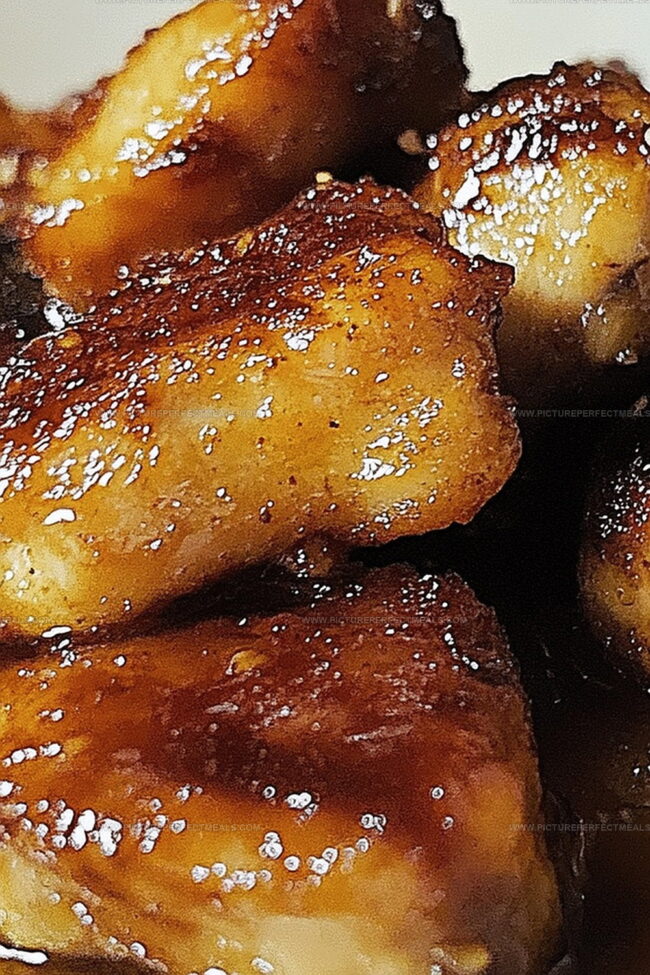
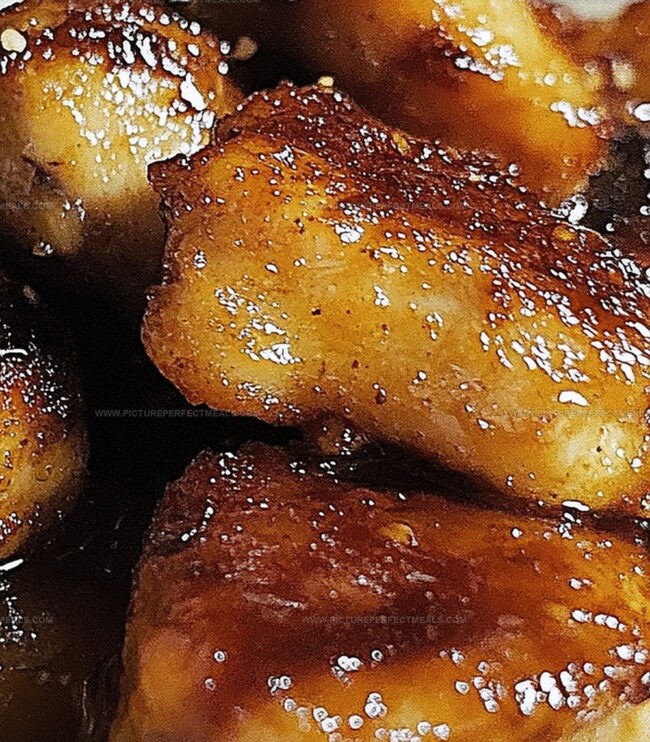
Transfer crispy chicken into a large bowl. Pour warm honey garlic sauce over pieces, gently tossing until every bite is generously covered.
Plate the glistening chicken. Sprinkle chopped green onions and sesame seeds on top for extra pizzazz. Serve immediately alongside steamed rice or quick stir-fried vegetables.
Crave-Worthy Tweaks for Honey Garlic Chicken
How to Present This Chicken Like a Pro
Meal Prep & Leftover Tips for Chicken Lovers
Print
Sticky Honey Garlic Chicken Recipe
- Total Time: 35 minutes
- Yield: 5 1x
Description
Crispy honey garlic chicken combines golden-brown, perfectly seasoned chicken with a sweet and savory glaze that tantalizes taste buds. Rich flavors from Asia inspire this simple yet elegant dish that you’ll crave again and again.
Ingredients
- 1 pound (454 grams) chicken thighs or breasts, boneless, skinless, cut into bite-sized pieces
- 1 cup panko breadcrumbs
- 2 large eggs, beaten
- ½ cup all-purpose flour
- ¼ cup cornstarch
- ½ tsp salt
- ¼ tsp black pepper
- Vegetable oil (for frying)
- ¼ cup honey
- 2 tbsps soy sauce
- 1 tbsp rice vinegar (or apple cider vinegar)
- ¼ cup water
- 2 cloves garlic, minced
- 1 tsp cornstarch (mixed with 1 tbsp water to make a slurry)
- Chopped green onions
- Sesame seeds
Instructions
- Seasoning Preparation: Generously coat chicken pieces with salt and pepper, ensuring thorough and even coverage for maximum flavor infusion.
- Coating Station Setup: Arrange three separate containers – one with flour and cornstarch blend, another with whisked eggs, and the third filled with panko breadcrumbs for a comprehensive breading process.
- Breading Technique: Systematically coat each chicken piece by first dredging in flour mixture, then dipping in egg wash, allowing excess to drip off before rolling completely in panko breadcrumbs for a crisp exterior.
- Oil Heating: Warm vegetable oil in a deep skillet to a precise 350F, maintaining consistent temperature to guarantee optimal crispiness and even cooking.
- Frying Process: Gently introduce breaded chicken into hot oil in small batches, preventing overcrowding and preserving oil temperature, rotating pieces to achieve a uniform golden-brown crust and ensure safe internal temperature, approximately 4-5 minutes per batch.
- Excess Oil Removal: Transfer fried chicken to paper towel-lined surface, allowing excess oil to drain and maintaining the crispy texture.
- Honey Garlic Sauce Creation: Combine honey, soy sauce, rice vinegar, and finely minced garlic in a saucepan, heating over medium flame and introducing a cornstarch slurry to develop a glossy, thickened sauce.
- Sauce Coating: Pour warm honey garlic sauce over crispy chicken in a large mixing bowl, gently tossing to ensure complete and uniform coverage.
- Final Presentation: Plate the sauced chicken, garnishing with thinly sliced green onions and a sprinkle of sesame seeds to enhance visual appeal and add textural complexity, serving immediately with steamed rice or stir-fried vegetables.
Notes
- Control Oil Temperature: Maintain precise 350F for perfectly crispy chicken without burning, using a deep-fry thermometer for accuracy.
- Avoid Overcrowding: Fry chicken in small batches to preserve oil temperature and ensure even, golden-brown crispiness.
- Pat Chicken Dry: Remove excess moisture before breading to guarantee maximum crunch and prevent soggy coating.
- Cornstarch Magic: Use a mix of flour and cornstarch for an extra-crispy, light breading that stays crunchy even after saucing.
- Prep Time: 15 minutes
- Cook Time: 20 minutes
- Category: Dinner, Snacks
- Method: Frying
- Cuisine: Asian
Nutrition
- Serving Size: 5
- Calories: 340
- Sugar: 12 g
- Sodium: 450 mg
- Fat: 14 g
- Saturated Fat: 2 g
- Unsaturated Fat: 10 g
- Trans Fat: 0 g
- Carbohydrates: 36 g
- Fiber: 1 g
- Protein: 20 g
- Cholesterol: 100 mg
Jenna Hartley
Founder & Recipe Creator
Expertise
Education
Box Hill Institute, Melbourne
William Angliss Institute, Melbourne
Jenna is the heart of Picture Perfect Meals, turning simple ingredients into beautiful, easy‑to‑make dishes.
Growing up around family meals in Melbourne, she trained at Box Hill Institute and then perfected her pastry skills at William Angliss Institute. She loves mixing classic Australian flavors with fresh ideas to keep cooking fun and stress‑free.