
Strawberry Santas Recipe Jolliest Holiday Treats
Sweet strawberry santas dance across holiday dessert tables with playful charm and irresistible cuteness.
Tiny white chocolate cream cheese fills these adorable bite-sized treats that look like miniature Santa characters.
Festive gatherings become magical when you serve these whimsical confections that spark joy and conversation.
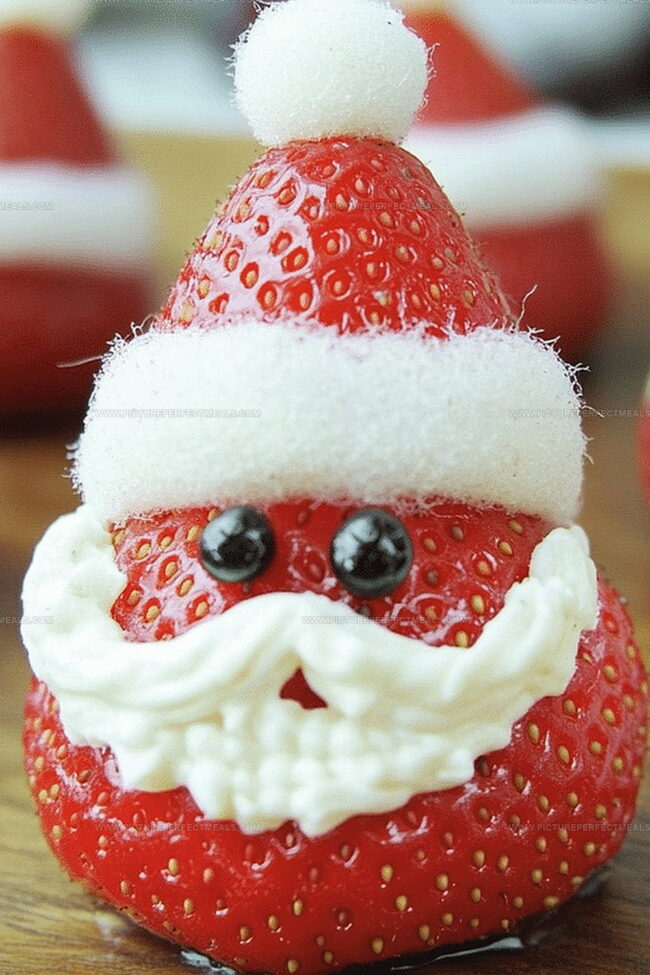
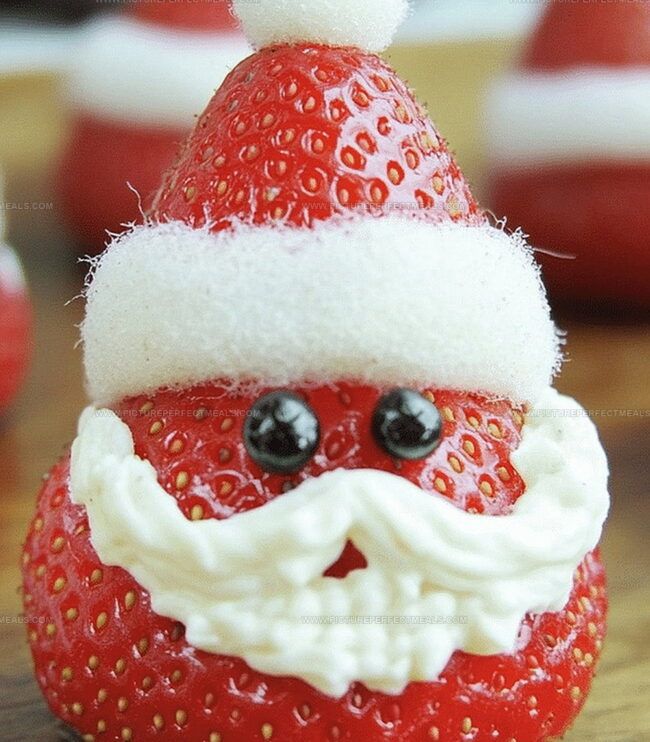
Soft strawberries create the perfect rosy cheeks for each miniature Santa figure.
Simple ingredients transform ordinary fruit into delightful edible decorations that children and adults will absolutely adore.
Plump strawberries stand upright, wearing delicate cream cheese frosting hats and faces that instantly make people smile.
Grab a plate and watch how quickly these charming little desserts disappear at your next celebration.
Strawberry Santas That Bring Holiday Cheer
Things to Prepare for Making Strawberry Santas
Main Ingredients:
Fresh Produce:Dairy and Cream:Decoration Ingredients:Follow These Steps for Fun Strawberry Santas
Step 1: Prepare Strawberry Bodies
Gently wash strawberries under cool water and pat completely dry with paper towels. Select large strawberries with sturdy flat bottoms. Using a sharp knife, slice off strawberry tops to create a stable base allowing strawberries to stand upright.
Step 2: Design Santa Hat
Take the sliced strawberry tops and carefully cut triangular shapes that will become Santa hats. Position these triangular pieces atop each strawberry body, creating a cute stacked design.
Step 3: Craft Whipped Cream Details
Select a piping bag or standard spoon to add fluffy white whipped cream. Cover strawberry body with a generous cream layer representing Santa’s beard and soft suit. Add a small cream dollop on hat tip to complete Santa’s classic look.
Step 4: Construct Playful Face
Gently place two mini chocolate chips onto cream surface to represent Santa’s eyes. For additional character, consider adding:Step 5: Add Festive Touches
Enhance strawberry Santas with delightful finishing elements:Step 6: Present and Celebrate
Arrange adorable Strawberry Santas on decorative serving plate. Serve immediately and watch guests smile with delight at these charming holiday treats.
Tips for Shaping and Storing Strawberry Santas
How to Keep Strawberry Santas Looking Cute
Strawberry Santas Pair Well with Holiday Treats
Try Different Fillings in Strawberry Santas
Print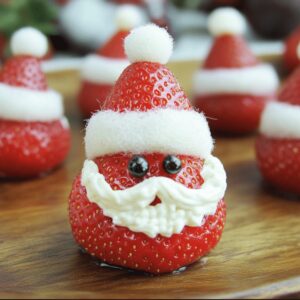
Strawberry Santas Recipe
- Total Time: 0 minutes
- Yield: 6 1x
Description
Whimsical Strawberry Santas bring holiday cheer with their adorable design and festive flavor. Sweet strawberries dressed as jolly santa characters create a playful dessert you’ll love making and sharing with family and friends.
Ingredients
Fresh Ingredients:
- 1 pint (500 g) fresh strawberries
Filling Ingredients:
- ½ cup (115 g) cream cheese, softened
- ¼ cup (30 g) powdered sugar, sifted
- ½ teaspoon vanilla extract
Decorative Ingredients:
- Mini chocolate chips (for eyes)
Instructions
- Meticulously rinse and gently dry plump strawberries, selecting uniform fruits with stable bases for optimal Santa character construction.
- Slice strawberry tops horizontally, creating a level foundation that allows each Santa figure to stand confidently on serving platters.
- Strategically position the trimmed strawberry cap as a festive hat, positioning it at a playful angle atop the strawberry body.
- Craft Santa’s signature fluffy beard and suit by carefully piping or dolloping whipped cream onto the strawberry’s surface, ensuring smooth, elegant coverage.
- Delicately place miniature chocolate chips as twinkling eyes, providing whimsical personality to each fruity character.
- Enhance the facial details by adding a tiny dot of whipped cream or a petite red candy to represent Santa’s charming nose.
- For an enchanting winter aesthetic, lightly dust the completed Strawberry Santas with powdered sugar, mimicking a gentle snowfall.
- Optionally embellish the base with a small mint or holly leaf, introducing an extra touch of holiday cheer.
- Arrange the completed Strawberry Santas on an elegant serving dish, presenting these delightful bite-sized treats ready for immediate enjoyment.
Notes
- Select ripe, firm strawberries with substantial size for easier assembly and a more impressive Santa appearance.
- Pat strawberries completely dry to prevent whipped cream from sliding off and maintain structural integrity.
- Use cold whipped cream for better piping and maintaining shape during decoration.
- Consider using stabilized whipped cream with gelatin or powdered sugar to help maintain form at room temperature.
- For dairy-free alternatives, swap whipped cream with coconut cream or vegan cream cheese frosting.
- Create uniform Santa shapes by using a sharp paring knife and cutting strawberries at consistent angles.
- Assemble Strawberry Santas just before serving to prevent cream from absorbing into strawberry and losing crispness.
- Experiment with different facial features using mini chocolate chips, edible googly eyes, or colored candy decorations.
- Store temporarily in refrigerator for up to 2 hours before serving to keep design intact.
- Use organic strawberries for cleaner flavor and potentially more vibrant presentation.
- Cook Time: 0 minutes
- Category: Snacks, Desserts
- Method: None
- Cuisine: American
Nutrition
- Serving Size: 6
- Calories: 105
- Sugar: 8 g
- Sodium: 50 mg
- Fat: 7 g
- Saturated Fat: 4 g
- Unsaturated Fat: 3 g
- Trans Fat: 0 g
- Carbohydrates: 10 g
- Fiber: 1 g
- Protein: 2 g
- Cholesterol: 20 mg
Daves Miller
Contributing Chef & Culinary Educator
Expertise
Education
Sullivan University, Louisville, Kentucky
White Mountains Community College, Berlin, New Hampshire
Daves is the friendly face guiding you through flavorful, fuss-free recipes at Picture Perfect Meals.
He studied culinary arts at Sullivan University and embraced Baking and Pastry Arts at White Mountains Community College. Daves specializes in comforting meals with vibrant flavors, highlighting fresh, seasonal ingredients.