Indulge in a Dreamy Chocolate Dessert Board Recipe Tonight
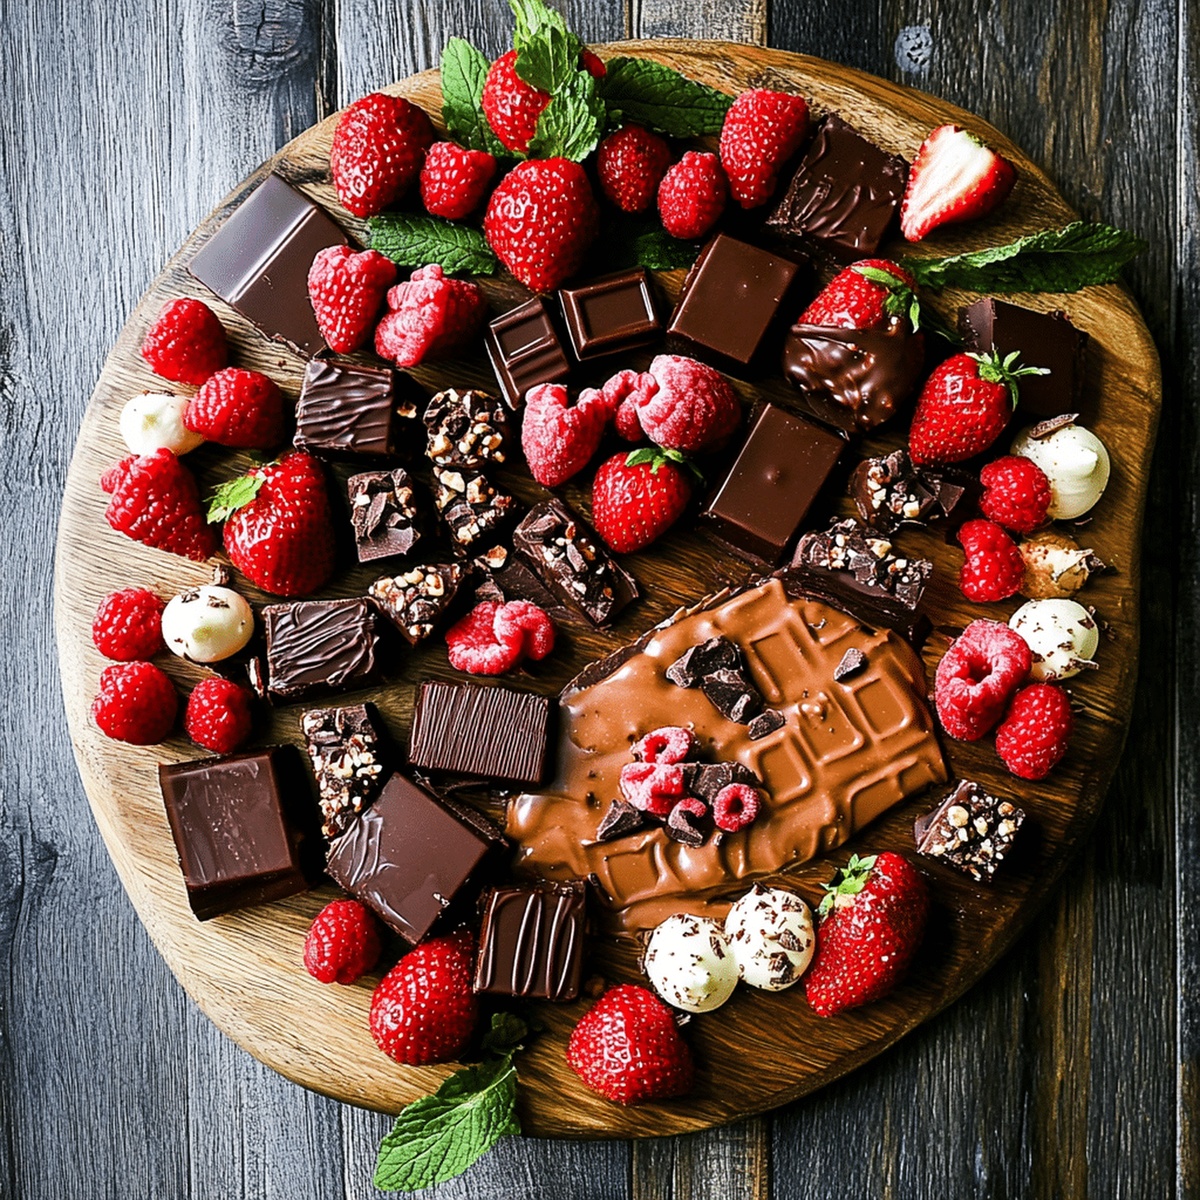
Chocolate lovers find pure bliss in this decadent chocolate dessert board that combines rich textures and indulgent flavors.
Carefully crafted with an array of chocolate treats, the dessert board promises a delightful sensory experience.
Each carefully selected chocolate element tells a unique story of sweetness and sophistication.
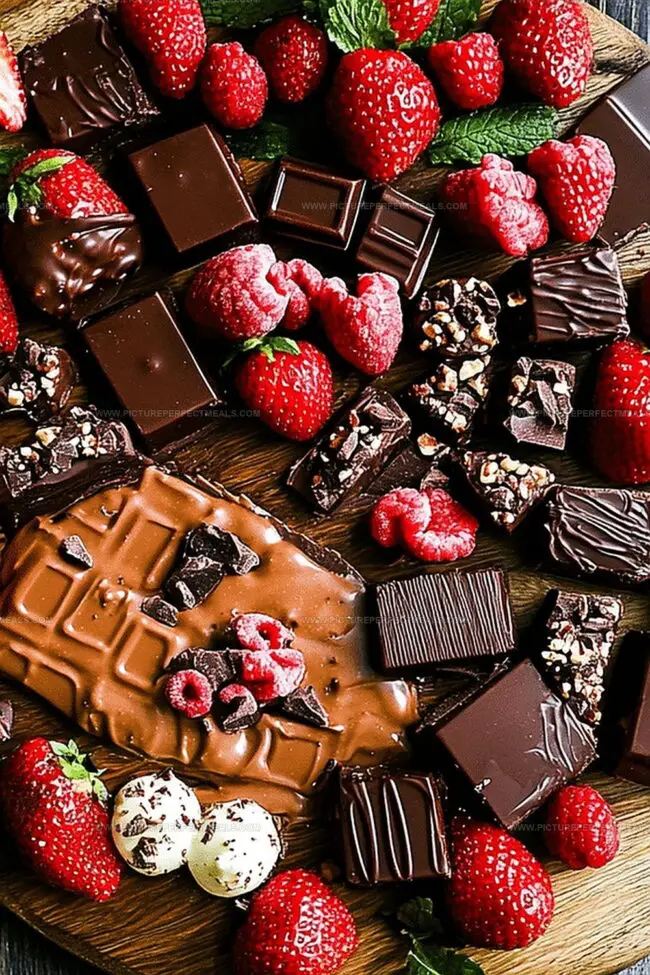
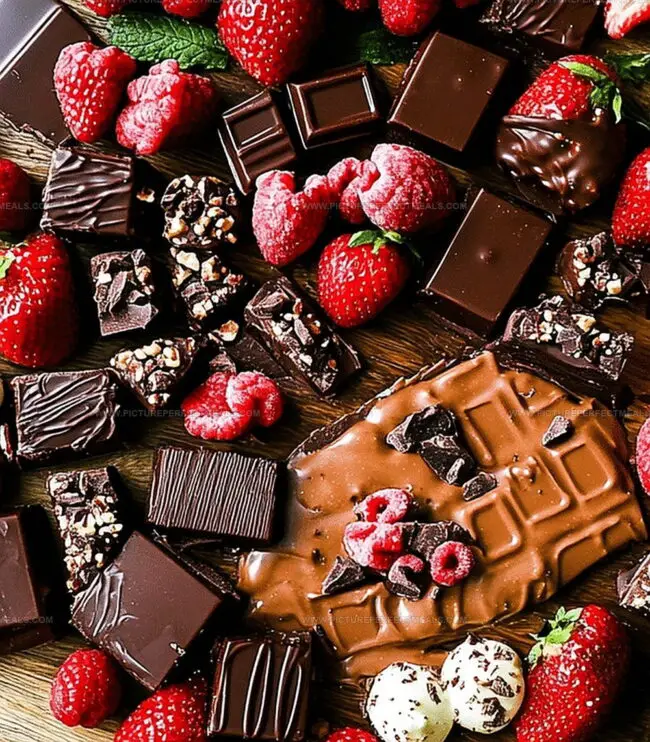
Smooth dark chocolates mingle with creamy milk varieties, creating a stunning visual and taste masterpiece.
Clusters of truffles, chocolate-dipped fruits, and delicate shards of brittle dance across the board, inviting exploration.
Elegant and irresistible, this dessert board transforms an ordinary gathering into an extraordinary chocolate celebration.
Prepare to savor every delectable moment of this chocolate paradise.
Quick Recipe Overview
Chocolate Dessert Board Ingredient Ideas
For Base and Serving:For Chocolate Delights:For Complementary Accompaniments:Tools for Styling and Serving Your Chocolate Board
How to Assemble a Chocolate Dessert Board Everyone Loves
Pick a stunning board that makes your chocolate display pop – whether it’s rustic wooden, sleek marble, or elegant ceramic platter. The surface sets the stage for your delectable chocolate adventure.
Arrange various chocolate treats with artistic flair – mix textures, heights, and colors to create an irresistible landscape. Cluster dark, milk, and white chocolates in interesting clusters that draw the eye.
Introduce delightful sidekicks that enhance chocolate’s rich flavor – think fresh berries, nuts, caramel drizzles, and delicate cookies. These supporting characters elevate your chocolate experience.
Scatter fondue-style accessories like marshmallows, fruit slices, and cake chunks that invite interactive munching. Small skewers or decorative toothpicks make sampling effortless and fun.
Sprinkle finishing touches like edible flowers, mint leaves, chocolate shavings, or powdered sugar. These elegant details transform your board from simple to spectacular.
Ensure chocolates aren’t too cold or warm – room temperature delivers optimal flavor and smooth texture. Remove chocolates from refrigeration 15-30 minutes before serving.
Accompany your chocolate board with complementary drinks like red wine, port, espresso, or creamy liqueurs that enhance the chocolate’s depth and complexity.
Flavor Combos, Shapes, and Pairings to Try
Serve as a Party Centerpiece or Late-Night Treat
Store Each Element to Keep It Fresh and Fancy
Print
Stunning Chocolate Dessert Board Recipe
- Total Time: 30 minutes
- Yield: 9 1x
Description
Rich chocolate dessert board showcases European artisan chocolates with elegant arrangement of truffles, pralines, and ganache-filled delicacies. Dark and milk chocolate selections invite sensory exploration through carefully curated delectable offerings.
Ingredients
- 1 cup (237 ml) dark chocolate squares or bars (broken into pieces)
- 1 cup (237 ml) milk chocolate squares or bars
- 1 cup (237 ml) white chocolate squares or bars
- ½ cup (118 ml) chocolate truffles
- ½ cup (118 ml) chocolate caramels or toffee
- ½ cup (118 ml) chocolate ganache or hot fudge sauce
- ½ cup (118 ml) Nutella or hazelnut spread
- ½ cup (118 ml) chocolate-covered almonds (or peanuts)
- ½ cup (118 ml) chocolate-covered pretzels
- ½ cup (118 ml) chocolate chip cookies (mini or regular)
- ½ cup (118 ml) brownie bites (cut into small squares)
- ½ cup (118 ml) chocolate wafers or biscotti
- ½ cup (118 ml) fresh strawberries
- ½ cup (118 ml) fresh raspberries
- ½ cup (118 ml) fresh blackberries
- ½ cup (118 ml) fresh apple slices
- ½ cup (118 ml) dried apricots (or dried bananas)
- ¼ cup (59 ml) marshmallows (mini or large)
- Crushed nuts (almonds, hazelnuts, or pecans)
- Shredded coconut
- Powdered sugar for dusting
- ½ cup (118 ml
Instructions
- Preparation: Position a spacious wooden board or marble slab as the foundation for an elegant chocolate dessert display.
- Chocolate Melting: Gently liquefy dark, milk, and white chocolate using a double boiler, stirring consistently to achieve a silky, uniform texture without scorching.
- Chocolate Crafting: Transform chocolate into artistic geometric shapes and create textural bark by spreading melted chocolate on parchment paper, adorning with chopped nuts, dried fruits, and a delicate sprinkle of sea salt.
- Fruit Preparation: Slice strawberries, raspberries, and bananas into precise, visually captivating segments to introduce vibrant color and refreshing contrast.
- Arrangement Technique: Strategically distribute chocolate truffles, chocolate-coated nuts, and handcrafted chocolate clusters across different board sections, creating an aesthetically pleasing composition.
- Decorative Touches: Embellish the display with artistic chocolate drizzles, zigzag patterns, and elegant swirls. Integrate complementary elements like marshmallows, pretzels, and graham crackers to enhance textural complexity.
- Finishing Flourish: Elevate presentation by garnishing with fresh mint leaves, delicate edible flowers, or a whisper of cocoa powder dusting. Refrigerate briefly to stabilize chocolate elements and ensure optimal serving temperature.
- Serving Suggestion: Accompany the board with small dessert forks, elegant toothpicks, or decorative serving utensils to encourage an interactive and sophisticated tasting experience.
Notes
- Choose the Right Surface: Select a board with smooth, clean texture that won’t transfer unwanted flavors to chocolate treats.
- Master Chocolate Melting: Control heat carefully to prevent chocolate from seizing or developing grainy texture; use low, consistent temperature.
- Prep Ingredients Precisely: Cut fruits and chocolates in uniform sizes for balanced presentation and easy guest sampling.
- Temperature Control Matters: Chill board briefly to set chocolate elements, ensuring perfect texture and preventing rapid melting during serving.
- Prep Time: 30 minutes
- Cook Time: 0 minutes
- Category: Desserts, Snacks
- Method: None
- Cuisine: American
Nutrition
- Serving Size: 9
- Calories: 400
- Sugar: 45g
- Sodium: 80mg
- Fat: 22g
- Saturated Fat: 10g
- Unsaturated Fat: 8g
- Trans Fat: 0g
- Carbohydrates: 50g
- Fiber: 3g
- Protein: 5g
- Cholesterol: 15mg
Jenna Hartley
Founder & Recipe Creator
Expertise
Education
Box Hill Institute, Melbourne
William Angliss Institute, Melbourne
Jenna is the heart of Picture Perfect Meals, turning simple ingredients into beautiful, easy‑to‑make dishes.
Growing up around family meals in Melbourne, she trained at Box Hill Institute and then perfected her pastry skills at William Angliss Institute. She loves mixing classic Australian flavors with fresh ideas to keep cooking fun and stress‑free.