Gleaming Mini Red Velvet Cheesecake Recipe: A Sweet Tiny Treat
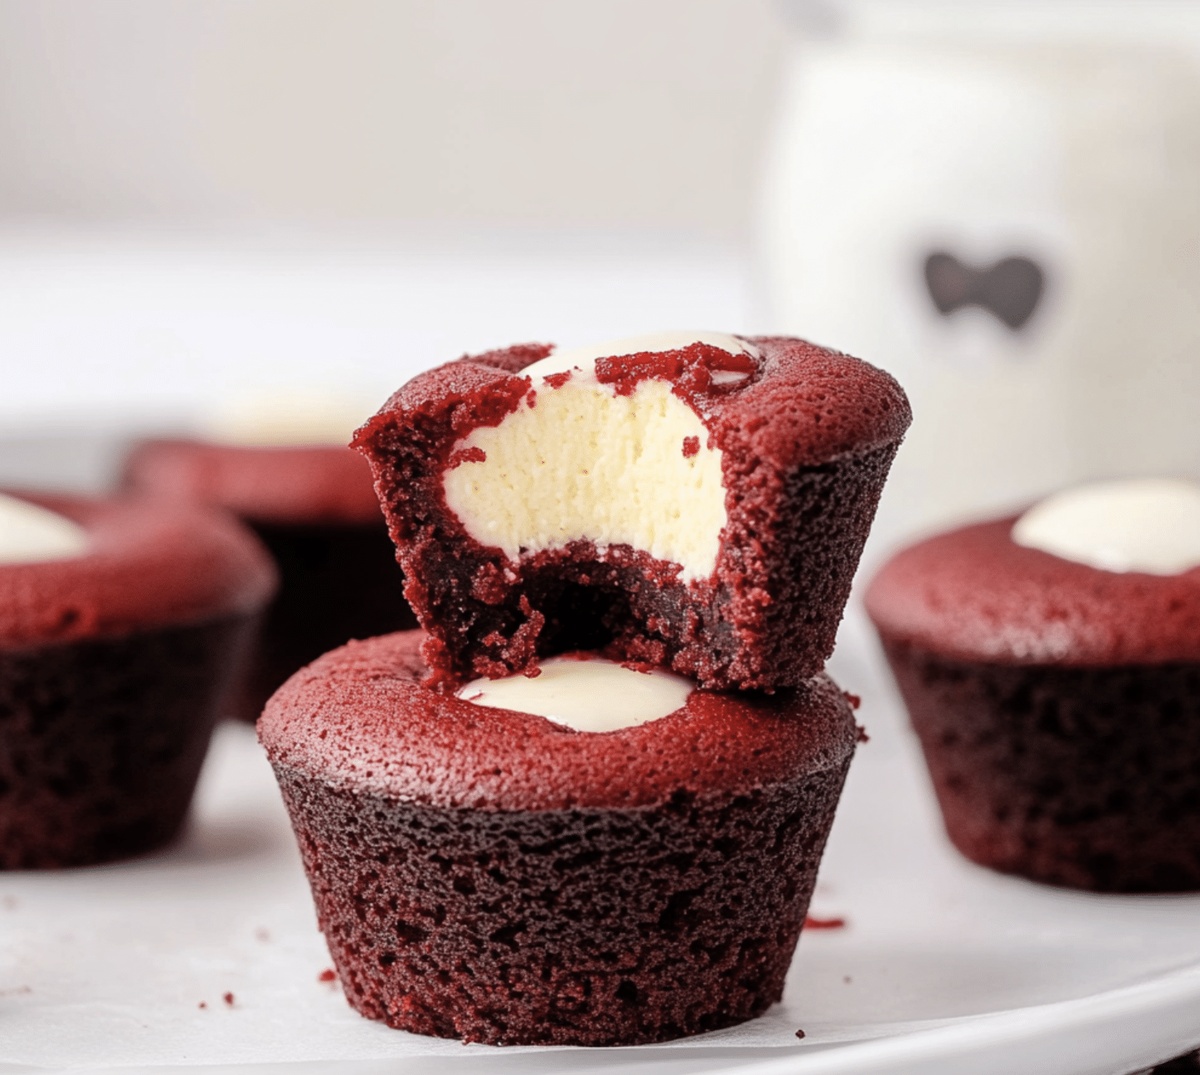
Decadent desserts often surprise us with their simple elegance, and these mini red velvet cheesecake bites strike the perfect balance between indulgence and charm.
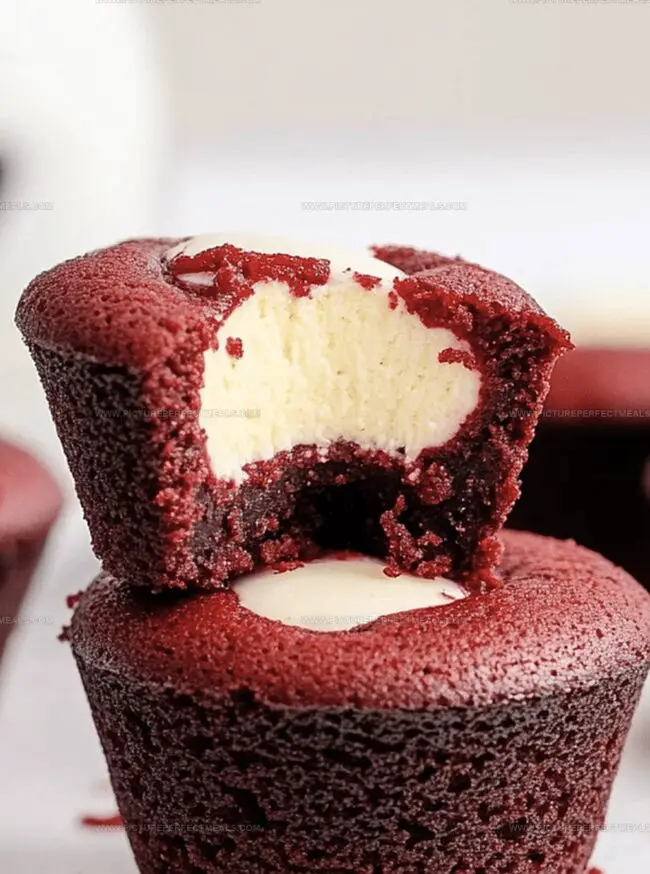
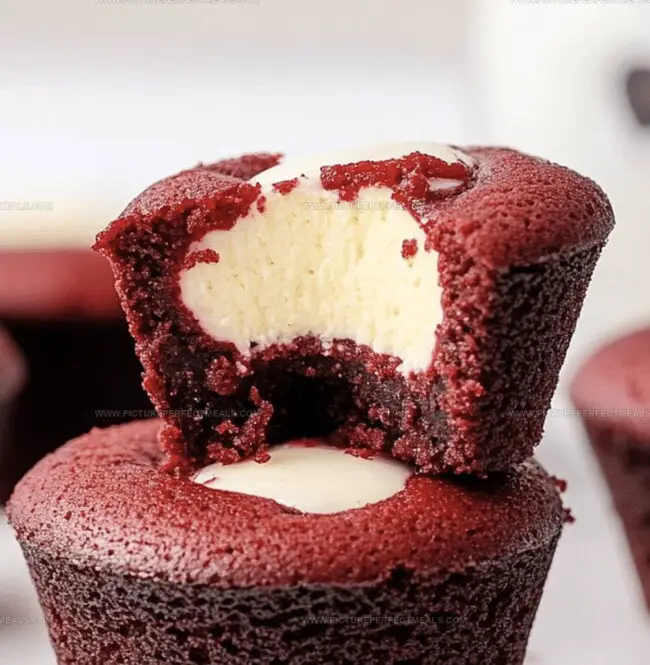
Creamy cheesecake swirled with deep crimson red velvet creates a visual masterpiece that delights every sense.
Rich cream cheese blends seamlessly with cocoa undertones, promising a luxurious experience in each delicate bite.
Compact yet bold, these miniature treats transform an ordinary gathering into a memorable celebration.
The recipe combines classic southern comfort with sophisticated bakery techniques.
Smooth, velvety textures melt on your tongue, revealing layers of complex flavors.
These petite desserts will undoubtedly become the star of your next sweet adventure.
Quick Recipe Overview
Mini Cheesecake Must-Haves (Red Velvet Style)
For The Crust:For The Cheesecake Filling:For Topping And Garnish:What You’ll Need to Bake These Red Velvet Minis
How to Make These Mini Cheesecakes
Crank your oven to a cozy 325F. Grab a muffin tin and line it with cute paper cups.
Crush those chocolate cookies into fine crumbs and mix with melted butter. Press a spoonful into each liner, packing it down like you mean it. Pop the tin in the oven for a quick 5-minute toast.
Grab your mixer and beat cream cheese until it’s silky smooth. Toss in sugar, then add egg, vanilla, and sour cream. Sprinkle in cocoa powder and splash some red food coloring to give it that classic red velvet magic.
Carefully spoon the vibrant batter into each liner, filling them about three-quarters full. Glide a spoon across the top to create a perfectly even surface.
Slide the tin into the oven and bake for 18-20 minutes. You’ll know they’re done when the centers look set and aren’t doing a wiggle dance.
Let the mini cheesecakes hang out in the pan for 10 minutes, then transfer to a cooling rack. Stick them in the fridge for a couple of hours to firm up.
Top each cheesecake with a cloud of whipped cream or a swirl of frosting. Sprinkle some chocolate shavings or a dusting of cocoa for that extra wow factor.
Tips for That Signature Red Velvet Flavor
Serving Your Mini Cheesecakes Just Right
How to Keep the Texture Perfect in the Fridge
Print
Stunning Mini Red Velvet Cheesecake Recipe
- Total Time: 35 minutes
- Yield: 13 1x
Description
Gourmet mini red velvet cheesecake blends classic Southern dessert elegance with creamy cheesecake indulgence. Chocolate graham cracker crust and cream cheese frosting complete this irresistible bite-sized treat you’ll want to savor with friends.
Ingredients
- 8 oz (225 g) cream cheese, softened
- 1 large egg, room temperature
- ⅓ cup (65 g) granulated sugar
- 12 Oreo cookies, crushed fine (filling removed)
- 3 tbsps unsalted butter, melted
- 2 tbsps sour cream
- 1 tsp vanilla extract
- 1 tbsp unsweetened cocoa powder
- 1 tsp red food coloring (gel or liquid)
- Whipped cream or cream cheese frosting
- Chocolate shavings or red sprinkles (optional)
Instructions
- Crust Preparation: Arrange paper liners in a muffin tin. Pulverize Oreo cookies into fine crumbs, mixing thoroughly with melted butter. Press the mixture compactly into each liner, creating an even base. Bake briefly to set, then cool completely.
- Cream Cheese Blend: Whip cream cheese until velvety smooth using an electric mixer. Gradually integrate granulated sugar, blending until light and uniform. Gently fold in egg, vanilla extract, and sour cream, maintaining a delicate texture.
- Color and Flavor: Sift cocoa powder into the mixture, adding vibrant red food coloring. Mix until achieving a consistent, rich crimson hue throughout the batter.
- Filling and Baking: Distribute the cheesecake mixture evenly across prepared crusts, filling each liner about three-quarters full. Smooth surfaces for a polished appearance. Bake in a preheated oven until centers set with minimal wobbling.
- Cooling and Setting: Remove from oven and let rest briefly in the pan. Transfer to a cooling rack, then refrigerate for several hours to develop a creamy, firm consistency.
- Final Flourish: Embellish with a delicate swirl of whipped cream or cream cheese frosting. Garnish with chocolate shavings, red sprinkles, or a light cocoa powder dusting for an elegant presentation.
Notes
- Prevent Cracking Cheesecake: Avoid overbaking by removing the mini cheesecakes when centers slightly jiggle, preventing cracks and maintaining a smooth, creamy texture.
- Control Moisture Levels: Use room temperature ingredients to ensure smooth blending and prevent separation, creating a silky, consistent cheesecake batter.
- Master Crust Technique: Press Oreo crumb mixture firmly and evenly into liners, using the back of a spoon or flat-bottomed glass for a compact, stable base that doesn’t crumble.
- Balance Color Intensity: Add food coloring gradually, mixing thoroughly to achieve a vibrant red velvet hue without creating streaks or uneven color distribution.
- Prep Time: 15 minutes
- Cook Time: 20 minutes
- Category: Desserts
- Method: Baking
- Cuisine: American
Nutrition
- Serving Size: 13
- Calories: 210
- Sugar: 10 g
- Sodium: 180 mg
- Fat: 14 g
- Saturated Fat: 8 g
- Unsaturated Fat: 4 g
- Trans Fat: 0 g
- Carbohydrates: 20 g
- Fiber: 1 g
- Protein: 3 g
- Cholesterol: 40 mg
Jenna Hartley
Founder & Recipe Creator
Expertise
Education
Box Hill Institute, Melbourne
William Angliss Institute, Melbourne
Jenna is the heart of Picture Perfect Meals, turning simple ingredients into beautiful, easy‑to‑make dishes.
Growing up around family meals in Melbourne, she trained at Box Hill Institute and then perfected her pastry skills at William Angliss Institute. She loves mixing classic Australian flavors with fresh ideas to keep cooking fun and stress‑free.