Dreamy Red Velvet Strawberry Cheesecake Recipe That Wows Guests
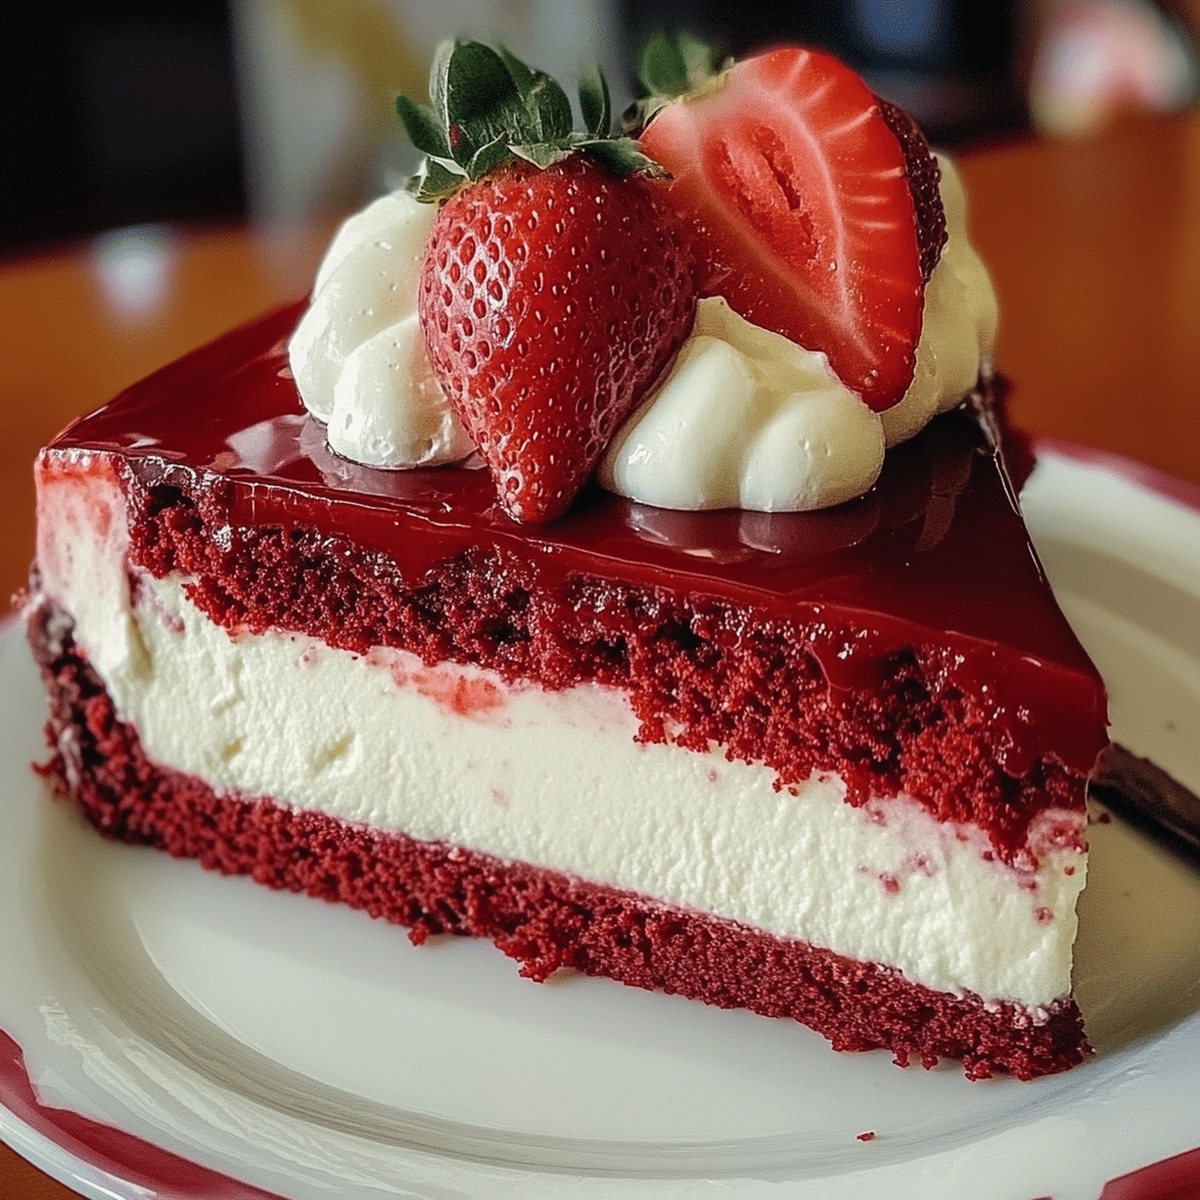
Decadent red velvet strawberry cheesecake brings a touch of luxurious indulgence to any dessert table.
Soft, velvety layers of crimson cake blend seamlessly with rich, creamy cheesecake filling.
Ripe, juicy strawberries add a burst of fresh sweetness that cuts through the dense, luscious texture.
The vibrant red hue promises a show-stopping centerpiece that will leave guests utterly impressed.
Each forkful promises a delightful dance of flavors and textures that melt in your mouth.
Sophisticated yet simple, this dessert delivers pure culinary magic.
Prepare to treat yourself to a slice of pure bliss that’s sure to become a new favorite.
Quick Recipe Overview
Ingredients for Red Velvet Strawberry Cheesecake
For Cake Layer:For Liquid Ingredients:For Color and Finishing:Tools to Build and Swirl This Dreamy Dessert
How to Make a Stunning Red Velvet Cheesecake
Whip up a velvety red cake foundation that’ll make your taste buds dance. Mix dry and wet ingredients seamlessly, avoiding overmixing to keep the texture light and dreamy. Pour batter into a prepared pan, aiming for a soft, slightly underbaked result that’ll meld perfectly with the upcoming cheesecake layer.
Crush fresh strawberries into a vibrant puree that will electrify your dessert with natural sweetness. Strain to remove seeds, ensuring a silky smooth flavor profile that’ll weave through the creamy cheesecake layers.
Blend cream cheese until luxuriously smooth, incorporating eggs and strawberry essence with gentle precision. The key is creating a cloudlike texture that whispers indulgence in every single bite.
Carefully pour the cheesecake mixture over the partially baked red velvet base. Nestle the pan into a water bath to ensure even, gentle cooking that prevents cracking and maintains a supremely rich consistency.
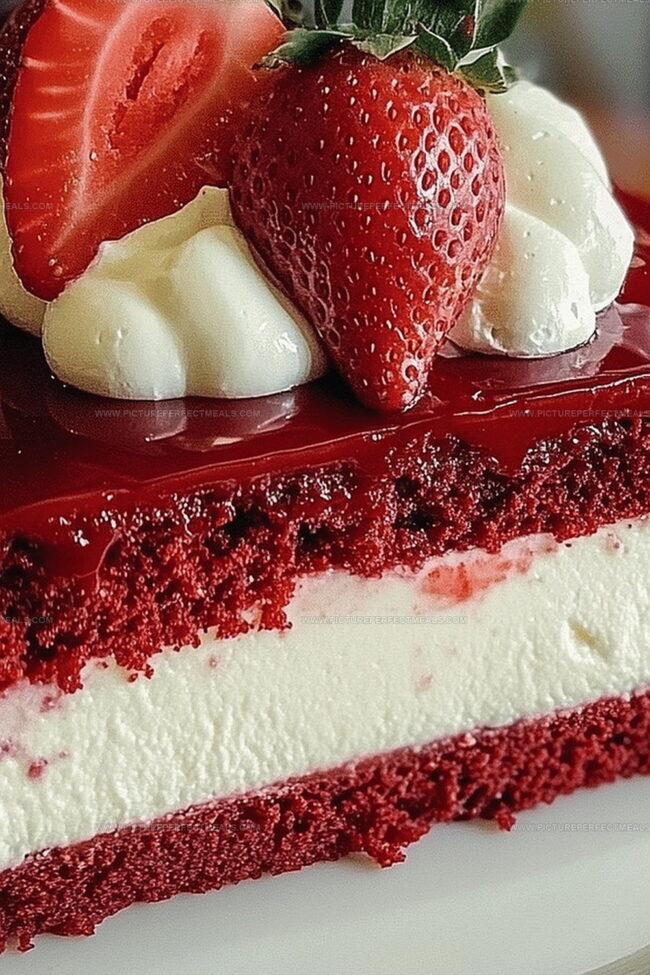
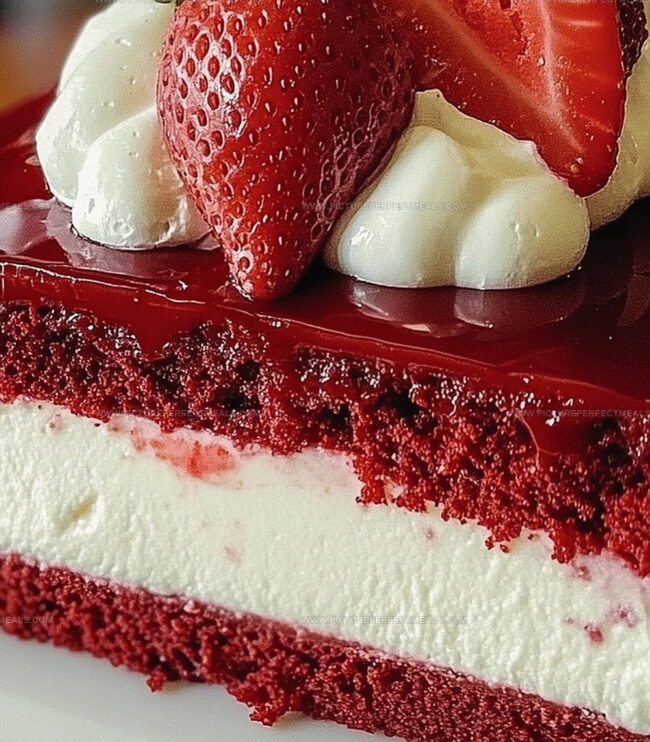
Allow the cheesecake to rest and settle, developing deep flavors. Once completely cooled, crown your masterpiece with fresh strawberry slices and a light dusting of powdered sugar for a stunning finale.
Cheesecake Tips for Texture and Balance
Serving This Valentine-Worthy Dessert
Best Way to Keep It and Set
Print
Stunning Red Velvet Strawberry Cheesecake Recipe
- Total Time: 1 hour 30 minutes
- Yield: 9 1x
Description
Rich red velvet strawberry cheesecake blends Southern charm with creamy indulgence. Layers of crimson cake and tangy cream cheese create a dessert that delights senses and satisfies sweet cravings completely.
Ingredients
- 1 large egg
- 1 large egg
- 1 cup (240 ml) all-purpose flour
- ½ cup (120 ml) vegetable oil
- ½ cup (120 ml) buttermilk
- ½ cup (100 g) granulated sugar
- ½ tsp baking soda
- ½ tsp salt
- 1 tbsp cocoa powder
- 1 tsp vanilla extract
- 1 tsp white vinegar
- 1 tbsp red food coloring
- 16 oz (454 g) cream cheese, softened
- ¾ cup (150 g) granulated sugar
- ½ cup (120 ml) sour cream
- 1 tsp vanilla extract
- 1 tbsp cornstarch
- 1 ½ cups (225 g) fresh strawberries, sliced
- ⅓ cup (80 ml) strawberry jam or preserves
- 1 tbsp lemon juice
- 1 tbsp water
Instructions
- Prepare Base: Meticulously combine cocoa-enriched dry ingredients with liquid components, whisking until a smooth, crimson batter forms with uniform color and texture.
- Pan Setup: Carefully pour the vibrant batter into a lined springform pan, ensuring an even, leveled surface that will provide a stable foundation for the cheesecake.
- Initial Baking: Position the pan in a preheated oven at 350°F, partially baking the red velvet layer for approximately 15-18 minutes until it sets but remains tender, allowing residual heat to complete the cooking process.
- Cooling Stage: Remove the ruby-hued base from the oven and allow it to cool completely at room temperature, creating a stable platform for the upcoming cream cheese layer.
- Cheesecake Layer Preparation: Gently blend cream cheese, sugar, eggs, and vanilla until smooth and creamy, avoiding over-mixing to prevent potential air bubbles or cracks.
- Layer Assembly: Delicately spread the cream cheese mixture over the cooled red velvet base, using a spatula to ensure an even, seamless distribution that maintains the cake’s structural integrity.
- Final Baking: Return the assembled cheesecake to the oven at 325°F, baking for 45-50 minutes until the center is slightly jiggly but set, indicating perfect doneness.
- Chilling and Garnishing: Refrigerate the cheesecake for minimum 4 hours, then adorn with fresh strawberry slices and optional whipped cream before serving.
Notes
- Cocoa Precision: Measure cocoa powder accurately to maintain the signature red velvet color and prevent a bitter taste.
- Moisture Management: Ensure the red velvet base is completely cooled and dry to prevent soggy layers in the final cheesecake.
- Baking Technique: Use partial baking method to create a stable base that won’t crack or separate from the cheesecake layer.
- Color Control: Add food coloring gradually to achieve the perfect vibrant red hue without altering the cake’s delicate texture.
- Prep Time: 20 minutes
- Cook Time: 1 hour 10 minutes
- Category: Desserts
- Method: Baking
- Cuisine: American
Nutrition
- Serving Size: 9
- Calories: 360
- Sugar: 30 g
- Sodium: 250 mg
- Fat: 22 g
- Saturated Fat: 7 g
- Unsaturated Fat: 15 g
- Trans Fat: 0 g
- Carbohydrates: 36 g
- Fiber: 1 g
- Protein: 6 g
- Cholesterol: 50 mg
Jenna Hartley
Founder & Recipe Creator
Expertise
Education
Box Hill Institute, Melbourne
William Angliss Institute, Melbourne
Jenna is the heart of Picture Perfect Meals, turning simple ingredients into beautiful, easy‑to‑make dishes.
Growing up around family meals in Melbourne, she trained at Box Hill Institute and then perfected her pastry skills at William Angliss Institute. She loves mixing classic Australian flavors with fresh ideas to keep cooking fun and stress‑free.