Sweet Mini Creme Brulee Cheesecakes Recipe

Heavenly Sweet Mini Creme Brulee Cheesecakes Recipe for Beginners

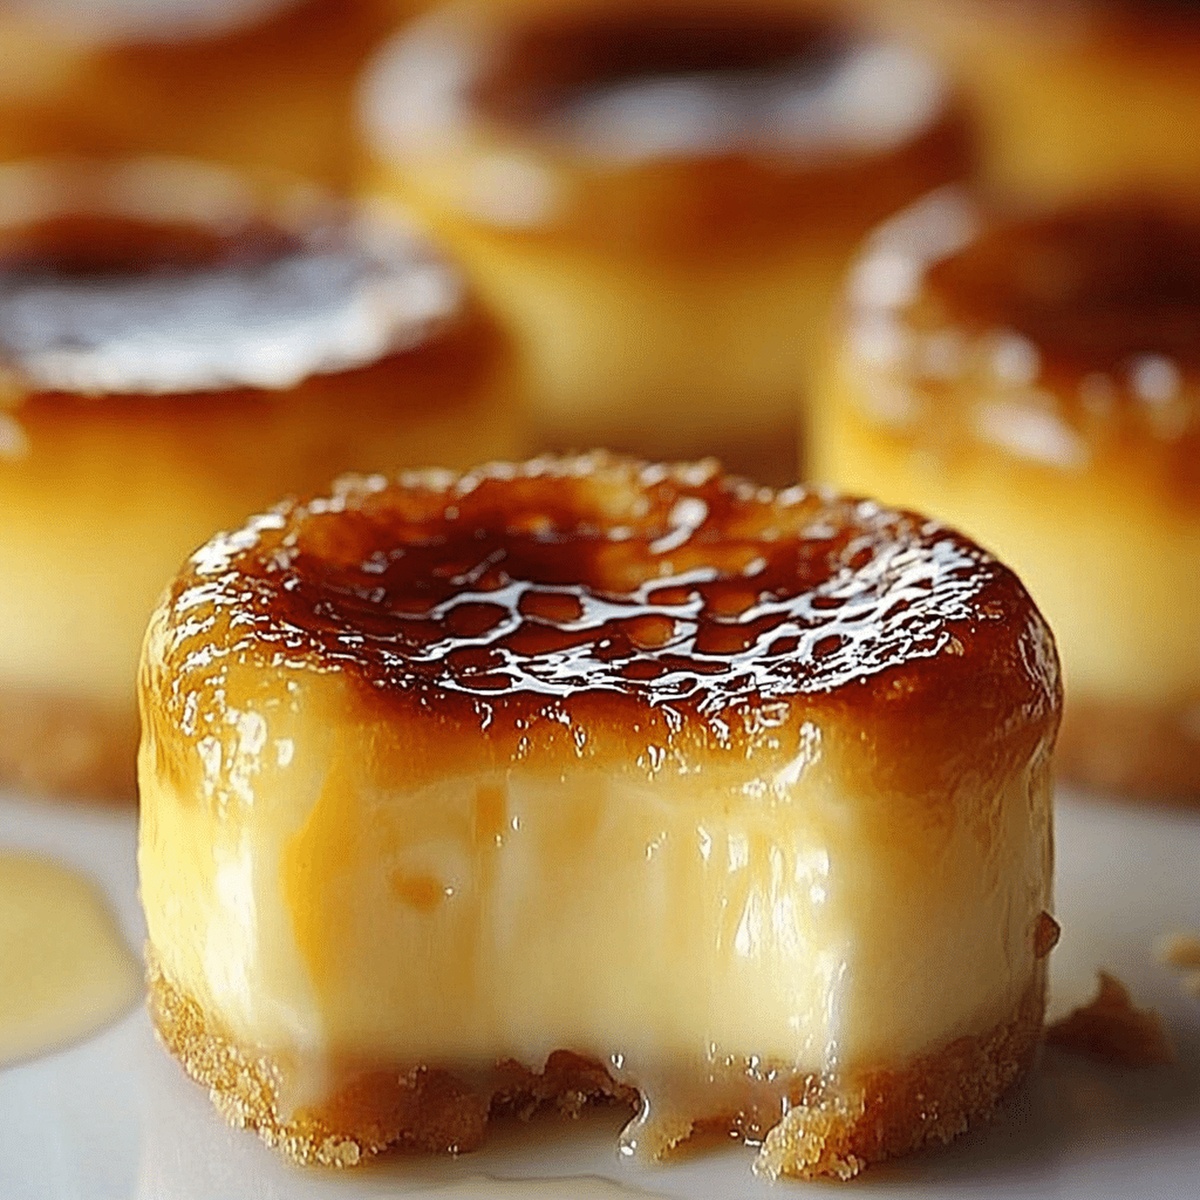
Creamy cheesecake meets classic French dessert in these delightful mini creme brulee cheesecakes that dance with rich, smooth flavors.

Every bite promises a luxurious experience packed with velvety texture and caramelized sugar crunch.

These petite treats blend the best of two beloved desserts into one irresistible package.

The delicate balance of cream cheese and custard creates a mouthwatering sensation that will elevate any gathering.

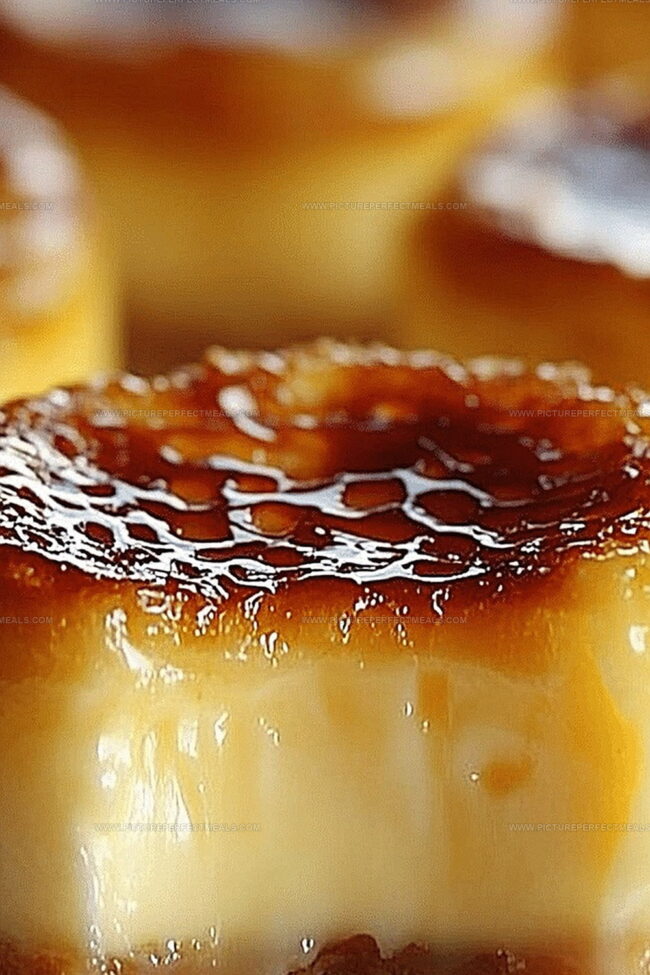
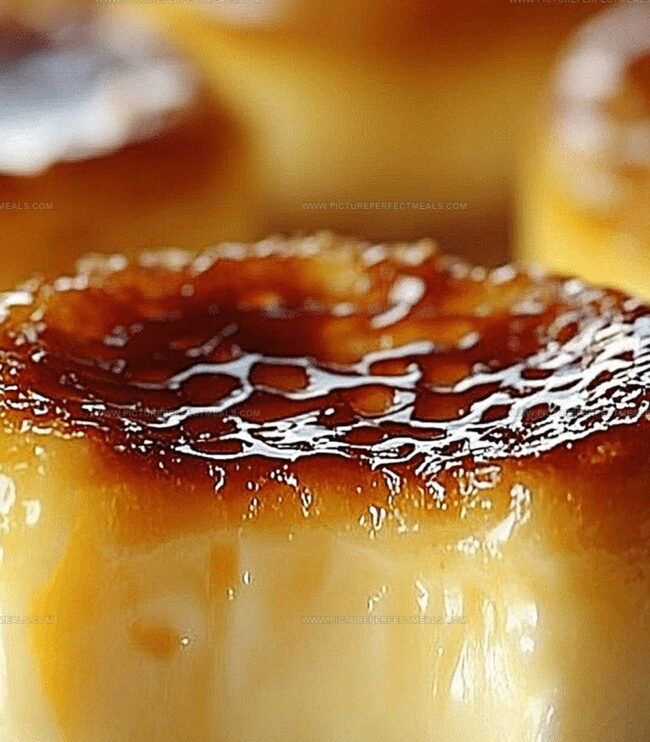
Silky smooth filling nestles beneath a perfectly crackling caramelized top, delivering a sensory experience that’s both elegant and indulgent.

Each mini cheesecake brings a touch of gourmet magic to your dessert repertoire.

Prepare to enchant your taste buds with this exquisite sweet masterpiece that’s sure to impress.

Quick Recipe Overview

Prep Time: 20 minutes

Cook Time: 25 minutes

Total Time: 45 minutes

Calories: 335 kcal

Servings: 6

Mini Creme Brulee Cheesecakes Ingredient List

For Crust:
  • Graham Cracker Crumbs: Provides a classic, crunchy base with sweet, graham flavor that complements the creamy cheesecake.
  • Sugar: Enhances the sweetness and helps bind the crust ingredients together.
  • Unsalted Butter: Melts and acts as a binding agent, creating a firm and cohesive crust texture.
For Cheesecake Filling:
  • Cream Cheese: Delivers a rich, smooth, and tangy foundation for the cheesecake's luxurious texture.
  • Sugar: Balances the tanginess of cream cheese and adds sweetness to the filling.
  • Eggs: Provide structure, richness, and help the cheesecake set during baking.
  • Vanilla Extract: Adds depth and warmth, enhancing the overall flavor profile.
  • Heavy Cream: Creates a silky, velvety consistency and adds extra richness.
  • Salt: Subtly amplifies and rounds out the other flavors in the filling.
For Caramelized Topping:
  • Granulated Sugar: Creates a crisp, golden, and crackling top layer that adds textural contrast to the creamy cheesecake.

Tools for Baking and Torching Mini Creme Brulee Cheesecakes

  • Muffin Tin: 12-cup standard size for perfect mini cheesecakes.
  • Paper Liners: Ensures easy removal and clean presentation.
  • Electric Mixer: Essential for beating cream cheese until smooth and creamy.
  • Large Mixing Bowl: Needed for preparing cream cheese filling.
  • Spoon or Small Glass: Used to flatten graham cracker crust.
  • Kitchen Torch: Critical for caramelizing sugar topping to golden brown crisp.
  • Measuring Cups and Spoons: Helps accurately measure ingredients.

How to Bake Mini Cheesecakes with That Crème Brulee Touch

  • Craft the Crunchy Base

Press graham cracker mixture firmly into muffin liners, creating a solid foundation for your mini desserts. Bake briefly to set the base and enhance its texture.

  • Whip the Creamy Filling

Blend cream cheese and sugar until silky smooth. Gently incorporate eggs, vanilla, cream, and salt, creating a luxurious cheesecake mixture that promises decadence.

  • Bake to Perfection

Pour filling into prepared crusts, filling almost to the top. Bake until centers are delicately set with a subtle jiggle, signaling the ideal consistency.

  • Chill and Rest

Allow cheesecakes to cool at room temperature, then refrigerate for several hours. This crucial step ensures a firm, creamy texture that melts in your mouth.

  • Torch the Topping

Remove cheesecakes from liners and sprinkle sugar across the surface. Use a kitchen torch to transform the sugar into a gleaming, crackling caramel crust that adds dramatic flair and irresistible crunch.

  • Serve and Enjoy

Let the caramelized sugar cool briefly, then present these mini masterpieces. Each bite promises a perfect balance of creamy cheesecake and crisp caramel topping.

Sweet Additions to Make Them Unforgettable

  • Make-Ahead Magic: Prepare these mini cheesecakes up to 3 days in advance and store them in an airtight container in the refrigerator. Add the caramelized sugar topping just before serving to maintain that perfect crispy texture.
  • Smooth Cheesecake Secret: Always use room temperature cream cheese and eggs to ensure a perfectly smooth, lump-free filling. Let ingredients sit out for about 30 minutes before starting the recipe.
  • Torch-Free Alternative: No kitchen torch? No problem! Place the sugar-topped cheesecakes under the broiler for 2-3 minutes, watching carefully to prevent burning. Keep the oven rack about 4-5 inches from the heat source.
  • Dietary Twist: For a gluten-free version, swap graham cracker crumbs with gluten-free cookie crumbs or crushed almond flour. To make it lighter, use low-fat cream cheese and replace heavy cream with Greek yogurt for a slightly tangier taste.
  • Flavor Fun: Experiment with different flavor additions like a drop of orange zest, a splash of coffee liqueur, or a sprinkle of cinnamon in the cheesecake batter to create unique variations that will surprise and delight your guests.

Serve These Mini Cheesecakes as a Classy Treat

  • Elegant Dessert Plating: Arrange mini cheesecakes on a slate or marble serving board with fresh berries scattered around, creating a stunning visual presentation that highlights their delicate size and caramelized sugar topping.
  • Berry Bliss Pairing: Complement the rich, creamy cheesecakes with a small side of raspberry or strawberry coulis, offering a tangy contrast that cuts through the dessert's decadent sweetness and adds a vibrant color splash.
  • Garnish Glow-Up: Top each mini cheesecake with a delicate mint leaf or a sprinkle of edible gold dust to elevate the dessert's sophistication and create an Instagram-worthy moment that guests will adore.
  • Wine & Dessert Harmony: Serve alongside a chilled glass of Sauternes or a late-harvest Riesling, whose subtle sweetness and crisp acidity perfectly balance the creamy texture and caramelized sugar crust of the mini cheesecakes.

Store and Chill Without Losing That Crackly Top

  • Chilled Storage Strategy: Refrigerate these mini cheesecakes in an airtight container for up to 4 days, keeping them fresh and delicious. Separate layers with parchment paper to prevent sticking.
  • Freezing Technique: Wrap each cheesecake individually in plastic wrap, then place in a freezer-safe container. They'll stay perfect for 2-3 months without losing texture or flavor.
  • Serving Temperature Tip: Remove cheesecakes from the refrigerator 15-20 minutes before enjoying, allowing them to soften slightly and enhance their creamy texture.
  • Topping Timing: Apply the caramelized sugar layer just before serving to maintain the crisp, golden crunch that makes these mini desserts special.
Print
clock clock iconcutlery cutlery iconflag flag iconfolder folder iconinstagram instagram iconpinterest pinterest iconfacebook facebook iconprint print iconsquares squares iconheart heart iconheart solid heart solid icon
Sweet Mini Creme Brulee Cheesecakes Recipe

Sweet Mini Creme Brulee Cheesecakes Recipe


5 Stars 4 Stars 3 Stars 2 Stars 1 Star

4.9 from 17 reviews

  • Total Time: 45 minutes
  • Yield: 7 1x

Description

Mini creme brulee cheesecakes blend classic French dessert elegance with creamy New York cheesecake tradition. Caramelized sugar tops delicate cream cheese filling, offering sweet satisfaction for discerning palates.


Ingredients

Scale
  • 12 oz (340 g) cream cheese, softened
  • 2 large eggs
  • 1 cup (240 ml) graham cracker crumbs
  • ⅓ cup (67 g) granulated sugar
  • 4 tbsps (50 g) granulated sugar
  • 2 tbsps (30 g) granulated sugar
  • ¼ cup (60 ml) heavy cream
  • 4 tbsps (56 g) unsalted butter, melted
  • 1 tsp vanilla extract
  • 1 pinch of salt

Instructions

  1. Prepare Base: Mix graham cracker crumbs, sugar, and melted butter until sandy-textured, then distribute evenly across muffin cups, pressing firmly to create a compact foundation. Briefly toast in preheated oven at 350°F until set, then cool completely.
  2. Create Filling: Whip cream cheese and sugar using an electric mixer until silky smooth. Integrate eggs individually, ensuring complete incorporation after each addition. Fold in vanilla extract, heavy cream, and salt until uniformly blended.
  3. Bake Cheesecakes: Pour filling into prepared crusts, nearly reaching the top. Bake in preheated oven until centers appear set but retain a subtle jiggle when gently nudged. Remove and cool at room temperature for 30 minutes.
  4. Chill and Set: Transfer cheesecakes to refrigerator and allow to firm completely for several hours. Once chilled, carefully extract from paper liners and arrange on heat-resistant surface.
  5. Caramelize Topping: Sprinkle a delicate, even layer of sugar across each cheesecake’s surface. Using a kitchen torch, caramelize sugar until achieving a golden, crisp veneer. Allow caramelized topping to cool momentarily before serving.

Notes

  • Prevent Cracking Technique: Avoid overmixing cheesecake batter and gently fold ingredients to maintain a smooth, crack-free texture.
  • Temperature Control: Allow cream cheese to reach room temperature before mixing to ensure a silky, lump-free filling.
  • Precise Baking Approach: Watch for a slight jiggle in the center when baking; this indicates perfectly cooked cheesecakes that will set during cooling.
  • Torch Caramelization Tip: Move the kitchen torch constantly while creating the brulee top to prevent burning and achieve an even golden-brown caramelization.
  • Prep Time: 20 minutes
  • Cook Time: 25 minutes
  • Category: Desserts
  • Method: Baking
  • Cuisine: French

Nutrition

  • Serving Size: 7
  • Calories: 310
  • Sugar: 22 g
  • Sodium: 150 mg
  • Fat: 23 g
  • Saturated Fat: 13 g
  • Unsaturated Fat: 9 g
  • Trans Fat: 0 g
  • Carbohydrates: 25 g
  • Fiber: 1 g
  • Protein: 5 g
  • Cholesterol: 85 mg
Jenna Hartley

Jenna Hartley

Founder & Recipe Creator

Expertise

  • Recipe development with a focus on single-dish meals.
  • Fusion of traditional and modern Australian cuisines.
  • Food styling and photography for digital platforms.​

Education

Box Hill Institute, Melbourne

  • Degree: Advanced Diploma of Hospitality Management
  • Focus: Specialized in practical food and beverage service, responsible alcohol and hygiene compliance, legal risk management, and hands‑on experience in a simulated restaurant environment.

William Angliss Institute, Melbourne

  • Program: Certificate IV in Patisserie
  • Focus: Specialized in pastry and bakery techniques, cookery and specialty food preparation, recipe planning and costing, commercial kitchen operations, sustainable and inclusive work practices, food safety and hygiene compliance, and workplace health and safety.

Jenna is the heart of Picture Perfect Meals, turning simple ingredients into beautiful, easy‑to‑make dishes. 

Growing up around family meals in Melbourne, she trained at Box Hill Institute and then perfected her pastry skills at William Angliss Institute. She loves mixing classic Australian flavors with fresh ideas to keep cooking fun and stress‑free.

Leave a Reply

Your email address will not be published. Required fields are marked *

Recipe rating 5 Stars 4 Stars 3 Stars 2 Stars 1 Star