Delightful Sweet Sugar Cookie Cups Recipe for Happy Bakers
Baking delightful sugar cookie cups promises a magical culinary adventure that will sweeten any gathering.
These delectable treats combine the classic comfort of homemade sugar cookies with an irresistible twist.
Crisp edges and soft centers create a perfect texture that melts in your mouth.
Each bite delivers a burst of sugary goodness that dance across your palate.
The simple ingredients come together effortlessly, making these cookie cups a breeze to prepare.
Decorated with colorful frosting or filled with creamy surprises, these cookie cups will become your new favorite dessert.
Serve them at parties, share with friends, or savor them as a personal indulgence that sparks pure joy.
Quick Recipe Overview
Pantry Staples for Sugar Cookie Cups
For Dough Base:For Dry Ingredients:For Optional Fillings and Decorations:Tools to Create Sugar Cookie Cups
Sugar Cookie Cup Directions
Crank your oven to a toasty 350F and give your mini muffin tin a quick spray of cooking oil.
Blend butter and sugar until they become a fluffy cloud. Splash in egg and vanilla, stirring until silky smooth. Gently fold in flour, baking powder, and salt until a soft dough emerges.
Roll dough into cute little balls, nestling one in each muffin cup. Use your finger or a spoon to press a cozy indent in the center, forming adorable tiny cups.
Slide the tin into the oven for 10-12 minutes until edges turn a gorgeous golden brown. Right after pulling them out, press centers again to ensure perfect cup shapes. Let them chill in the tin for a quick 5 minutes before moving to a cooling rack.
Once completely cool, go wild filling these delightful cups! Swirl in frosting, drizzle ganache, or dollop fruit preserves. Sprinkle with fun toppings like mini chocolate chips or colorful sprinkles.
Serve immediately or keep in a sealed container for later munching. Watch everyone’s eyes light up when they see these adorable treats!
Tips to Elevate Sugar Cookie Cups
Serving Sugar Cookie Cups in Style
Smart Storage for Sugar Cookie Cups
Print
Sweet Sugar Cookie Cups Recipe
- Total Time: 27 minutes
- Yield: 13 1x
Description
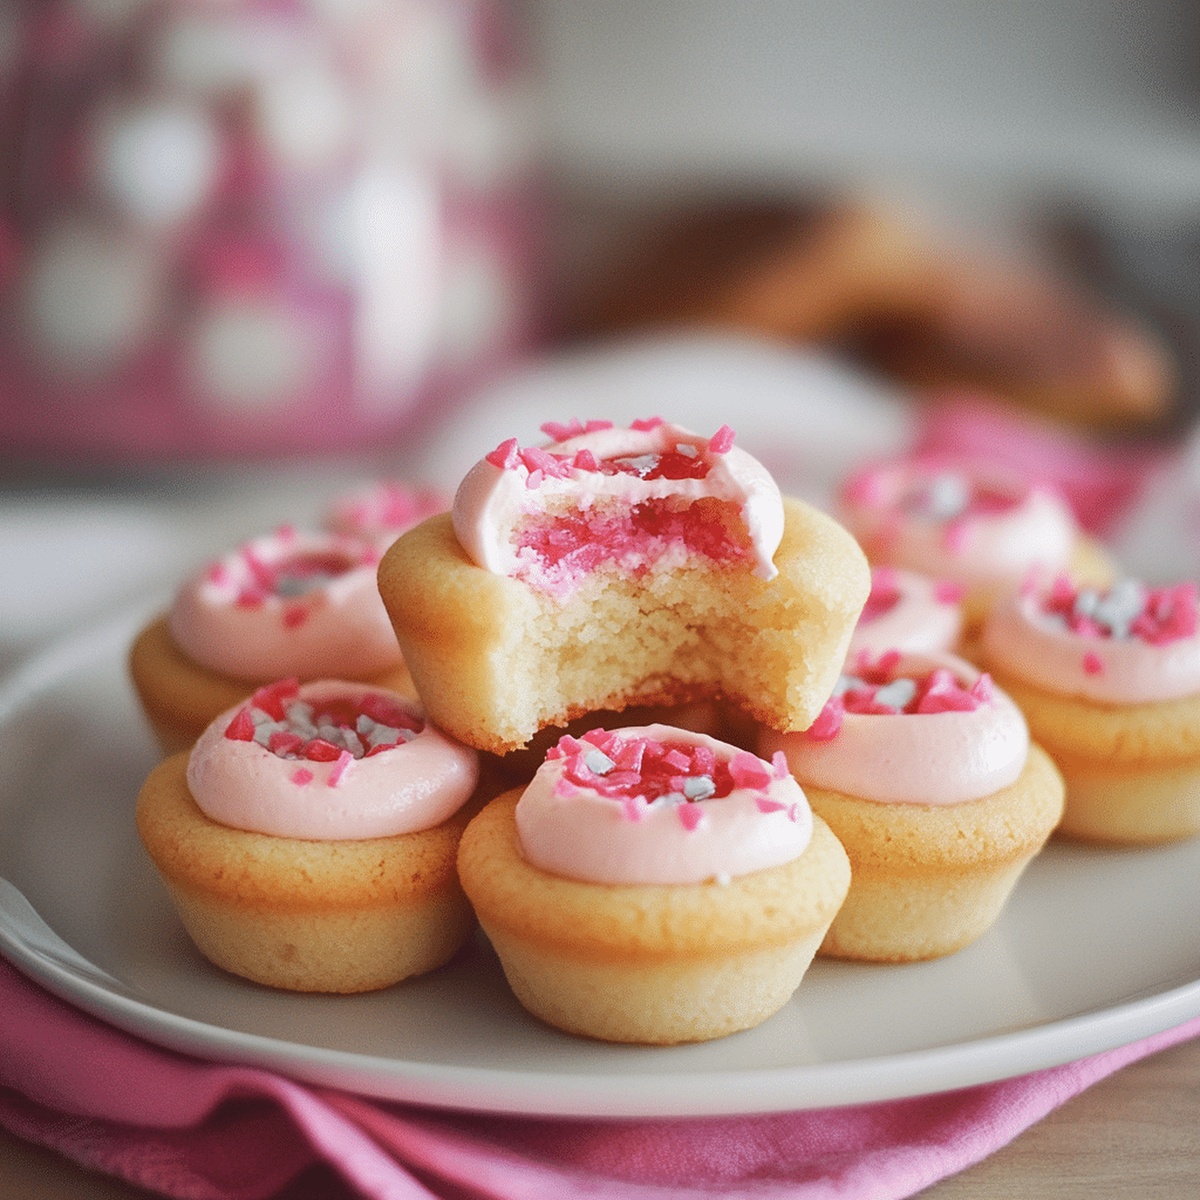
Delightful sugar cookie cups bring a whimsical twist to classic desserts, offering a perfect handheld treat. Creamy fillings nestled in crisp cookie shells provide a delectable combination that will tempt dessert enthusiasts to indulge.
Ingredients
- 1.5 cups (360 ml) all-purpose flour
- ¾ cup (170 g) granulated sugar
- ½ cup (113 g/1 stick) unsalted butter, softened
- 1 large egg
- 1 tsp vanilla extract
- ½ tsp baking powder
- ¼ tsp salt
- ½ cup frosting (store-bought or homemade)
- Sprinkles
- Mini chocolate chips
- Fresh fruit
- Chocolate ganache
- Fruit preserves
- Whipped cream
Instructions
- Preparation: Warm the oven to 350°F (175°C) and generously spray a mini muffin tin with non-stick coating to guarantee smooth cookie extraction.
- Mixing Base: Vigorously cream butter and sugar until the mixture achieves a light, fluffy consistency with soft, billowing peaks, creating a luxurious foundation.
- Liquid Integration: Whisk egg and vanilla extract into the butter mixture, blending seamlessly to develop a smooth, homogeneous texture.
- Dry Ingredient Fusion: Sift flour, baking powder, and salt together, ensuring a lump-free mixture that will distribute evenly throughout the dough.
- Dough Formation: Gently fold dry ingredients into the wet mixture, creating a tender, cohesive dough with minimal manipulation to maintain delicate texture.
- Shaping Process: Roll dough into uniform 1-inch spheres, nestling one ball into each muffin cavity, then delicately press the center to create a signature cup-like indentation.
- Baking Transformation: Slide the muffin tin into the preheated oven, baking for 10-12 minutes until edges turn a delicate golden brown, signaling perfect doneness.
- Cooling and Refinement: Immediately upon removal, gently re-press centers to reinforce the cup shape while cookies remain warm and pliable, then allow to rest in the tin for 5 minutes.
- Final Touches: Transfer cookie cups to a wire rack to cool completely, then embellish with preferred fillings like velvety frosting, decadent ganache, or vibrant fruit preserves.
- Presentation and Serving: Garnish with decorative elements such as sprinkles, chocolate chips, or fresh fruits, and serve immediately or store in an airtight container to maintain optimal texture and flavor.
Notes
- Create Smooth Dough: Avoid overmixing when combining wet and dry ingredients to prevent tough, dense cookie cups with a rubbery texture.
- Prevent Sticking: Use high-quality non-stick spray or generously grease the mini muffin tin to guarantee effortless cookie removal without breaking.
- Perfect Cup Shape: Press the center of dough balls gently but firmly immediately after baking while cookies are still warm to maintain a clean, defined indentation.
- Temperature Control: Allow cookie cups to cool completely before adding fillings to prevent melting and maintain structural integrity of the delicate pastry shell.
- Prep Time: 15 minutes
- Cook Time: 12 minutes
- Category: Desserts, Snacks
- Method: Baking
- Cuisine: American
Nutrition
- Serving Size: 13
- Calories: 180
- Sugar: 14 g
- Sodium: 90 mg
- Fat: 8 g
- Saturated Fat: 5 g
- Unsaturated Fat: 3 g
- Trans Fat: 0 g
- Carbohydrates: 25 g
- Fiber: 0 g
- Protein: 2 g
- Cholesterol: 30 mg
Jenna Hartley
Founder & Recipe Creator
Expertise
Education
Box Hill Institute, Melbourne
William Angliss Institute, Melbourne
Jenna is the heart of Picture Perfect Meals, turning simple ingredients into beautiful, easy‑to‑make dishes.
Growing up around family meals in Melbourne, she trained at Box Hill Institute and then perfected her pastry skills at William Angliss Institute. She loves mixing classic Australian flavors with fresh ideas to keep cooking fun and stress‑free.