
Soft & Dreamy Velvety Red Valentines Cinnamon Rolls Recipe
Warm, gooey, and decadent red velvet cinnamon rolls dance with romantic charm, promising an irresistible valentines dessert that melts hearts.
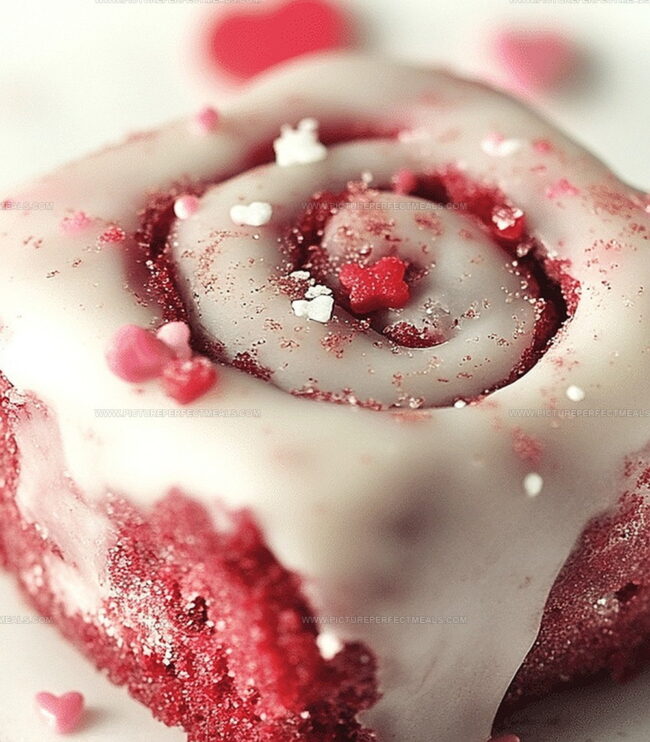
These soft spirals blend rich cocoa and deep crimson hues into a dreamy pastry experience.
Swirls of cream cheese frosting cascade over each tender roll, creating a luxurious treat perfect for celebrating love.
Delicate and indulgent, these rolls transform breakfast into a passionate culinary moment.
Baking these rolls fills your kitchen with an intoxicating aroma of cinnamon and sweet romance.
Every bite promises a tender, moist sensation that celebrates the essence of Valentine’s Day.
You’ll fall in love with this show-stopping dessert that turns an ordinary morning into an extraordinary celebration of affection.
Quick Recipe Overview

Red Velvet Roll Ingredients Checklist
For Dough Ingredients:For Filling Ingredients:For Frosting Ingredients:Kitchen Tools for Red Velvet Cinnamon Rolls
Red Velvet Cinnamon Roll Directions
Create a bubbly yeast mixture by combining warm milk, yeast, and a touch of sugar. Let it sit until it becomes frothy and alive with potential.
Blend together melted butter, egg, and a splash of vibrant red food coloring. Mix in the awakened yeast and gradually incorporate flour, cocoa powder, and salt until a soft, luxurious dough emerges.
Knead the dough until it becomes smooth and elastic. Place it in a cozy, greased bowl and let it rest and rise in a warm spot, growing and transforming for about an hour.
Whip together softened butter, brown sugar, and cinnamon into a dreamy, fragrant mixture that will make hearts melt.
Roll out the risen dough into a tempting rectangle. Lavishly spread the cinnamon filling across the surface. Carefully roll the dough into a beautiful log and slice into delicate rounds.
Nestle the rolls in a baking dish and let them rise once more. Bake in a preheated oven until they turn golden and your kitchen fills with an irresistible aroma.
Whip up a cloud-like cream cheese frosting, spreading it generously over the warm rolls. Serve immediately and watch love bloom with every bite.
Tips & Flavor Ideas for Red Velvet Rolls
How to Plate Red Velvet Rolls
Save & Enjoy Red Velvet Rolls Later
Print
Velvety Red Valentines Cinnamon Rolls Recipe
- Total Time: 2 hours 45 minutes
- Yield: 13 1x
Description
Luxurious red velvet valentines cinnamon rolls combine classic comfort with romantic charm. Sweet cream cheese frosting and rich cocoa notes create a delightful dessert you cannot resist.
Ingredients
- 3 cups (375 grams/13.2 oz) all-purpose flour
- 1 large egg
- 1 cup (240 mL/8 fl oz) whole milk
- 2 ¼ tsps (7 grams) active dry yeast
- ¼ cup (50 grams/1.8 oz) granulated sugar
- ¼ cup (60 grams/2.1 oz) unsalted butter
- 2 tbsps cocoa powder
- 12 tsps red food coloring
- ½ tsp salt
- ½ cup (115 grams/4 oz) unsalted butter
- ¾ cup (150 grams/5.3 oz) brown sugar
- 2 tsps ground cinnamon
- 4 oz (115 grams) cream cheese
- 1 cup (120 grams/4.2 oz) powdered sugar
- 2 tbsps (30 grams/1 oz) unsalted butter
- ½ tsp vanilla extract
- 1 pinch salt
Instructions
- Yeast Activation: Combine warm milk, yeast, and partial sugar in a container, allowing the mixture to foam and become frothy, confirming yeast vitality.
- Wet Mixture Preparation: Blend melted butter, egg, remaining sugar, and red food coloring in a large bowl, thoroughly integrating the activated yeast mixture.
- Dough Formation: Whisk flour, cocoa powder, and salt in a separate bowl, gradually folding dry ingredients into the wet mixture to create a smooth, cohesive dough.
- Dough Development: Knead the dough on a flour-dusted surface or with a stand mixer’s dough hook until achieving a silky, elastic texture, approximately 8-10 minutes.
- First Rise: Place dough in a greased bowl, cover with a cloth, and position in a warm spot until volume doubles, typically 1-1.5 hours.
- Filling Creation: Mix softened butter, brown sugar, and cinnamon until uniformly combined and spreadable.
- Roll Assembly: Roll risen dough into a rectangular shape, evenly distributing cinnamon-sugar filling across the stretched surface.
- Shaping and Portioning: Tightly roll the dough from the long edge into a compact log, slicing into 12 consistent portions.
- Second Rise and Baking Preparation: Arrange rolls in a greased baking dish, covering and allowing a secondary rise for 30-45 minutes until puffy.
- Baking Process: Bake in a preheated oven at 350F (175C) for 20-25 minutes, ensuring a light golden color and complete cooking.
- Frosting Preparation: Whip cream cheese and butter until smooth, incorporating powdered sugar, vanilla extract, and a salt pinch, beating until light and fluffy.
- Final Touch: Generously spread cream cheese frosting over slightly warm rolls, ready to be served and enjoyed.
Notes
- Yeast Activation Tip: Ensure milk temperature is between 100-110°F to prevent killing the yeast; too hot or cold can disrupt fermentation.
- Dough Consistency Hack: Add flour gradually while kneading to achieve a soft, tacky texture without becoming dry or crumbly.
- Color Enhancement Strategy: Use gel food coloring for more vibrant red hue without altering dough’s liquid balance.
- Rising Environment Control: Place dough in a warm, draft-free spot like inside a turned-off oven with a pan of hot water to guarantee optimal proofing conditions.
- Prep Time: 20 minutes (plus 2 hours rising time)
- Cook Time: 25 minutes
- Category: Breakfast, Snacks, Desserts
- Method: Baking
- Cuisine: American
Nutrition
- Serving Size: 13
- Calories: 292
- Sugar: 21 g
- Sodium: 220 mg
- Fat: 15 g
- Saturated Fat: 9 g
- Unsaturated Fat: 4 g
- Trans Fat: 0 g
- Carbohydrates: 36 g
- Fiber: 1 g
- Protein: 3 g
- Cholesterol: 40 mg
Jenna Hartley
Founder & Recipe Creator
Expertise
Education
Box Hill Institute, Melbourne
William Angliss Institute, Melbourne
Jenna is the heart of Picture Perfect Meals, turning simple ingredients into beautiful, easy‑to‑make dishes.
Growing up around family meals in Melbourne, she trained at Box Hill Institute and then perfected her pastry skills at William Angliss Institute. She loves mixing classic Australian flavors with fresh ideas to keep cooking fun and stress‑free.