Velvety Red Velvet Cheesecake Cupcakes Recipe

Dreamy Red Velvet Cheesecake Cupcakes Recipe for Sweet Lovers

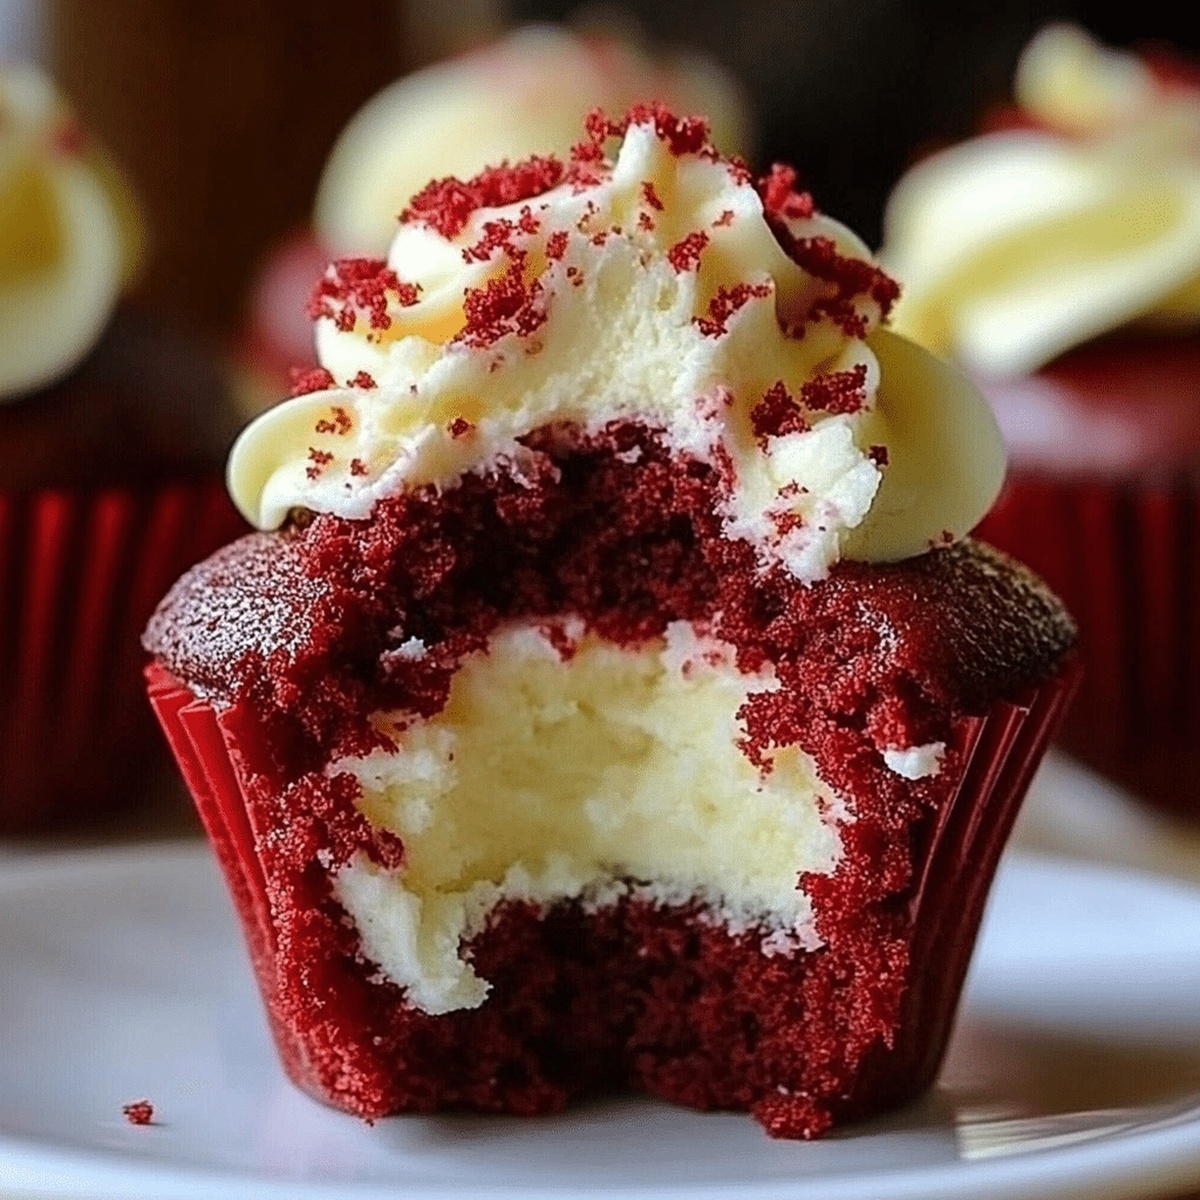
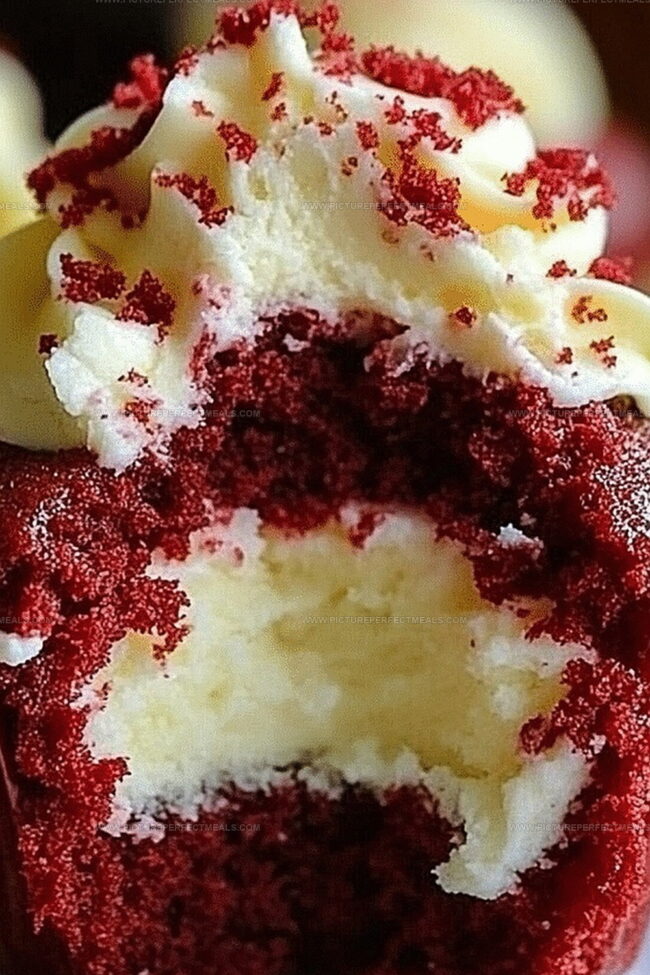
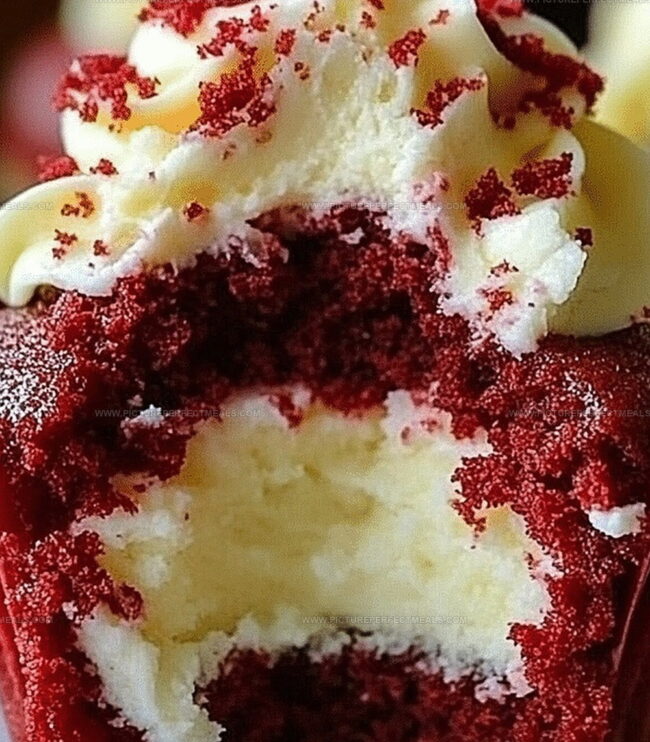
Decadent red velvet cheesecake cupcakes blend the richness of cream cheese with the classic allure of a beloved dessert.

Soft, crimson-hued cakes promise a delightful twist on traditional treats.

The smooth cream cheese filling nestles perfectly within each tender cupcake.

Deep cocoa notes dance alongside velvety cream cheese, creating a harmonious flavor profile.

Delicate swirls of frosting crown these elegant little indulgences.

Chocolate lovers and dessert enthusiasts will absolutely adore these irresistible cupcakes that elevate any gathering or quiet moment of sweet pleasure.

Prepare to fall in love with every luxurious bite.

How to Bake and Frost These Pretty Cupcakes

  • Fire Up the Oven and Get Ready

Blast your oven to a toasty 350°F and tuck cupcake liners into every spot of your muffin tin. This sets the stage for some seriously delicious red velvet magic.

  • Whip Together the Cake Batter

In a big mixing bowl, dance those dry ingredients together – flour, cocoa powder, and a pinch of magic. In another bowl, get romantic with your wet ingredients, blending butter, sugar, eggs, and vanilla until they’re super smooth and happy.

  • Create the Cheesecake Swirl

Grab your cream cheese and beat it into silky submission with sugar and egg. This dreamy mixture will become the heart of your cupcake’s soul.

  • Marry the Batters

Gently fold your red velvet batter into the muffin cups, then dollop that creamy cheesecake right in the center. Swirl them together like dancers, creating beautiful marbled patterns.

  • Bake to Perfection

Slide your cupcake tin into the preheated oven and let them transform for about 18-22 minutes. They’re done when a toothpick comes out with just a few moist crumbs.

  • Cool and Dress Up

Let your cupcakes chill completely, then crown them with a luxurious cream cheese frosting. Each bite will be a celebration of flavor and texture.

Tips to Keep the Red Velvet Soft and Rich

  • Cream Cheese Softening Trick: Let cream cheese sit at room temperature for 30-45 minutes before mixing to ensure smooth, lump-free batter and easier blending.
  • Vibrant Color Secret: Use gel food coloring instead of liquid for a more intense red color without altering the batter's consistency.
  • Make-Ahead Magic: Prepare cupcake batter and refrigerate up to 24 hours in advance to develop richer flavors and save time on baking day.
  • Gluten-Free Option: Swap all-purpose flour with a gluten-free 1:1 baking blend to make these cupcakes accessible for those with gluten sensitivities.
  • Freezer-Friendly Treat: Store unfrosted cupcakes in an airtight container for up to 3 months, thawing at room temperature and adding cream cheese frosting just before serving.

How to Present These at Parties

  • Delightful Dessert Pairing: Serve these red velvet cheesecake cupcakes alongside a cold glass of milk or creamy vanilla latte for a perfect sweet complement.
  • Elegant Party Presentation: Arrange cupcakes on a tiered cake stand with fresh strawberries or edible rose petals for a stunning dessert table centerpiece.
  • Festive Topping Adventure: Sprinkle additional cream cheese frosting with red velvet cake crumbs or mini chocolate shavings to enhance visual appeal and add extra texture.
  • Seasonal Garnish Flair: Decorate with seasonal berries like raspberries or edible flowers during summer, or crushed candy canes during winter holidays for a festive touch.

Storage That Maintains Moisture and Form

  • Smart Fridge Storage: Keep these delightful red velvet cheesecake cupcakes in an airtight container in the refrigerator for up to 4 days. They'll maintain their creamy texture and vibrant color when sealed properly.
  • Quick Freezing Method: Layer cupcakes between sheets of parchment paper in a freezer-safe container. Freeze for up to 3 weeks, ensuring maximum freshness and easy grab-and-go treats.
  • Room Temperature Tip: Allow refrigerated cupcakes to sit at room temperature for 15-20 minutes before serving to restore their soft, luxurious texture and enhance flavor profiles.
  • Make-Ahead Magic: Prepare cupcake batter and cream cheese filling up to 24 hours in advance. Store separately in sealed containers in the refrigerator, then assemble and bake when ready to enjoy.

Quick Recipe Overview

Prep Time: 15 minutes

Cook Time: 20 minutes

Total Time: 35 minutes

Calories: 320 kcal

Servings: 12

Red Velvet Cheesecake Cupcake Ingredients

For Cake Base:
  • All-Purpose Flour: Provides delicate structure and soft texture for cupcake foundation.
  • Unsweetened Cocoa Powder: Delivers rich, deep chocolate undertones and classic red velvet color depth.
  • Baking Soda: Helps cupcakes rise and creates light, airy crumb.
  • Salt: Enhances overall flavor complexity and balances sweetness.
For Wet Ingredients:
  • Vegetable Oil: Ensures moisture and tender crumb, preventing dry cupcakes.
  • Buttermilk: Creates tangy flavor and helps activate baking soda for better rise.
  • Large Eggs: Binds ingredients together and provides structure.
  • Vanilla Extract: Adds warm, aromatic background note to enhance overall flavor.
  • White Vinegar: Contributes to signature red velvet tanginess and helps activate baking soda.
  • Red Food Coloring: Creates signature vibrant red hue characteristic of red velvet desserts.
For Cheesecake Filling:
  • Cream Cheese: Delivers creamy, rich filling with smooth texture.
  • Granulated Sugar: Sweetens cheesecake layer and balances tangy cream cheese.
  • Large Egg: Helps set and stabilize cheesecake filling.
  • Vanilla Extract: Adds subtle depth to cheesecake component.

Tools for a Swirl of Cream Cheese in Every Cup

  • Muffin Tin: Standard 12-cup pan for perfectly portioned cupcakes.
  • Cupcake Liners: Prevents sticking and makes serving easier.
  • Electric Mixer: Essential for beating cream cheese and mixing batters smoothly.
  • Large Mixing Bowls: One for dry ingredients, another for wet ingredients.
  • Measuring Cups and Spoons: Precise measurements ensure perfect texture.
  • Whisk: Great for combining dry ingredients evenly.
  • Rubber Spatula: Helps scrape batter from sides of bowl and fold ingredients gently.
  • Piping Bag (Optional): Creates professional-looking frosting swirls.
  • Cooling Rack: Allows cupcakes to cool evenly without getting soggy.
Print
clock clock iconcutlery cutlery iconflag flag iconfolder folder iconinstagram instagram iconpinterest pinterest iconfacebook facebook iconprint print iconsquares squares iconheart heart iconheart solid heart solid icon
Velvety Red Velvet Cheesecake Cupcakes Recipe

Velvety Red Velvet Cheesecake Cupcakes Recipe


5 Stars 4 Stars 3 Stars 2 Stars 1 Star

4.7 from 27 reviews

  • Total Time: 35 minutes
  • Yield: 13 1x

Description

Indulgent red velvet cheesecake cupcakes blend classic Southern charm with creamy cheesecake layers. Rich cocoa notes and tangy cream cheese create a luxurious dessert sensation you’ll adore.


Ingredients

Scale
  • 1 ¼ cups (156 g) all-purpose flour
  • 1 tbsp (7 g) cocoa powder
  • ½ tsp baking soda
  • ¼ tsp salt
  • ½ cup (120 ml/4 fl oz) vegetable oil
  • ¾ cup (150 g) granulated sugar
  • 1 large egg
  • ½ cup (120 ml/4 fl oz) buttermilk
  • 1 tsp vanilla extract
  • 1 tsp white vinegar
  • 1 tbsp red food coloring
  • 8 oz (226 g) cream cheese, softened
  • ¼ cup (50 g) granulated sugar
  • 1 egg yolk
  • ½ tsp vanilla extract
  • 8 oz (226 g) cream cheese, softened
  • 4 tbsps (57 g) unsalted butter, softened
  • 1 cup (120 g) powdered sugar
  • 1 tsp vanilla extract

Instructions

  1. Preparation: Nestle cupcake liners into a standard muffin tin, creating a uniform grid for the indulgent red velvet cheesecake cupcakes.
  2. Temperature Setup: Calibrate the oven to 350°F (175°C), allowing ample time for thorough preheating.
  3. Batter Fusion: Whisk red velvet cake ingredients until a silky, crimson-hued mixture forms, eliminating any potential lumps or dry pockets.
  4. Cheesecake Filling: Blend cream cheese mixture until velvety smooth, ensuring a luxurious and consistent texture throughout.
  5. Layer Construction: Distribute red velvet batter to form the base layer, then delicately introduce the cream cheese filling at the center of each cupcake liner.
  6. Marbling Technique: Gently top the cream cheese with remaining red velvet batter, creating an artistic swirl and completely encasing the filling.
  7. Baking Process: Position the muffin tin centrally in the oven, baking for 18-22 minutes until the cupcakes exhibit a subtle springback and the cheesecake center sets perfectly.
  8. Cooling Stage: Allow cupcakes to rest completely in the tin, then transfer to a wire rack for final cooling and optional elegant garnishing with cream cheese frosting or a delicate powdered sugar dusting.

Notes

  • Optimize Batter Consistency: Sift dry ingredients and mix wet components thoroughly to prevent lumps, ensuring a smooth, even texture that enhances the cupcake’s delicate structure.
  • Control Color Intensity: Use gel food coloring instead of liquid for a more vibrant red hue without altering the batter’s moisture balance, creating a rich, deep crimson appearance.
  • Prevent Cheesecake Cracking: Avoid overmixing the cream cheese filling and gently fold ingredients to minimize air bubbles, resulting in a silky, crack-free cheesecake center.
  • Master Baking Precision: Use an instant-read thermometer to check doneness, aiming for an internal temperature of 160°F to guarantee food safety while maintaining a moist, tender crumb.
  • Prep Time: 15 minutes
  • Cook Time: 20 minutes
  • Category: Desserts, Snacks
  • Method: Baking
  • Cuisine: American

Nutrition

  • Serving Size: 13
  • Calories: 320
  • Sugar: 27 g
  • Sodium: 250 mg
  • Fat: 18 g
  • Saturated Fat: 10 g
  • Unsaturated Fat: 8 g
  • Trans Fat: 0 g
  • Carbohydrates: 36 g
  • Fiber: 0.5 g
  • Protein: 4 g
  • Cholesterol: 60 mg
Jenna Hartley

Jenna Hartley

Founder & Recipe Creator

Expertise

  • Recipe development with a focus on single-dish meals.
  • Fusion of traditional and modern Australian cuisines.
  • Food styling and photography for digital platforms.​

Education

Box Hill Institute, Melbourne

  • Degree: Advanced Diploma of Hospitality Management
  • Focus: Specialized in practical food and beverage service, responsible alcohol and hygiene compliance, legal risk management, and hands‑on experience in a simulated restaurant environment.

William Angliss Institute, Melbourne

  • Program: Certificate IV in Patisserie
  • Focus: Specialized in pastry and bakery techniques, cookery and specialty food preparation, recipe planning and costing, commercial kitchen operations, sustainable and inclusive work practices, food safety and hygiene compliance, and workplace health and safety.

Jenna is the heart of Picture Perfect Meals, turning simple ingredients into beautiful, easy‑to‑make dishes. 

Growing up around family meals in Melbourne, she trained at Box Hill Institute and then perfected her pastry skills at William Angliss Institute. She loves mixing classic Australian flavors with fresh ideas to keep cooking fun and stress‑free.

Leave a Reply

Your email address will not be published. Required fields are marked *

Recipe rating 5 Stars 4 Stars 3 Stars 2 Stars 1 Star