
Dreamy Red Velvet Cookies with Cream Cheese Frosting Recipe
Soft, decadent red velvet cookies with cream cheese frosting dance between indulgence and pure comfort.
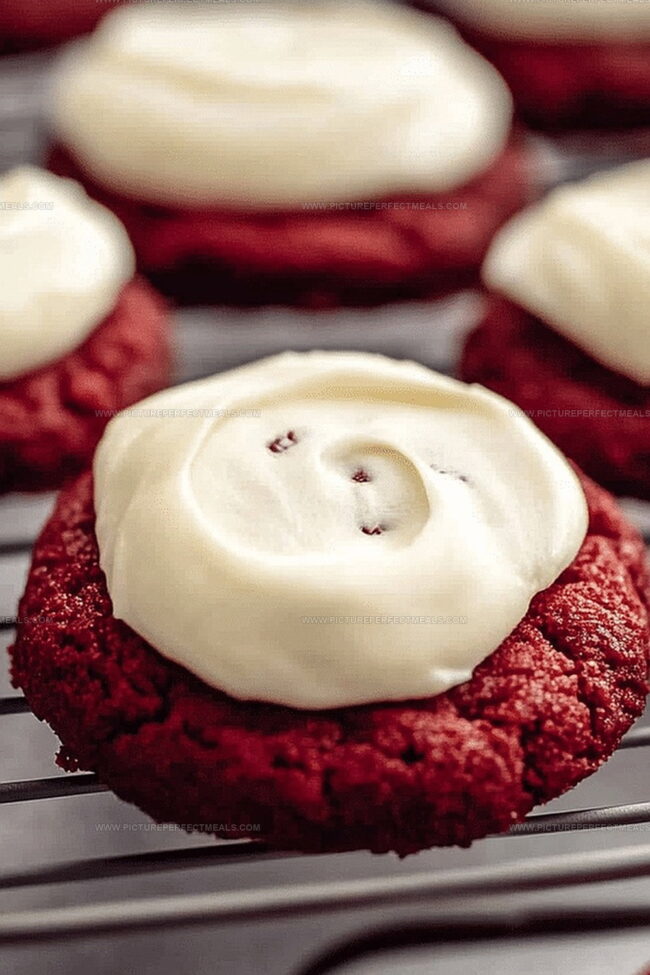
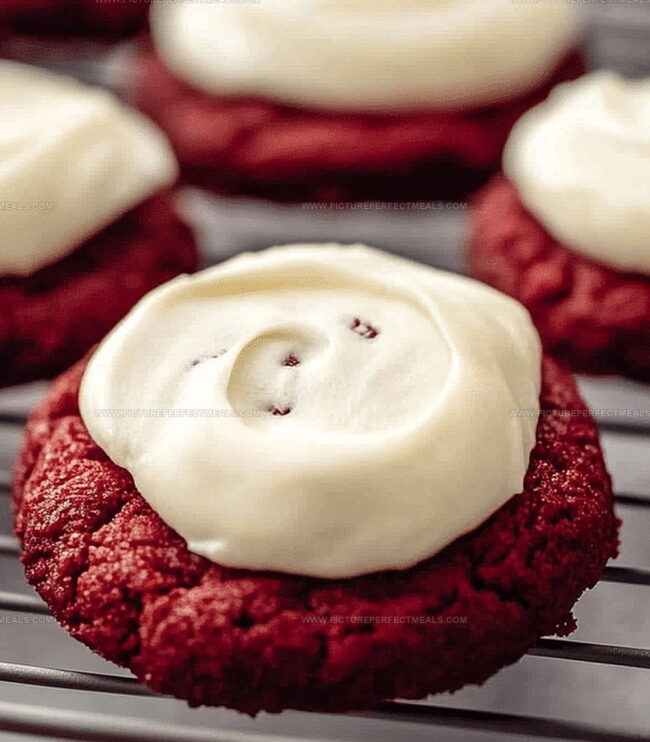
These vibrant cookies carry a rich crimson hue that catches every eye at the table.
Deep cocoa notes mingle with a subtle tanginess that makes each bite irresistible.
The cream cheese frosting adds a luxurious, silky layer of sweetness that perfectly complements the cookie’s velvety texture.
Bakers of all skill levels can master this delightful treat with simple ingredients and straightforward steps.
Prepare to wow friends and family with these show-stopping cookies that promise to become an instant favorite.
Your dessert game just reached a whole new level of deliciousness.
Quick Recipe Overview
Ingredients for Red Velvet Cookies with Cream Cheese Frosting
For Dough Base:For Wet Ingredients:For Cream Cheese Frosting:Tools to Bake Red Velvet Cookies with Frosting
How to Make Red Velvet Cookies with Frosting
Mix softened butter with sugars until they become airy and light. Splash in eggs one by one, stirring thoroughly. Drizzle red food coloring and vanilla for a vibrant, sweet touch. In another bowl, blend flour, cocoa, baking soda, and salt. Gently fold dry ingredients into the wet mixture until just combined.
Heat the oven to 350F. Spread parchment paper on baking sheets. Scoop rounded dollops of dough, leaving space between each cookie. Slide into the oven and bake until edges look crisp but centers remain soft. Let cookies rest on the sheet for a quick five minutes before moving to a cooling rack.
Blend cream cheese and butter until silky smooth. Gradually sift in powdered sugar, mixing until the frosting becomes fluffy and luxurious. Stir in a hint of vanilla for extra flavor.
Once cookies have completely cooled, slather a generous layer of cream cheese frosting on half the cookies. Top with remaining cookies to create delightful, indulgent sandwiches.
Red Velvet Cookie Variations and Tips
Serving Red Velvet Cookies with Frosting
Best Storage for Red Velvet Cookies with Frosting
Print
Velvety Red Velvet Cookies With Cream Cheese Frosting Recipe
- Total Time: 1 hour
- Yield: 13 1x
Description
Indulgent red velvet cookies with cream cheese frosting bring classic Southern charm to classic dessert expectations. Home bakers can savor rich chocolate notes and silky cream cheese elegance in one perfect sweet treat.
Ingredients
- 1 cup (226 g / 8 oz) unsalted butter, softened to room temperature
- 1 cup (200 g) granulated sugar
- 1 cup (220 g) packed light brown sugar
- 2 large eggs, at room temperature
- 2 ½ cups (320 g) all-purpose flour
- ¼ cup (25 g) unsweetened cocoa powder
- 1 tbsp red food coloring
- 2 tsp pure vanilla extract
- 1 tsp baking soda
- ½ tsp salt
- 8 oz (226 g) cream cheese, softened to room temperature
- ¼ cup (57 g / 4 tbsps) unsalted butter, softened to room temperature
- 2 cups (240 g) powdered sugar
- 1 tsp pure vanilla extract
Instructions
- Creaming Station: Whip butter and sugars until achieving a cloud-like, homogeneous texture with zero granular remnants.
- Liquid Integration: Blend eggs individually, then infuse vanilla and crimson food coloring, creating a vibrant, cohesive foundation.
- Dry Ingredient Fusion: Sift together flour, cocoa powder, baking soda, and salt, forming a harmonious powder mixture.
- Dough Preparation: Delicately incorporate dry components into wet ingredients, stirring minimally to preserve cookie’s tender structure.
- Thermal Configuration: Calibrate oven to 350F and line baking sheets with parchment paper for optimal non-stick performance.
- Cookie Formation: Sculpt uniform dough mounds, positioning them strategically with adequate spacing to prevent merging during baking.
- Baking Choreography: Roast cookies for 10-12 minutes, monitoring for set perimeters and slightly yielding centers, indicating ideal doneness.
- Cooling Protocol: Rest cookies momentarily on baking sheets, then transfer to wire rack for complete temperature equilibration.
- Frosting Alchemy: Whisk cream cheese and butter until achieving a silky, lump-free consistency.
- Frosting Refinement: Gradually fold powdered sugar and vanilla extract, crafting a luxurious, velvety cream.
- Final Assembly: Once cookies reach ambient temperature, generously layer cream cheese frosting between cookies, transforming them into decadent sandwich delicacies.
Notes
- Master Butter Creaming: Whip butter and sugars until ultra-fluffy and zero sugar crystals remain, which ensures smooth, tender cookie texture.
- Control Food Coloring: Add red food coloring gradually to achieve vibrant crimson without compromising liquid balance in the dough.
- Prevent Overmixing: Fold dry ingredients gently and minimally to maintain soft, delicate cookie structure and avoid dense, tough results.
- Temperature Management: Let cookies cool completely before frosting to prevent cream cheese spread from melting and losing structural integrity.
- Prep Time: 25 minutes
- Cook Time: 35 minutes
- Category: Desserts, Snacks
- Method: Baking
- Cuisine: American
Nutrition
- Serving Size: 13
- Calories: 373
- Sugar: 36 g
- Sodium: 243 mg
- Fat: 18 g
- Saturated Fat: 11 g
- Unsaturated Fat: 7 g
- Trans Fat: 0 g
- Carbohydrates: 52 g
- Fiber: 1 g
- Protein: 3 g
- Cholesterol: 64 mg
Jenna Hartley
Founder & Recipe Creator
Expertise
Education
Box Hill Institute, Melbourne
William Angliss Institute, Melbourne
Jenna is the heart of Picture Perfect Meals, turning simple ingredients into beautiful, easy‑to‑make dishes.
Growing up around family meals in Melbourne, she trained at Box Hill Institute and then perfected her pastry skills at William Angliss Institute. She loves mixing classic Australian flavors with fresh ideas to keep cooking fun and stress‑free.