Whimsical Cake Pop Recipe

Magical Whimsical Cake Pop Recipe for Sweet Fun Delight

Dessert lovers chase the perfect sweet bite with these irresistible cake pop treats that blend playful textures and delightful flavors.

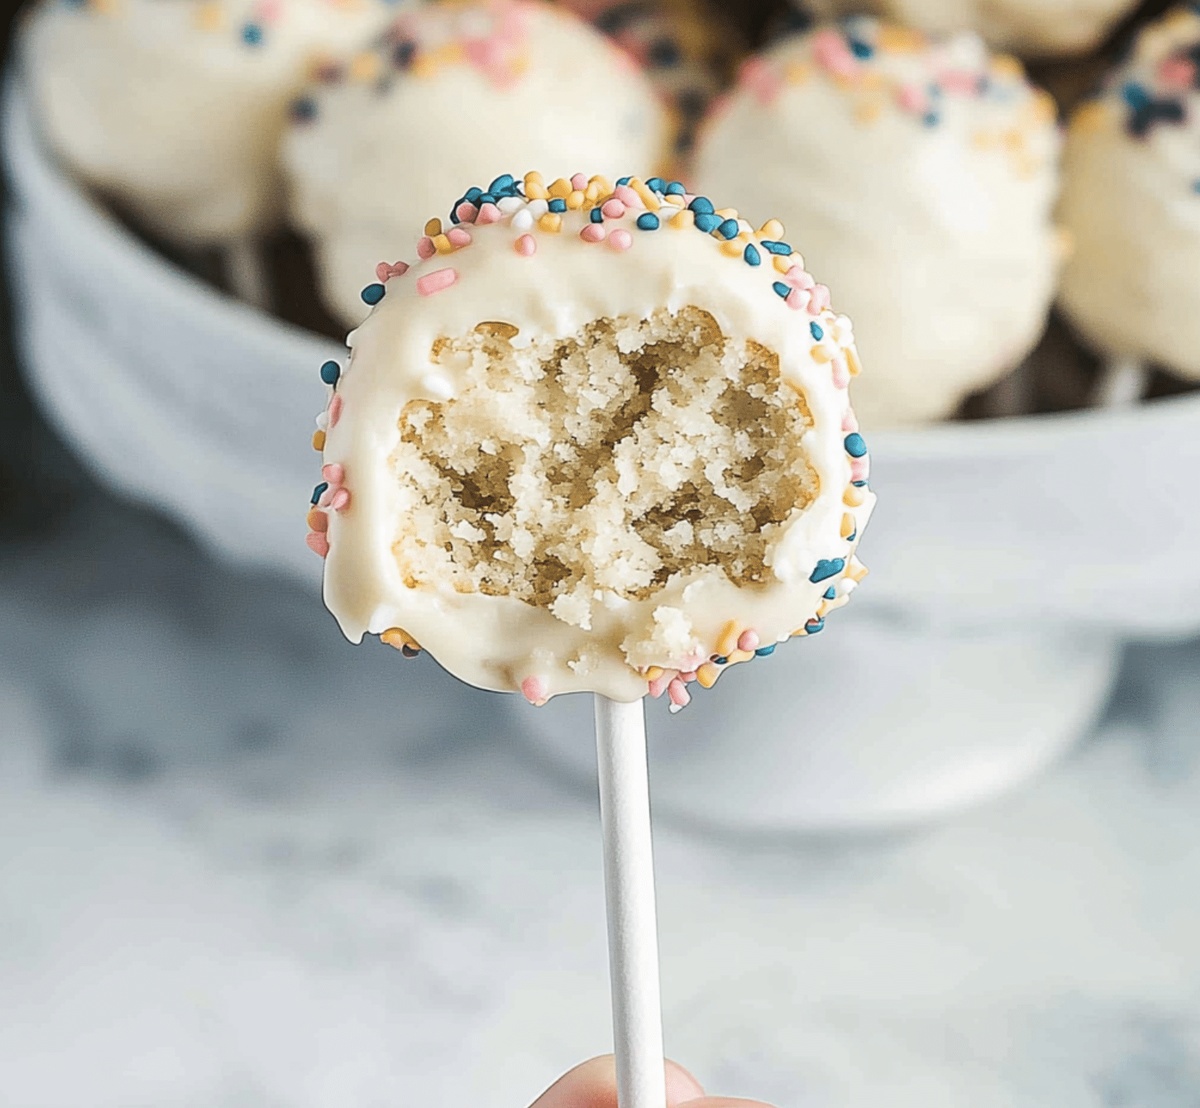
Creamy cake crumbs mixed with rich frosting create the most amazing cake pop magic for every celebration.

These delectable spheres of pure joy can elevate any gathering with their stunning presentation and remarkable taste.

Compact and adorable, each cake pop delivers a burst of sweetness that dances across your palate.

Crafted with simple ingredients and a touch of creativity, these little delights promise to become an instant favorite.

Party guests and kids alike will fall in love with these charming, bite-sized desserts that sparkle with personality.

Prepare to wow everyone with this foolproof recipe that turns ordinary cake into extraordinary fun.

Quick Recipe Overview

Prep Time: 45 minutes

Cook Time: 30 minutes

Total Time: 1 hour 15 minutes

Calories: 150 kcal

Servings: 20

Cake Pop Ingredient List

For Cake Base:
  • Boxed Cake Mix: Provides the foundational flavor and texture for your cake pops, choose a flavor that complements your desired taste profile.
  • Vegetable Oil: Ensures moisture and helps bind the cake ingredients smoothly during baking.
  • Eggs: Adds structure and richness to the cake, select fresh eggs for best results.
For Binding and Moisture:
  • Frosting: Creates the perfect sticky consistency to hold cake crumbs together, select creamy versions for easier mixing.
For Coating and Decoration:
  • Chocolate Melts or Chocolate: Provides a smooth, glossy exterior that transforms simple cake balls into stunning treats, select high-quality chocolate for best flavor.
  • Vegetable Oil: Helps thin chocolate coating for smoother dipping and more even coverage.
  • Cake Pop Sticks: Essential for creating the classic cake pop shape and making them easy to handle.
  • Sprinkles: Adds playful color and texture, choose varieties that complement your chocolate coating.
For Optional Extras:
  • Styrofoam Block or Cake Pop Stand: Helps cake pops dry perfectly upright, preventing sliding or uneven coating.
  • Parchment Paper: Prevents sticking and makes cleanup easier during cake ball preparation.

Tools You’ll Use to Make Cake Pops

  • Large mixing bowl: Essential for crumbling cake and mixing with frosting.
  • Baking sheet: Perfect for chilling cake balls and lining with parchment paper.
  • Parchment paper: Prevents cake balls from sticking and makes cleanup easy.
  • Cake pop sticks: Necessary for creating and holding cake pops.
  • Microwave-safe bowl: Ideal for melting chocolate or candy melts smoothly.
  • Cake pop stand or Styrofoam block: Helps cake pops dry and set upright.
  • Spatula: Great for mixing cake crumbs and frosting thoroughly.
  • Measuring cup: Ensures accurate frosting and ingredient amounts.

Make Cake Pops for Any Celebration

  • Bake Your Base

Whip up a delicious cake following the package instructions. Let it cool down completely, giving it plenty of time to reach room temperature.

  • Crumble to Perfection

Crush the cooled cake into super fine crumbs using your hands or a food processor. Aim for a soft, even texture that will make your cake pops amazing.

  • Mix and Bind

Blend frosting into your cake crumbs, stirring until the mixture holds together when pressed. The goal is a consistency that’s not too dry or too wet.

  • Create Cake Balls

Roll the mixture into smooth, bite-sized spheres. Place them on a tray and chill in the refrigerator to help them firm up and stay together.

  • Prepare the Chocolate Coating

Melt chocolate or candy melts, creating a smooth, glossy mixture. If it seems too thick, add a tiny bit of oil to thin it out.

  • Attach the Sticks

Dip each stick’s tip into melted chocolate, then gently insert it into a chilled cake ball. This helps the stick stay in place securely.

  • Dunk and Decorate

Submerge each cake pop into the melted chocolate, making sure it’s fully covered. Tap off excess coating and quickly add sprinkles or decorations.

  • Set and Serve

Stand the cake pops upright in a foam block or special holder, allowing them to dry completely before enjoying your delightful treat.

Tips to Personalize Your Cake Pops

  • Cake Pop Mastery: Tips & Twists
  • Texture Perfection: Keep cake crumbs fine and consistent by using a food processor or crushing cake with hands to ensure smooth, uniform cake balls that hold together without crumbling.
  • Moisture Magic: Add frosting gradually to prevent overly wet mixture; the ideal consistency should hold shape when pressed without being too sticky or dry.
  • Chill for Success: Always refrigerate or freeze cake balls before dipping to prevent them from falling apart during chocolate coating process and ensure clean, professional-looking results.
  • Coating Confidence: Use room temperature chocolate for smooth dipping, and thin with a little vegetable oil if too thick; gently tap stick on bowl's edge to remove excess coating and create clean, even finish.
  • Diet-Friendly Variations: Swap regular cake mix with gluten-free options, use dairy-free chocolate for vegan version, or experiment with alternative flour like almond or coconut for low-carb alternative that fits various dietary needs.

Sharing and Serving Cake Pops

  • Sweet Party Centerpiece: Create a stunning display by arranging cake pops in varying heights using decorative stands or foam blocks, making them a beautiful focal point at birthdays, showers, or special events.
  • Flavor Adventure Platter: Offer multiple flavor variations by preparing different cake and frosting combinations like chocolate-raspberry, vanilla-caramel, or red velvet-cream cheese to surprise guests with diverse tastes.
  • Kid-Friendly Decorating Station: Set up a fun activity where children can personalize their cake pops with colorful sprinkles, edible glitter, and mini chocolate chips, turning dessert into an interactive experience that keeps them entertained.
  • Gifting Elegance: Package individual cake pops in clear cellophane bags tied with ribbons matching event colors, creating charming homemade treats perfect for party favors or thoughtful edible gifts.

Cake Pop Storage Advice

  • Smart Storage Solutions: Refrigerate cake pops in an airtight container for up to 5 days, keeping them fresh and delicious.
  • Freezing Magic: Wrap each cake pop individually in plastic wrap, then store in a freezer-safe container for 2-3 weeks of extended enjoyment.
  • Room Temperature Tips: Keep decorated cake pops at cool room temperature for 1-2 days, away from direct sunlight or heat sources.
  • Make-Ahead Strategy: Prepare cake balls up to 3 days before coating and decorating, storing them covered in the refrigerator for maximum convenience and flavor retention.
Print
clock clock iconcutlery cutlery iconflag flag iconfolder folder iconinstagram instagram iconpinterest pinterest iconfacebook facebook iconprint print iconsquares squares iconheart heart iconheart solid heart solid icon
Whimsical Cake Pop Recipe

Whimsical Cake Pop Recipe


5 Stars 4 Stars 3 Stars 2 Stars 1 Star

4.7 from 18 reviews

  • Total Time: 1 hour 15 minutes
  • Yield: 21 1x

Description

Chocolate cake pops offer a delightful twist on classic desserts that bring joy to parties and gatherings. Sweet spheres of moist cake coated in smooth chocolate provide a perfect handheld treat for all who enjoy compact, indulgent sweets.


Ingredients

Scale
  • 1 box cake mix (any flavor)
  • 2 cups (16 oz/454 g) chocolate or candy melts (any color)
  • 3 eggs
  • ⅓ cup (80 ml) vegetable oil
  • 1 cup (240 ml) water
  • ½ cup (125 g) frosting (store-bought or homemade)
  • Cake pop sticks
  • Sprinkles or decorations (optional)

Instructions

  1. Cake Crumbling: Disintegrate the cooled cake into fine, uniform crumbs within a spacious mixing bowl, ensuring no large fragments remain.
  2. Mixture Preparation: Blend frosting into the cake crumbs, kneading thoroughly until the mixture becomes malleable and holds its shape when compressed, creating a consistent dough-like consistency.
  3. Sphere Formation: Mold uniform cake balls by rolling small portions between your palms, crafting compact, symmetrical spheres with smooth surfaces.
  4. Chilling Phase: Arrange the formed cake spheres on a parchment-lined tray and refrigerate for 30 minutes to solidify their structure and enhance handling stability.
  5. Chocolate Coating Preparation: Melt chocolate using a double boiler or microwave, incorporating a small amount of vegetable oil to achieve a silky, pourable consistency with optimal shine.
  6. Stick Insertion: Dip lollipop stick tips into melted chocolate before carefully embedding them halfway through the chilled cake spheres, creating a secure anchor.
  7. Coating and Decorating: Immerse each cake pop into the liquid chocolate, ensuring complete coverage, then gently tap to remove excess. Immediately embellish with sprinkles or edible glitter while the coating remains wet.
  8. Setting Process: Position the decorated cake pops vertically in a foam block or specialized stand, allowing them to set and solidify at ambient temperature until the chocolate hardens completely.

Notes

  • Crumb Consistency Control: Break cake into fine, even crumbs to ensure smooth texture and easy binding with frosting, avoiding large chunks that disrupt cake pop structure.
  • Frosting Balance Technique: Add frosting incrementally and mix thoroughly, stopping when mixture holds shape without being too wet or dry – the perfect consistency prevents crumbling or falling apart.
  • Chill for Stability: Refrigerate cake balls before dipping to firm up mixture, making chocolate coating process smoother and preventing potential disintegration during decoration.
  • Chocolate Coating Pro Tip: Maintain chocolate at ideal melting temperature (around 90°F) and use thin consistency by adding slight vegetable oil to achieve glossy, smooth coverage without clumping.
  • Prep Time: 45 minutes
  • Cook Time: 30 minutes
  • Category: Desserts, Snacks
  • Method: Baking
  • Cuisine: American

Nutrition

  • Serving Size: 21
  • Calories: 150
  • Sugar: 10g
  • Sodium: 200mg
  • Fat: 6g
  • Saturated Fat: 1g
  • Unsaturated Fat: 3g
  • Trans Fat: 0g
  • Carbohydrates: 20g
  • Fiber: 0g
  • Protein: 2g
  • Cholesterol: 30mg
Jenna Hartley

Jenna Hartley

Founder & Recipe Creator

Expertise

  • Recipe development with a focus on single-dish meals.
  • Fusion of traditional and modern Australian cuisines.
  • Food styling and photography for digital platforms.​

Education

Box Hill Institute, Melbourne

  • Degree: Advanced Diploma of Hospitality Management
  • Focus: Specialized in practical food and beverage service, responsible alcohol and hygiene compliance, legal risk management, and hands‑on experience in a simulated restaurant environment.

William Angliss Institute, Melbourne

  • Program: Certificate IV in Patisserie
  • Focus: Specialized in pastry and bakery techniques, cookery and specialty food preparation, recipe planning and costing, commercial kitchen operations, sustainable and inclusive work practices, food safety and hygiene compliance, and workplace health and safety.

Jenna is the heart of Picture Perfect Meals, turning simple ingredients into beautiful, easy‑to‑make dishes. 

Growing up around family meals in Melbourne, she trained at Box Hill Institute and then perfected her pastry skills at William Angliss Institute. She loves mixing classic Australian flavors with fresh ideas to keep cooking fun and stress‑free.

Leave a Reply

Your email address will not be published. Required fields are marked *

Recipe rating 5 Stars 4 Stars 3 Stars 2 Stars 1 Star